Counter-Strike Gets The RGB LED Treatment

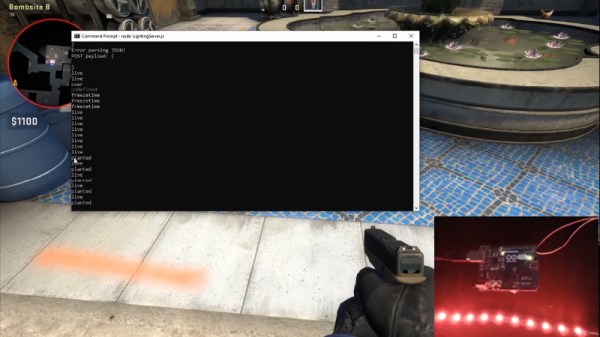
Inspired by the over-the-top stage lighting and pyrotechnics used during e-sport events, [Hans Peter] set out to develop a scaled-down version (minus the flames) for his personal Counter-Strike: Global Offensive sessions. It might seem like pulling something like this off would involve hacking the game engine, but as it turns out, Valve was kind enough to implement a game state API that made it relatively easy.

According to the documentation, the CS:GO client can be configured to send out state information to a HTTP server at regular intervals. It even provided example code for implementing a simple state server in Node.js, which [Hans] adapted for this project by adding some conditional statements that analyze the status of the current game.

These functions fire off serial commands to the attached Arduino, which in turn controls the WS2812B LEDs. The Arduino code takes the information provided by the HTTP server and breaks that down into various lighting routines for different conditions such as wins and losses. But things really kick into gear when a bomb is active.

[Hans] wanted to synchronize the flashing LEDs with the beeping sound the bomb makes in the game, but the API doesn’t provide granular enough data. So he recorded the audio of the bomb arming sequence, used Audacity to precisely time the beeps, and implemented the sequence in his Arduino code. In the video after the break you can see that the synchronization isn’t perfect, but it’s certainly close enough to get the point across in the heat of battle.

With the special place that Counter-Strike occupies in the hearts of hackers and gamers alike, it’s little surprise people are still finding unique ways to experience the game.

Continue reading “Counter-Strike Gets The RGB LED Treatment”

How Many LEDs Can You Drive?

Driving more than a handful of LEDs from a microcontroller is often a feat that takes tedious wiring, tricking the processor, or a lot of extra external hardware. Charlieplexing is perhaps the most notorious of these methods, and checks two of those three boxes. This library for the Teensy 4.0 checks all three, but it can also drive a truly staggering 32,000 LEDs at one time.

The TriantaduoWS2811 library is able to drive 32 channels of LEDs from a Teensy 4.0 using only three pins and minimal processor resources. It uses the FlexIO and DMA subsystems of the i.MX RT1062, the particular ARM processor on the Teensy, to drive four external shift registers. Together, the system is able to achieve 30 frames per second on with 1,000 LEDs per channel, for a total of 32,000 LEDs. Whoah.

[Ward] aka [wramsdell] wondered what one would do with all of the horsepower of a Teensy microcontroller when he first saw its specifications, and was able to build this project to take advantage of its features. What’s surprising, though, is that it doesn’t use nearly everything the processor is capable of, so you can do other tasks at the same time as driving that giant LED display.

Have LED Bulbs Reached Their Final (and Cheapest) Form?

[electronupdate] has done a lot of LED light bulb teardowns over the years, witnessing a drive towards ever-cheaper and ever-simpler implementations, and suspects that LED light bulb design has finally reached its ultimate goal. This teardown of a recent dollar store example shows that cost-cutting has managed to shave even more off what was already looking like a market saturated with bottom-dollar design.

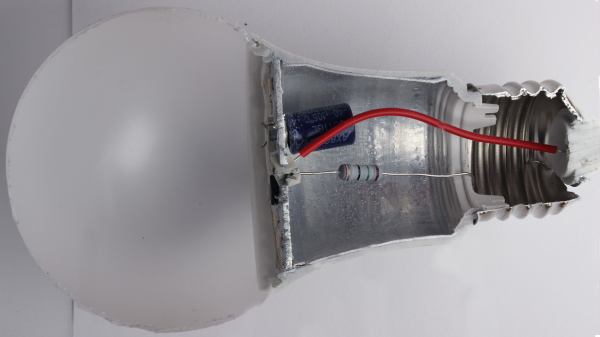
The electrical components inside this glowing model of cost-cutting consists of one PCB (previously-seen dollar store LED bulb examples had two), eleven LEDs, one bridge rectifier, two resistors, and a controller IC. A wirewound resistor apparently also serves as a fuse, just in case.

Inside the unmarked controller IC. The design is as cheap as it is clever in its cost-cutting.

That’s not all. [electronupdate] goes beyond a simple teardown and has decapped the controller IC to see what lurks inside, and the result is shown here. This controller is responsible for driving the LEDs from the ~100 Volts DC that the bridge rectifier and large electrolytic cap present to it, and it’s both cheap and clever in its own way.

The top half is a big transistor for chopping the voltage and the bottom half is the simple control logic; operation is fast enough that no flicker is perceived in the LEDs, and no output smoothing cap is needed. The result, of course, is fewer components and lower cost.

Some of you may recall that back in the early days of LED lighting, bulbs that could last 100,000 hours were a hot promise. That didn’t happen for a variety of reasons and the march towards being an everyday consumable where cost was paramount continued. [electronupdate] feels they have probably reached that ultimate goal, at least until something else changes. They work, they’re cheap, and just about everything else has been successfully pried up and tossed out the door.

Emergency Torch Runs Without Batteries

It’s always good to have a torch on hand for emergencies. Unfortunately, sometimes these torches can be forgotten, and wind up with dead batteries when you need them most. For those cases, this build from [techrallyofficial] is just the ticket.

Instead of a battery, the torch relies on a 1.5 farad supercapacitor to store energy. The body of the torch is constructed out of PVC pipe and fittings, and packs strong neodymium magnets inside. A coil of wire wrapped is formed around an old solder spool, which, when shaken past the magnets, generates a current. This is rectified with a series of diodes and charges the supercapacitor, powering the light.

It’s a classic design that is available commercially, but it’s one easily replicated in the home shop, too. It would make a great educational project, particularly as students would be left with a useful device to take home at the end of the lesson. We’ve seen others resurrect commercial builds with upgrades, too. Video after the break.

Continue reading “Emergency Torch Runs Without Batteries”

Arduino Drives A 600-Character Display

[Peterthinks] admits he’s no cabinet maker, so his projects use a lot of hot glue. He also admits he’s no video editor. However, his latest video uses some a MAX7219 to create a 600 character scrolling LED sign. You can see a video of the thing, below. Spoiler alert: not all characters are visible at once.

The heart of the project is a MAX7219 4-in-1 LED display that costs well under $10. The board has four LED arrays resulting in a display of 8×32 LEDs. The MAX7219 takes a 16-bit data word over a 10 MHz serial bus, so programming is pretty easy.

Continue reading “Arduino Drives A 600-Character Display”

HackIt: Why Aren’t We Hacking On The LED Printer?

Strings of LEDs are a staple of the type of project we see here at Hackaday, with addressable devices such as the WS2812 in particular having changed beyond recognition what is possible on a reasonable budget. They’ve appeared in all kinds of projects, but are perhaps most memorable when used in imaging projects such as screen-like arrays or persistence-of-vision systems. There’s another addressable LED product that we haven’t seen here, which is quite a surprise considering that it can be found with relative ease in junk piles and has been on the market for decades. We’re talking about the LED printer, and the addressable LED product in question is a very high density array of LEDs the width of a page, designed to place an image of the page to be printed on the toner transfer drum.

Continue reading “HackIt: Why Aren’t We Hacking On The LED Printer?”

Fake That Fireplace Flicker With Flame Bulbs

Ask anyone who’s ever tuned into Fireplace TV on a cold winter’s night — even though you can’t feel the heat or roast a marshmallow with it, fake fire is almost as soothing as the real thing. And if you have kids or pets, it’s a whole lot safer. But why go to the expense of buying a lighted insert when you could just make your own?

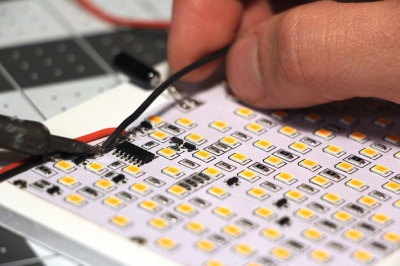
You don’t even need to get fancy with a microcontroller and RGB LEDs, either — just do what [Ham-made] did and dismantle some LED flame bulbs. They already have everything you need, and the flex PCB makes them easy to work with.

[Ham-made] adhered three bulbs’ worth to a piece of foam board with double-stick tape, soldered all the leads together, and wired in a toggle switch and a 2xAA battery pack. The bulbs each had a tilt switch so that the “flames” flow upward regardless of orientation, but [Ham-made] removed those to avoid flickering connectivity and fights with the toggle switch.

Once it was all wired up, [Ham-made] hot-glued some magnets to the foam board and attached it to the underside of the grate to keep it safe from the logs and the ash pit, while still allowing the glow to emanate from the right spot for realism. The only thing missing are the crackles and pops, and [Ham-made] is burning to hear your implementation ideas.

[Ham-made] wasn’t using his fireplace in the traditional way because the house is smallish and centrally heated. But if you rely on yours to keep you warm and cozy, why not make it voice-activated?