3D Printed Fan Filter Takes Cues From Costume Scene

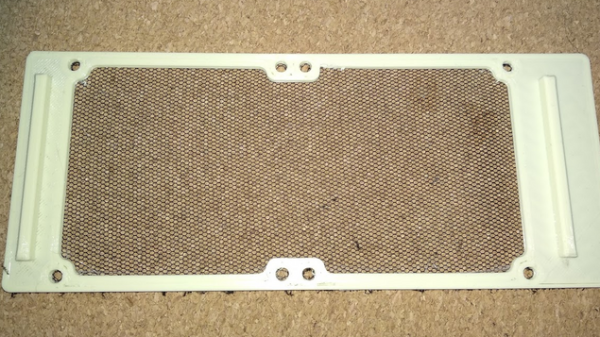
This custom fan filter created by [Kolomanschell] is a clever application of a technique used to create wearable 3D printed “fabrics”, which consist of printed objects embedded into a fine mesh like a nylon weave. The procedure itself is unchanged, but in this case it’s done not to embed 3D printed objects into a mesh, but to embed a mesh into a 3D printed object.
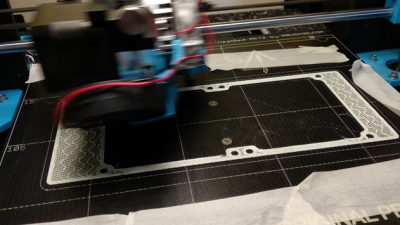
The basic idea is that a 3D print is started, then paused after a few layers. A fine fabric mesh (like tulle, commonly used for bridal veils) is then stretched taut across the print bed, and printing is resumed. If all goes well, the result is 3D printed elements embedded into a flexible, wearable sheet.

The beauty of this technique is that the 3D printer doesn’t need to be told a thing, because other than a pause and resume, the 3D print is nothing out of the ordinary. You don’t need to be shy about turning up the speed or layer height settings either, making this a relatively quick print. Cheap and accessible, this technique has gotten some traction in the costume and cosplay scene.

As [Kolomanschell] shows, the concept works great for creating bespoke filters, and the final result looks very professional. Don’t let the lack of a 3D model for your particular fan stop you from trying it for yourself, we’ve already shared a great resource for customizable fan covers. So if you’ve got a 3D printer and a bit of tulle, you have everything you need for a quick afternoon project.

Add A Microscope To Your 3D Printer

There are many ways to keep an eye on your 3D printer as it churns out the layers of your print. Most of us take a peek every now and then to ensure we’re not making plastic vermicelli, and some of us will go further with a Raspberry Pi camera or similar. [Uri Shaked] has taken this a step further, by adding a USB microscope on a custom bracket next to the hot end of his Creality Ender 3.

The bracket is not in itself anything other than a run-of-the-mill piece of 3D printing, but the interest comes in what can be done with it. The Ender 3 has a resolution of 12.5μm on X/Y axes, and 2.5μm on Z axes, meaning that the ‘scope can be positioned to within a hair’s-breadth of any minute object. Of course this achieves the primary aim of examining the integrity of 3D prints, but it also allows any object to be tracked or scanned with the microscope.

For example while examining a basil leaf, [Uri] noticed a tiny insect on its surface and was able to follow it with some hastily entered G-code. Better still, he took a video of the chase, which you can see below the break. From automated PCB quality control to artistic endeavours, we’re absolutely fascinated by the possibilities of a low-cost robotic microscope platform.

[Uri] is a perennial among Hackaday-featured projects, and has produced some excellent work over the years. Most recently we followed him through the production of an event badge.

Continue reading “Add A Microscope To Your 3D Printer”

Raspberry Pi Helps Vintage Psion Find Its Voice

Ask a hacker to imagine computing in the 1980s, and they might think of the classic 8-bit all-in-one machines from the likes of Commodore and Atari, or perhaps the early PCs and Macs. No matter the flavor, they’ll likely have one thing in common: a lack of mobility thanks to being anchored down by a bulky CRT screen in the form of either a television or a dedicated monitor. Mobile computing at the time was something of an expensive rarity, consisting of various quirky handhelds that today have been all but forgotten.

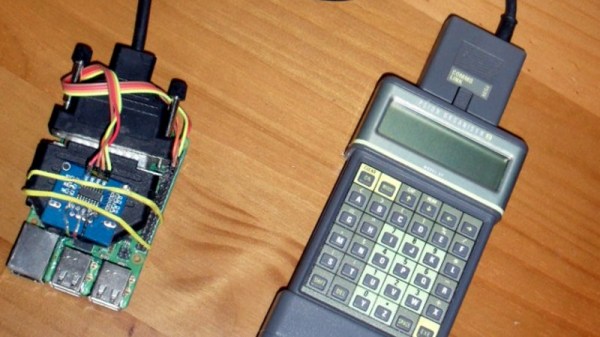
Looking to see if one of these so-called “pocket computers” could still be of use in 2019, [James Fossey] set out to get his circa 1986 Psion Organiser II connected to the Internet. With a Hitachi CPU, two-line text-only LCD and ABCD keyboard it’s a world away from the modern smartphone, yet as an early stab at a PDA as well as general purpose computer it’s visibly an ancestor of the devices we carry today. Of course, as the Psion was produced before the advent of affordable mobile data and before even the invention of the Web, it needed a bit of help connecting to a modern network.

Psion sold an RS-232 cable accessory which came with both serial terminal and file transfer in ROM, so with one of these sourced and a little bit of hackery involving an RS-232 to TTL converter and a DB-25 connector, he was able to hook it up to a Raspberry Pi. That means it’s reduced to being a dumb terminal for a more powerful machine that can do the heavy lifting, but those with long memories will tell you that’s exactly what would have been done with the help of a modem to connect to a BBS back in 1986. So far he’s got a terminal on the Pi and a Twitter client, but he’s declined to show us the Hackaday Retro Edition.

Psion has rarely featured directly on these pages, but despite being forgotten by many today they were a groundbreaking company whose influence on portable computing stretched beyond their own line of devices. One we have shown you is an effort to put more recent hardware into a Psion Series 5 clamshell.

High Performance Stereo Computer Vision For The Raspberry Pi

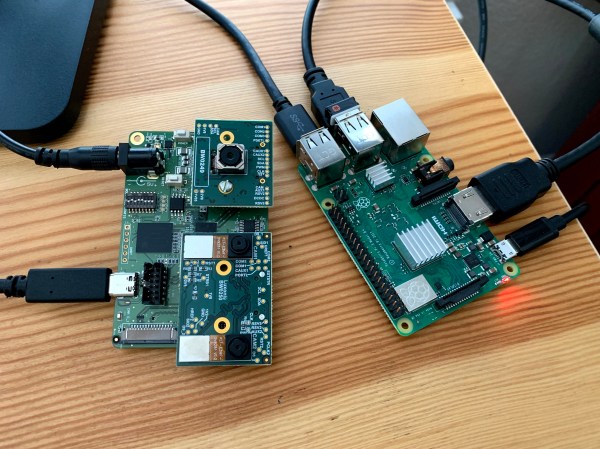
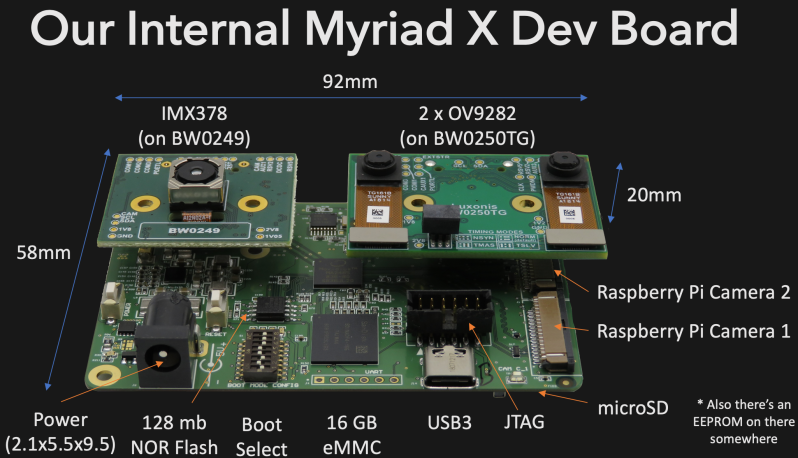
Up until now, running any kind of computer vision system on the Raspberry Pi has been rather underwhelming, even with the addition of products such as the Movidius Neural Compute Stick. Looking to improve on the performance situation while still enjoying the benefits of the Raspberry Pi community, [Brandon] and his team have been working on Luxonis DepthAI. The project uses a carrier board to mate a Myriad X VPU and a suite of cameras to the Raspberry Pi Compute Module, and the performance gains so far have been very promising.

So how does it work? Twin grayscale cameras allow the system to perceive depth, or distance, which is used to produce a “heat map”; ideal for tasks such as obstacle avoidance. At the same time, the high-resolution color camera can be used for object detection and tracking. According to [Brandon], bypassing the Pi’s CPU and sending all processed data via USB gives a roughly 5x performance boost, enabling the full potential of the main Intel Myriad X chip to be unleashed.

For detecting standard objects like people or faces, it will be fairly easy to get up and running with software such as OpenVino, which is already quite mature on the Raspberry Pi. We’re curious about how the system will handle custom models, but no doubt [Brandon’s] team will help improve this situation for the future.

The project is very much in an active state of development, which is exactly what we’d expect for an entry into the 2019 Hackaday Prize. Right now the cameras aren’t necessarily ideal, for example the depth sensors are a bit too close together to be very effective, but the team is still fine tuning their hardware selection. Ultimately the goal is to make a device that helps bikers avoid dangerous collisions, and we’ve very interested to watch the project evolve.

The video after the break shows the stereoscopic heat map in action. The hand is displayed as a warm yellow as it’s relatively close compared to the blue background. We’ve covered the combination Raspberry Pi and the Movidius USB stick in the past, but the stereo vision performance improvements Luxonis DepthAI really takes it to another level.

Continue reading “High Performance Stereo Computer Vision For The Raspberry Pi”

Make Your Own Flexible Panel Lights

In this day and age, production values are everything. Even bottom-rung content creators are packing 4K smartphones and DSLRs these days, so if you want to compete, you’re gonna need the hardware. Lighting is the key to creating good video, so you might find a set of flexible panel lights handy. Thankfully, [DIY Perks] is here to show you how to build your own. (Video embedded below.)

The key to building a good video light rig is getting the right CRI, or Color Rendering Index. With low CRI lights, colors will come out looking unnatural or with odd casts in your videos. [DIY Perks] has gone to the effort of hunting down a supplier of high-quality LED strips in a range of different color temperatures that have a high CRI value, making them great for serious video work.

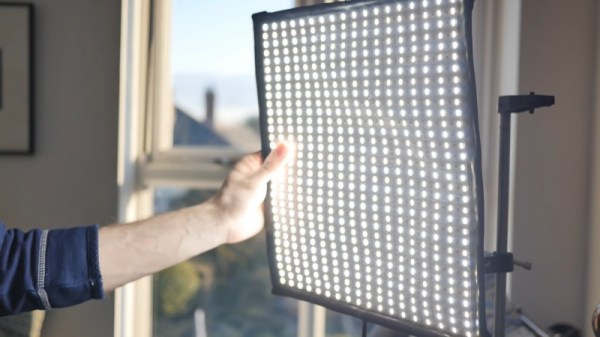
To build the flexible panel, the LED strips are glued onto a fake leather backing pad, which is then given a steel wire skeleton to enable it to be bent into various shapes. Leather loops are built into each corner of the panel as well, allowing the light to be fitted to a stand using a flexible aluminium bracket. The LEDs are slightly under-volted to help them last longer and enable them to run from a laptop power supply.

The build is one that focuses on light quality and usability, rather than just throwing a bunch of bright LEDs at the problem and calling it good. The results are great, with the panel showing a significant improvement on [DIY Perks]’s earlier builds.
Continue reading “Make Your Own Flexible Panel Lights”

Maybe The Oldest Computer, Probably The Oddest

[Tadao Hamada] works for Fujitsu Tokki, a subsidiary of the more famous Fujitsu. In 1956, Fujitsu decided to compete with IBM and built a relay-based computer, the FACOM128. The computer takes up 70 square meters and weighs about 3 tons. By 1959, they’d learned enough to make a FACOM128B model that was improved. [Hamada’s] job is to keep one of these beasts operational at Fujitsu’s Numazu plant. According to the Japanese Computer Museum, it may be the oldest working computer.

Continue reading “Maybe The Oldest Computer, Probably The Oddest”

An All-Iron Battery Isn’t Light, But It’s Cheap

Rechargeable batteries are a technology that has been with us for well over a century, and which is undergoing a huge quantity of research into improved energy density for both mobile and alternative energy projects. But the commonly used chemistries all come with their own hazards, be they chemical contamination, fire risk, or even cost due to finite resources. A HardwareX paper from a team at the University of Idaho attempts to address some of those concerns, with an open-source rechargeable battery featuring electrode chemistry involving iron on both of its sides. This has the promise of a much cheaper construction without the poisonous heavy metal of a lead-acid cell or the expense and fire hazard of a lithium one.

A diagram of the all-iron cell.

The chemistry of this cell is split into two by an ion-exchange membrane, iron (II) chloride is the electrolyte on the anode side where iron is oxidised to iron 2+ ions, and Iron (III) chloride on the cathode where iron is reduced to iron hydroxide. The result is a cell with a low potential of only abut 0.6V, but at a claimed material cost of only $0.10 per kWh Wh of stored energy. The cells will never compete on storage capacity or weight, but this cost makes them attractive for fixed installations.

It’s encouraging to see open-source projects coming through from HardwareX, we noted its launch back in 2016.

Thanks [Julien] for the tip.