Why Use A Sensor When A Pseudo-Sensor Will Do?

Usually, when you need to sense something in a project, the answers are straightforward. Want to sense air temperature? There’s a sensor for that. Particulate content in the air? There’s a sensor for that, too. Someone sneaking up on you? Get yourself some passive infrared sensors (PIRs) and maybe a smart camera just to be sure.

But sometimes you can be sneaky instead, saving the cost of a sensor by using alternative techniques. Perhaps there’s a way to use the hardware you already have to determine what you need. Maybe you can use statistical methods to calculate the quantity you’re looking for from other measurements.

Today, we’ll examine a great example of a “pseudo-sensor” build in an existing commercial device, and examine how these techniques are often put to good use in industry.

Continue reading “Why Use A Sensor When A Pseudo-Sensor Will Do?”

Marimbatron: A Digital Marimba Prototyping Project

The Marimbatron is [Leo Kuipers] ‘s final project as part of the Fab Academy program supervised by [Prof. Neil Gershenfeld] of MIT’s Center for Bits and Atoms. The course aims to teach students how to leverage all the fab lab skills to create unique prototypes using the materials at hand.

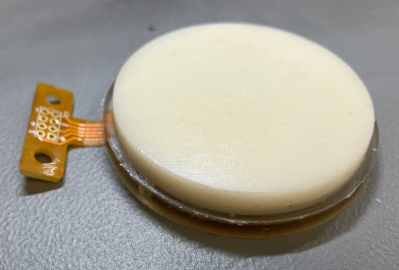
The final polyurethane/PET/Flex PCB stack-up for the sensor pad

Fortunately, one of the main topics covered in the course is documentation, and [Leo] has provided ample material for review. The marimba consists of a horizontal series of wooden bars, each mounted over a metal resonator tube. It is played similarly to the xylophone, with a piano-type note arrangement, covering about five octaves but with a lower range than the xylophone. [Leo] converted this piano-type layout into a more logical grid arrangement. The individual pads are 3D printed in PETG and attached to a DIY piezoresistive pressure sensor made from a graphite-sprayed PET sheet laid upon a DIY flexible PCB. A central addressable LED was also included for indication purposes. The base layer is made of cast polyurethane, formed inside a 3D-printed rigid mould. This absorbs impact and prevents crosstalk to nearby sensors. The sensor PCB was initially prototyped by adhering a layer of copper tape to a layer of Kapton tape and cutting it out using a desktop vinyl cutter. While this method worked for the proof of concept, [Leo] ultimately outsourced the final version to a PCB manufacturer. The description of prototyping the sensor and dealing with over-moulding was particularly fascinating.

Continue reading “Marimbatron: A Digital Marimba Prototyping Project”

Bed Sensors Do More Than You’d Think

Bed sensors do sort of sound like a gimmick — after all, who cares whether someone is occupying the bed? But if you think about it, that information is quite useful from a home automation standpoint. A person could do all sorts of things in this state, from ensuring the overhead lights in the room can’t come on, to turning off other smart devices that are likely not being used while both occupants are sleeping.

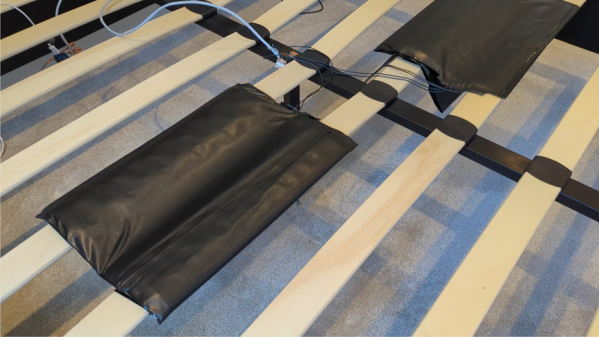
[The Home Automation Guy] presents a couple of ways of doing this, but both center around a fairly inexpensive pressure-sensing mat.

In the first method, he connects the pressure mat up to a Zigbee Aqara Leak Sensor, which conveniently has two terminals on the back to accept the wires from the pressure sensor. Then he simply connects it up to a Zigbee-compatible home assistant like the Aqara Hub.

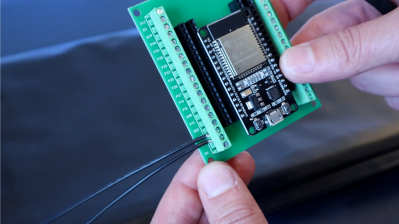
In slightly harder mode, he forgoes the Aqara Leak Sensor and connects the pressure mat up to an ESP32 using a nifty screw terminal dev board. Then he sets up the sensor and all the desired actions in ESPHome. Of course, with an ESP32, it’s easy to add a second pressure mat for [Mrs. The Home Automation Guy]’s side of the bed.

Now, once they’ve both gone off to bed, the house goes into night mode — all the smart plugs, Sonos devices, and other things are powered down, and the alarm system is put into night mode. Be sure to check out the build video after the break.

Continue reading “Bed Sensors Do More Than You’d Think”

D-POINT: A Digital Pen With Optical-Inertial Tracking

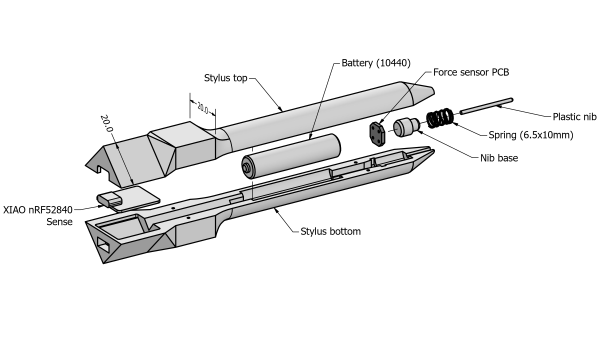
[Jcparkyn] clearly had an interesting topic for their thesis project, and was conscientious enough to write up a chunk of it and release it to the wild. The project in question is a digital pen that uses some neat sensor fusion to combine the inputs from a pen-mounted gyro/accelerometer with data from an optical tracking system provided by an off-the-shelf webcam.

A six degrees of freedom (6DOF) tracking system is achieved as a result, with the pen-mounted hardware tracking orientation and the webcam tracking the 3D position. The pen itself is quite neat, with an ALPS/Alpine HSFPAR003A load sensor measuring the contact pressure transmitted to it from the stylus tip. A Seeed Xaio nRF52840 sense is on duty for Bluetooth and hosting the needed IMU. This handy little module deals with all the details needed for such a high-integration project and even manages the charging of a single 10440 lithium cell via a USB-C connector.

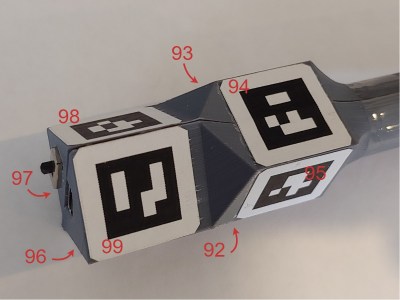
Positional tracking uses Visual Pose Estimation (VPE) assisted with ArUco markers mounted on the end of the stylus. A consumer-grade (i.e. uncalibrated) webcam is all that is required on the hardware side. The software utilizes the familiar OpenCV stack to unroll the effects of the webcam rolling shutter, followed by Perspective-n-Point (PnP) to estimate the pose from the corrected image stream. Finally, a coordinate space conversion is performed to determine the stylus tip position relative to the drawing surface.
The sensor fusion is taken care of with a Kalman filter, smoothed with the typical Rauch-Tung-Striebel (RTS) algorithm before being passed onto the final application. This process is running in Python using the NumPy module, as you would expect, but accelerated using the Numba JIT compiler.

Motion tracking is not news to us, we’ve seen many an implementation over the years, such as this one. But digital input pens? Why aren’t they more of a thing?

Thanks to [Oliver] for the tip!

Blood Pressure Cuff Hacked Into Water Level Sensor

We often write a post and then learn something new and cool from the comments. The same thing happened when [Andreas] posted a video about monitoring fluid levels. Commenters told him that the best fluid level sensor was a hacked blood pressure monitor. He didn’t know that, and we didn’t either, until we watched his video, below.

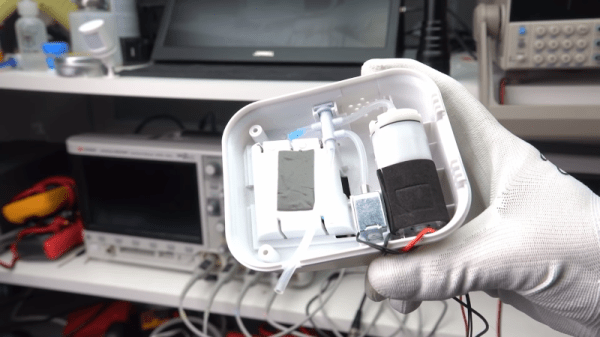
It is well-known that an air-tight tube in a tank that is closed at the top and open inside the tank will develop a pressure that corresponds to the liquid level in the tank. This is a common approach when you want the pressure sensor to be far away from the tank in, say, an enclosed building. So why use a blood pressure monitor? Because a common enhancement to the system is to use a pump to pressurize the measurement tube first so the system can tolerate small leaks. The blood pressure monitor has everything you need: a pump, a valve, and a pressure sensor.

Continue reading “Blood Pressure Cuff Hacked Into Water Level Sensor”

Arduino Variometer In A Mint Tin

While humans have done a pretty good job of figuring out how to fly with various mechanical contrivances, the fact remains that our natural senses aren’t really well suited to being off the ground. For example, unless you have a visual reference point, determining which way is up is quite a bit harder than you might think. Which is why pilots rely on instruments such as the variometer, that determines the current rate of climb and descent, to guide them when their eyes can’t be trusted.

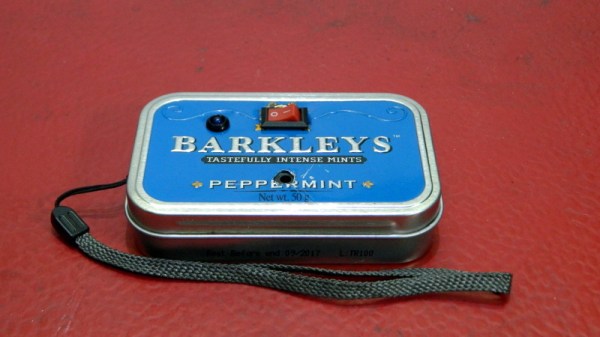
It’s also a very handy thing to have when paragliding, which is why [mircemk] decided to build a hand-held version using the Arduino Nano and a BMP180 pressure sensor. Since you don’t want to be staring at a little screen in mid-air, the device conveys changes in altitude with audio tones. A rising tone means you’re moving upwards, while a lower tone indicates downward travel. In the video below, you can see that it only takes a meter or two of vertical movement before the device picks up on the change.

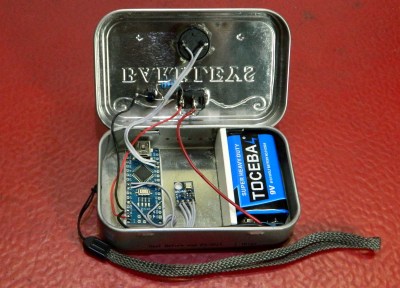
Looking for a simple yet rugged enclosure for the device, [mircemk] found a metal mint tin that would hold the microcontroller, sensor, buzzer, and the 9 V battery that powers it all. We know what you’re thinking, but don’t worry; holes have been popped in the sides to make sure there’s no pressure difference inside the tin. There’s plenty of room to replace the alkaline battery with a rechargeable pack and associated charge controller, but we imagine there’s a certain security in tossing in a fresh new primary cell before slipping the surly bonds of Earth.

If you’re in interested DIY instrumentation for a glider or other aircraft that actually has a proper cockpit, this sunlight readable flight computer made from a Kobo e-reader would be a great start.

Continue reading “Arduino Variometer In A Mint Tin”

Force Sensitive Resistor Takes The Pain Out Of Bed Leveling

How do you know if your 3D printer bed is levelled? Oh, don’t worry – you’ll know. Without a level bed, filament won’t stick properly to the build surface and you’ll run into all sorts of other problems. Knowing how tricky it can be to get the bed just right, [Antzy] built a tool to help.

The device, which he calls the FS-Touch, is based around an Arduino Pro Micro fitted with a force sensitive resistor. This allows the distance between the bed and nozzle to be measured based on the force read by the resistor when placed in between the two.

Using the tool is simple. First, the bed is brought roughly into alignment using the typical paper method. Then, a reading is taken from one corner of the bed, and the measurement saved for reference. The other corners can then be set to the same level, with the aid of LEDs to guide the user in which direction to turn the adjustment knobs.

Measuring force in this way has the potential of being more repeatable than the somewhat difficult paper method. It promises to ease the task for users that may be struggling to get their bed in proper shape. Of course, automated bed levelling makes things even easier again. Video after the break.

Continue reading “Force Sensitive Resistor Takes The Pain Out Of Bed Leveling”