For those who don’t know, Burning Man is a week-long festival in the middle of the Black Rock Desert in Nevada. The event attracts a wide range of creative people from all over the world.
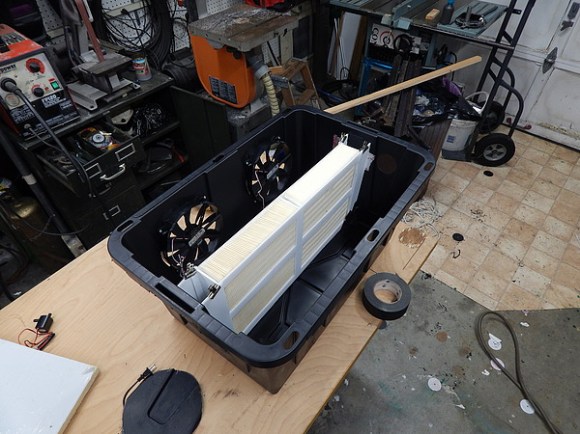
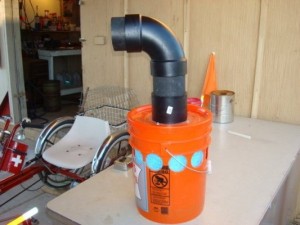
This year, [Jake] is going to bring his homemade evaporative ‘swamp cooler’ to help battle the heat. His design uses a medium-sized shipping container with two large holes cut out of it and two 200mm PC cooling fans embedded into the plastic. The fans blow air from the outside into the bin. Humidifier filters sourced from a local dump are inserted into the middle of the container. The filters acts as an absorbent material to hold melt-water being pumped in from another cooler chest above.
A 30 watt solar panel provides enough power to keep the swamp cooler going while giving enough juice to energize decorative LED interior lights along with some backup batteries for phones and cameras. [Jake]’s system contains a re-purposed A/C computer load center for the solar system. He plans to take temperature and humidity readings at the Burn, bringing back the data from the desert to share with the world.
[Jake] does warn about mold with this system though, but one of the advantages with the filters he chose is that they are pretreated with biocidal compounds. This should help to reduce the chance of mold growth. High humidity conditions are also a disadvantage with this type of cooler, but this is a non-issue in the extremely dry desert of The Playa.
If you plan to go to Burning Man, tell about your energy/cooling preparations. Will you be bringing a system similar to this? If so, let us know.
 The people over at Gray Wolf Survival have this
 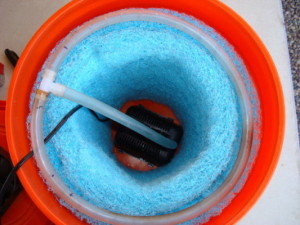 It uses a LOT less energy than an air conditioner unit so there won’t be a need to increase the power capabilities of a simple system to work it, and it can reduce the temperature by up to 30 degrees as well as alleviate the dryness associated with living through a Burn. It runs off 12V DC so it can either use the solar panel or connect to a battery. It has a 12V power plug for this, and draws as little power as absolutely possible. Plus, it has the ability to easily connect to a larger water source so it won’t have to be continually refilled. These considerations make it very portable and perhaps backpackable as well.