Gadgeteer Plant Monitor Wants It Wet And Photogenic

gadgeteer-plant-monitor

[Christian] is growing a tomato plant on his desk and wanted to capture some time-lapse images of its progress. To that end he built a rig that monitors moisture levels and snaps images at regular intervals.

The hardware he’s using is part of the Gadgeteer family. These run a .NET micro framework and are modular which makes for easy assembly. A laser-cut plywood stand helps to position the camera module for the best shots. Its takes a picture of the seedling once every ten minutes. There is a quartet of RGB LEDs surrounding the lens. They help illuminate the subject for each picture. But [Christian] also mentions that the red LEDs provide light the plant needs to grow (we raise an eyebrow at that claim, but in truth we have no idea if red LEDs make plants grow or not). There is also a moisture sensor which you can see inserted in the soil.

The images and moisture readings are all pushed to a server. There is an Ethernet board near the base of the rig. It uses POST to send the image, which is saved by a server-side script. The moisture data is sent via a GET command.

Open Source Capactive Charger Resurrects An Electric Skateboard

mikey-sklar-on-electric-skateboard

Here’s [Mikey Sklar] posing on his new electric skateboard. Well, it’s new to him at any rate. He bought it used on eBay for $250. That may not sound like much of a deal, but these will run more like $800 retail. The savings comes because the thing would no longer charge. But it took him just an hour and a half with his capacitive charger to resurrect the flat lithium cells.

The first thing he did in trouble shooting the situation was to measure the voltage of the battery pack. It registered 5V, which is a far cry from the 36V it should supply. The built-in charger does nothing, as it’s circuitry isn’t designed to work in a situation like this one. But [Mikey] has a tool perfect for this purpose. Da Pimp is a capacitive charger which we’ve seen before. It succeeds where the other failed because it is able to adapt itself to the internal resistance of the battery, no matter what voltage level it starts at.

[Mikey] shows off the use of his charger in the clip after the break. His first test run was more than two miles without issue.

Continue reading “Open Source Capactive Charger Resurrects An Electric Skateboard”

Building A Thermal Imaging Sensor From Scratch

[youtube=http://www.youtube.com/watch?v=pIb1scnD67o&w=470]

[Rob] lives in a 100-year-old house, and with these antique lath and plaster walls and old window frames comes a terrible amount of drafts. The usual way to combat this energy inefficiency is with a thermal imaging camera, a device that overlays the temperature of an object with a video image. These cameras are hideously expensive so [Rob] did what any of us would do and built his own.

The build centers around a Melexis MLX90620 far infrared thermopile that can be had for about $80. Basically, this sensor is a very, very low resolution camera (16×4 pixels) that senses heat instead of light. By sticking this sensor on a breadboard with an Arduino Mini and WiFly network adapter, [Rob] is able to pull the data down from the IR sensor to his iPhone and overlay it on the feed from the camera.

The result, as seen in the video above, is a low-resolution but still very useful thermal imaging camera, perfect for looking for cold drafts in an old house or tracking down [Arnie] just like a Predator.

Tip ‘o the hat to [Ronald] for sending this one in.

Optimus Prime Keeps A Vigilant Watch Over The Hen-house

[shOOter—]  and his family are just starting to keep chickens and need a coop in which the hens could roost. He wanted it to be mobile and protective and what is more mobile and protective and the leader of the Transformers? As you can see, his chicken coop is modeled after Optimus Prime.

The cab of the truck serves as the hen-house. It’s made of marine grade plywood held together with glue and galvanized nails. The exhaust stacks, which are made of PVC pipe, are not just decorative. They are chutes for the feed trays to either side of the blue ramp (you can’t really see the trays in this image). To give the chickens a way to stretch their legs he brought his welding skills to bear. The trailer portion of the build is a welded metal frame covered in mesh which provides a rather large exercise yard. Since the habitat is enclosed there’s really no need for an intricate motorized door.

[Thanks James]

Unlocking Silk For Uses As An Optical, Digital, Biological, Or Food Storage Device

[Fiorenzo Omenetto] gave a TED talk early last year to illustrates a lot of intriguing uses for silk. Before watching his presentation we would have been hard pressed to come up with a use for silk other than in clothing. But it turns out that investigating how silk worms create the material has led to a range of other applications. You can see the full talk embedded after the break.

One of the first things he shows off is a transparent film made of silk. The material looks almost like cellulose film, and can function in a similar way. [Fiorenzo] shines a laser through a silk slide that has a micro-dot of words embedded in it. the result is a clearly readable message projected on the wall. The film can also be used for holographic images.

But it’s the biodegradable aspects that are clearly the breakthrough here. A slide of silk can be doped with pharmaceuticals and programmed for a very specific time release. This way the drugs no longer need to be stored under refrigeration, and can be reclaimed using only water. The same properties allow one to manufacture disposable objects that will quickly and completely degrade. But there’s even more, if you dope the material with a conductor like gold it becomes a disposable circuit.

Continue reading “Unlocking Silk For Uses As An Optical, Digital, Biological, Or Food Storage Device”

Electric Vehicle Peripheral Controller For The Masses

This juicy hunk of printed circuits is an open source controller for the peripherals of an electric car. It’s the product of a capstone project working on a vehicle aimed at urban commuting. There wasn’t a suitable non-proprietary module for controlling a car’s peripherals so the team built their own.

As far as we can tell this is not responsible for driving the vehicle itself. We assume there’s another piece of hardware which reads from the accelerator pedal, drives the motors accordingly, and handles things like regenerative braking. But there’s a lot of other things in a modern vehicle that need to be taken care of as well. Head, tail, and turn indicator lights must be switched. All of the dashboard controls (like the turn signal lever and the wiper blade speed settings) need to be monitored. Something needs to drive the door locks, and a system that reads the door ajar sensors and switches the dome light on and off must be handled. This is where the controller pictured above really shines.

The team has released all of the hardware information. The code is not yet available, but will be as soon as they’ve cleaned it up enough to package the first release candidate.

Light Bulb Efficiency Exhibit Updated With LED Bulb Option

It seems like tinkerers are always being tapped to build or repair exhibit hardware. This time around it’s [Dino’s] turn. He’s been asked to alter a light bulb efficiency demo so that it includes an LED option.

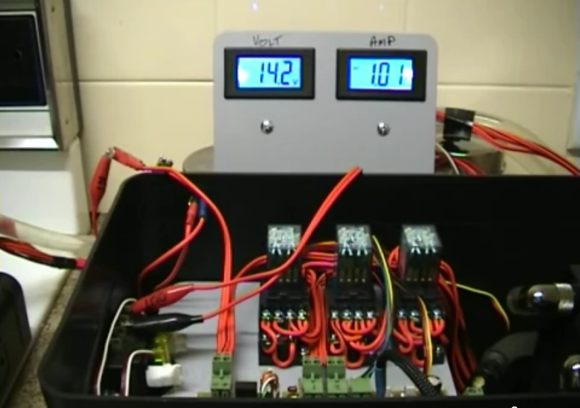
The idea here is that you crank a generator to power different types of light bulbs. There’s an ammeter built in, but possibly the best feedback is knowing how hard you have to crank to illuminate the most inefficient choice. As it stands there is a toggle switch to choose between incandescent and CFL bulbs. [Dino’s] solution is to use a three-position rotary switch. He removes the toggle switch and replaces it with a socket for the LED bulb. A new location for the rotary switch is chosen and he does a bit of work to get it mounted securely. If you haven’t worked with this type of switch before he takes the time in the video after the break to explain how they work.

Continue reading “Light Bulb Efficiency Exhibit Updated With LED Bulb Option”