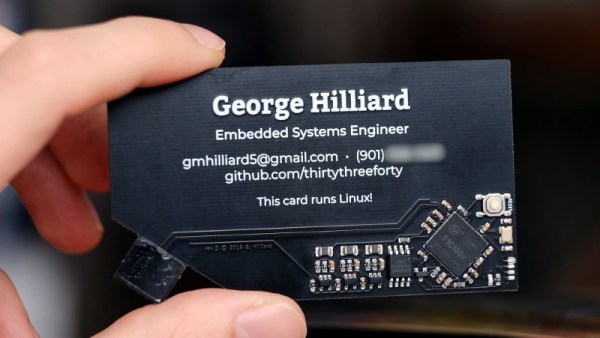
It takes a lot of work to get a functional PCB business card that’s thin, cheap, and robust enough to be practical. If you can even blink a few LEDs on the thing and still hand them out with a straight face, you’ve done pretty well for yourself. So you can imagine our surprise when [George Hilliard] wrote in to tell us about his $3 business card computer that boots into a functioning Linux environment. If this were a bit closer to April, we might have figured it was just a joke…
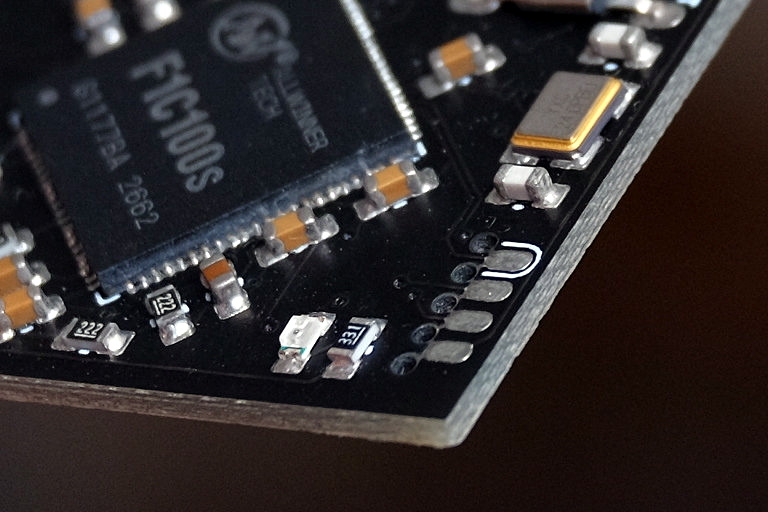
Of course it helps that, as an embedded systems engineer, [George] literally does this kind of thing for a living. Which isn’t to say it was easy, but at least he keeps close enough tabs on the industry to find a suitable ARM solution at a price that makes sense, namely the Allwinner F1C100s. This diminutive chip offers both RAM and CPU in a single package, which greatly simplifies the overall design and construction of the card.
 With a root filesystem that weighs in at just 2.4 MB, the environment on the card is minimal to say the least. There’s no networking, limited I/O, and forget about running any heavy software. But it does boot in about six seconds, and [George] managed to pack in a MicroPython interpreter and a copy of the classic Unix dungeon crawler
 rogue.
Oh yeah, and it also has his resume and some samples of his photography onboard. It is, after all, a business card. All the user has to do is plug it into the USB port of their computer and wait for the virtual serial port to pop up that will let them log into the system running on the card. It also shows up as a USB Mass Storage device for recipients who might not be quite as adept at the command line.
In addition to the high-level documentation for this project, [George] has also prepared a deeper write-up that goes into more technical detail for anyone who might be looking to follow in his footsteps. Thanks to all of the source code that he’s made available, it should be a lot easier for the next person to get their own disposable pocket computer up and running.
We’ve seen all manner of electronic business cards over the years, but never anything quite like this. Which, of course, is quite the point. If you’re ever given a business card that doubles as a computer running a full-fledged operating system on it, you aren’t likely to forget it anytime soon.

![Ken Thompson and Dennis Ritchie at a PDP-11. Peter Hamer [CC BY-SA 2.0]](https://hackaday.com/wp-content/uploads/2019/10/1279px-Ken_Thompson_sitting_and_Dennis_Ritchie_at_PDP-11_2876612463.jpg)


