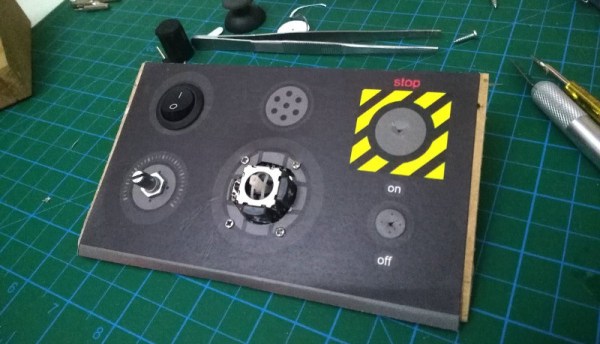
Whether with projects featured here or out in the real world, we have a tendency to focus most upon the end product. The car, solar panel, or even robot. But there’s a lot more going on behind the scenes that needs to be taken care of as well, whether it’s fuel infrastructure to keep the car running, a semiconductor manufacturer to create silicon wafers, or a control system for the robot. This project is one of the latter: a human interface device for a robot arm that is completely DIY.
While robots are often automated, some still need human input. The human input can be required all the time, or can be used to teach the robot initially how to perform a task which will then be automated. This “keyboard” of sorts built by [Ahmed] comes with a joystick, potentiometer, and four switch inputs that are all fully programmable via an Arduino Due. With that, you can perform virtually any action with whatever type of robot you need, and since it’s based on an Arduino it would also be easy to expand.
The video below and project page have all the instructions and bill of materials if you want to roll out your own. It’s a pretty straightforward project but one that might be worth checking out since we don’t often feature controllers for other things, although we do see them sometimes for controlling telescopes rather than robots.
Printing on fabric might be a familiar trick, but adding stretch into the equation gives our fabric prints the ability to reconstitute themselves back into 3D. That’s exactly what [Gabe] has accomplished; he’s developed a script that takes open 3d meshes and converts them to a hexagonal pattern that, when 3D-printed on a stretched fabric, lets them pop into 3D upon relaxing the fabric.
[Gabe’s] algorithm first runs an open 3D surface through the “Boundary-First Flattening Algorithm,” which gives [Gabe] a 2D mesh of triangles. Triangles are then mapped to hexagons based on size, which produces a landscape of 2D hexagons. Simply printing this hexagonal pattern onto prestretched fabric defines the shape of the object that will surface when the fabric is allowed to relax. As for how to wrap our heads around the mapping algorithm, as [Gabe] explains it, “The areas that experienced the most shrinkage in the flattening process should experience the least shrinkage when the fabric contracts after printing, and the regions that experienced little to no shrinkage in the flattening process should contract as much as possible in the fabric representation.”
If that seems tricky to visualize, just imagine taking a cheap halloween mask and trying to crush it flat onto a table. To smush it perfectly flat, some sections need to stretch while others need to shrink. Once flat though, we can simply keep stretching to remove all the sections that needed to shrink. At this point, if our material were extremely elastic, we could simply let go and watch our rubber mask jump back into 3D. That’s the secret behind [Gabe’s] hexagonal pattern. The size and spacing of these hexagons limit the degree to which local regions of the fabric are allowed to contract. In our rubber mask example, the sections that we stretched out the furthest have the most to travel, so they should contract as much as possible, while the sections that shrank in the initial flattening (although we kept stretching until they too needed to stretch) should shrink the least.
We’ve seen some classy fabric-printing tricks in the past. If you’re hungry for more 3D printing on fabric, have a look at [David Shorey’s] flexible fabric designs.
We’ve noticed waving cats in restaurants and stores for years, but even the happy bobbing of their arm didn’t really catch our attention. Maybe [Josh] had seen a couple more than we have when it occurred to him to take one apart to see how they work. They are designed to run indoors from unreliable light sources and seem to bob along forever. How do the ubiquitous maneki-neko get endless mechanical motion from one tiny solar cell?
Perhaps unsurprisingly given the prevalence and cost of these devices, the answer is quite simple. The key interaction is between a permanent magnet mounted to the end of the waving arm/pendulum and a many-turn wire coil attached to the body. As the magnet swings over the coil, its movement induces a voltage. A small blob of analog circuitry reacts by running current through the coil. The end effect is that it “senses” the magnet passing by and gives it a little push to keep things moving. As long as there is light the circuit can keep pushing and the pendulum swings forever. If it happens to stop a jolt from the coil starts the pendulum swinging and the rest of the circuit takes over again. [Josh] points to a similar circuit with a very nice write up in an issue of Nuts and Volts for more detail.
We’ve covered [Josh]’s toy teardowns before and always find this category of device particularly interesting. Toys and gadgets like the maneki-neko are often governed by razor-thin profit margins and as such must satisfy an extremely challenging intersection of product constraints, combining simple design and fabrication with just enough reliability to not be a complete disappointment.
For more, watch [Josh] describe his method in person after the break, or try flashing his code to an Arduino and make a waving cat of your own.
We’ve all had the heartbreak of ordering something online, only to have it arrive in less than mint condition. Such are the risks of plying the global marketplace, only more so for used gear, which seems to be a special target for the wrath of sadistic custom agents and package handlers all along the supply chain.
This cruel fate befell a vintage Vectrex game console ordered by [Senile Data Systems]; the case was cracked and the CRT was an imploded mass of shards. Disappointing, to say the least, but not fatal, as he was able to make a working console from the remains of the Vectrex and an old IBM monitor. The Google translation is a little rough, but from what we can gather, the Vectrex, a vector-graphics console from the early 80s with such hits as MineStorm, Star Castle, and Clean Sweep, was in decent shape apart from the CRT. So with an old IBM 5151 green phosphor monitor, complete with a burned-in menu bar, was recruited to stand in for the damaged components. The Vectrex guts, including the long-gone CRT’s deflection yoke assembly, were transplanted to the new case. A little room was made for the original game cartridges, a new controller was fashioned from a Nintendo candy tin, and pretty soon those classic games were streaking and smearing across the long-persistence phosphors. We have to admit the video below looks pretty trippy.
If arcade restorations are your thing, display replacements like this are probably part of the fun. Here’s a post about replacing an arcade display with a trash bin CRT TV, an important skill to have is this business.
It’s Friday, and that means this is your last weekend to get your project together for the Robotics Module Challenge in this year’s Hackaday Prize. We’re looking for tools for robots that blow the doors off what is commercially available. If you have a project in mind that adds sensors or capabilities to our fine electronic friends, enter it in the Hackaday Prize.
The Hackaday community has thrown itself full-force into the Hackaday Prize, and right now we’re getting very close to eight hundred projects entered in this year’s Prize. Next week, we’ll choose the top twenty projects entered during the Robotics Module Challenge to advance to the finals. Each of those twenty projects will be awarded $1,000 and be in the running to win the Grand Prize of $50,000 and four other top cash prizes.
This is your last chance to get in on the Robotics Module Challenge. For this Challenge, we’re looking for modules that can be used in robotics projects across the world. This could be a motor driver, sensor package, or even 3D printed tweels. Don’t wait — start your entry now.
Have you ever torn open an Ethernet jack? We’d bet the vast majority of readers — even the ones elbow-deep into the hardware world — will answer no. So we applaud the effort in this one, but the conclusion landed way off the mark.
In the last few days, a Tweet showing a Raspberry Pi with its Ethernet socket broken open suggested the little PCB inside it is a hidden bug. With more going on inside than one might expect, the conclusion of the person doing the teardown was that the Raspberry Pi foundation are spying upon us through our Ethernet traffic. That’s just not the case. But we’re still excited about what was found.
Hackers, Designers, and Engineers flooded into Dom Omladine on Saturday for what can only be described as an epic celebration of hardware culture. This is the second time Hackaday has organized a huge conference in Belgrade, and lightning really did strike twice.
A Gathering of New Friends and Old
We got things started off with a meetup the night before the conference. The first Hackaday Belgrade was held in 2016 and we didn’t reserve a bar on Friday night — we ended up taking over one just through sheer numbers. This year we called ahead for a large outdoor space, then made good use of it.
A great kickoff to the weekend
LED cube animation emulation demo
*No beers were wasted during this meetup
Everyone was giddy with anticipation of the next day to come. There is always a sizzling energy of meeting up in real life. Most of this group hangs out on Hackaday.io, but only some of them have met in person. Add to that the reunions of those who became friends at the previous Hackaday Belgrade and at other cons around Europe and you have the feeling of coming home. These really are your people.
Yes, a Conference. But the Cool Kind
Hackaday conferences are more than just parties… they’re conferences. If you approach it the right way you can get your employer on board with you attending because you’re going to meet incredible people, learn lots of stuff, and come back excited to take on the Universe. Actually, bring your boss along for the ride too!
Flooding into Hackaday Belgrade
Breakfast spread as the doors open
This year we had thirteen incredible talks. As is our practice, we started off with a super-technical talk as Rachel Wong (aka @konichiwakitty) discussed her Ph.D research which involves growing eye tissue in the lab. But like all incredibly brilliant minds, she has a creative outlet which she also covered as part of her Keynote address. Rachel has a passion for building wearables that are reaching for the future by embracing things we really do need in our garments and gear.
Main hall packed for the keynote address
The workshop area full to the brim
From drone monitoring networks to robot soldering machines, and concepts for designing meaningful hardware to using code to automate tedious PCB layout, there was plenty in these talks for everyone.
Rachel Wong on the growing of eye tissue
Elliot Williams demos Logic Noise live on stage
I really enjoyed Elliot Williams’ talk on Logic Noise for his live demos using simple logic chips to build up complex music. Marcel van Kervinck took us on a journey of TTL computer design. And Sophi Kravitz’s talk on building non-rigid airships had at least two people at the con get inspired and spin their own blimp design during the conference! There was a live-feed of the talks so keep your eye on Hackaday as we pull those out to be featured individually.
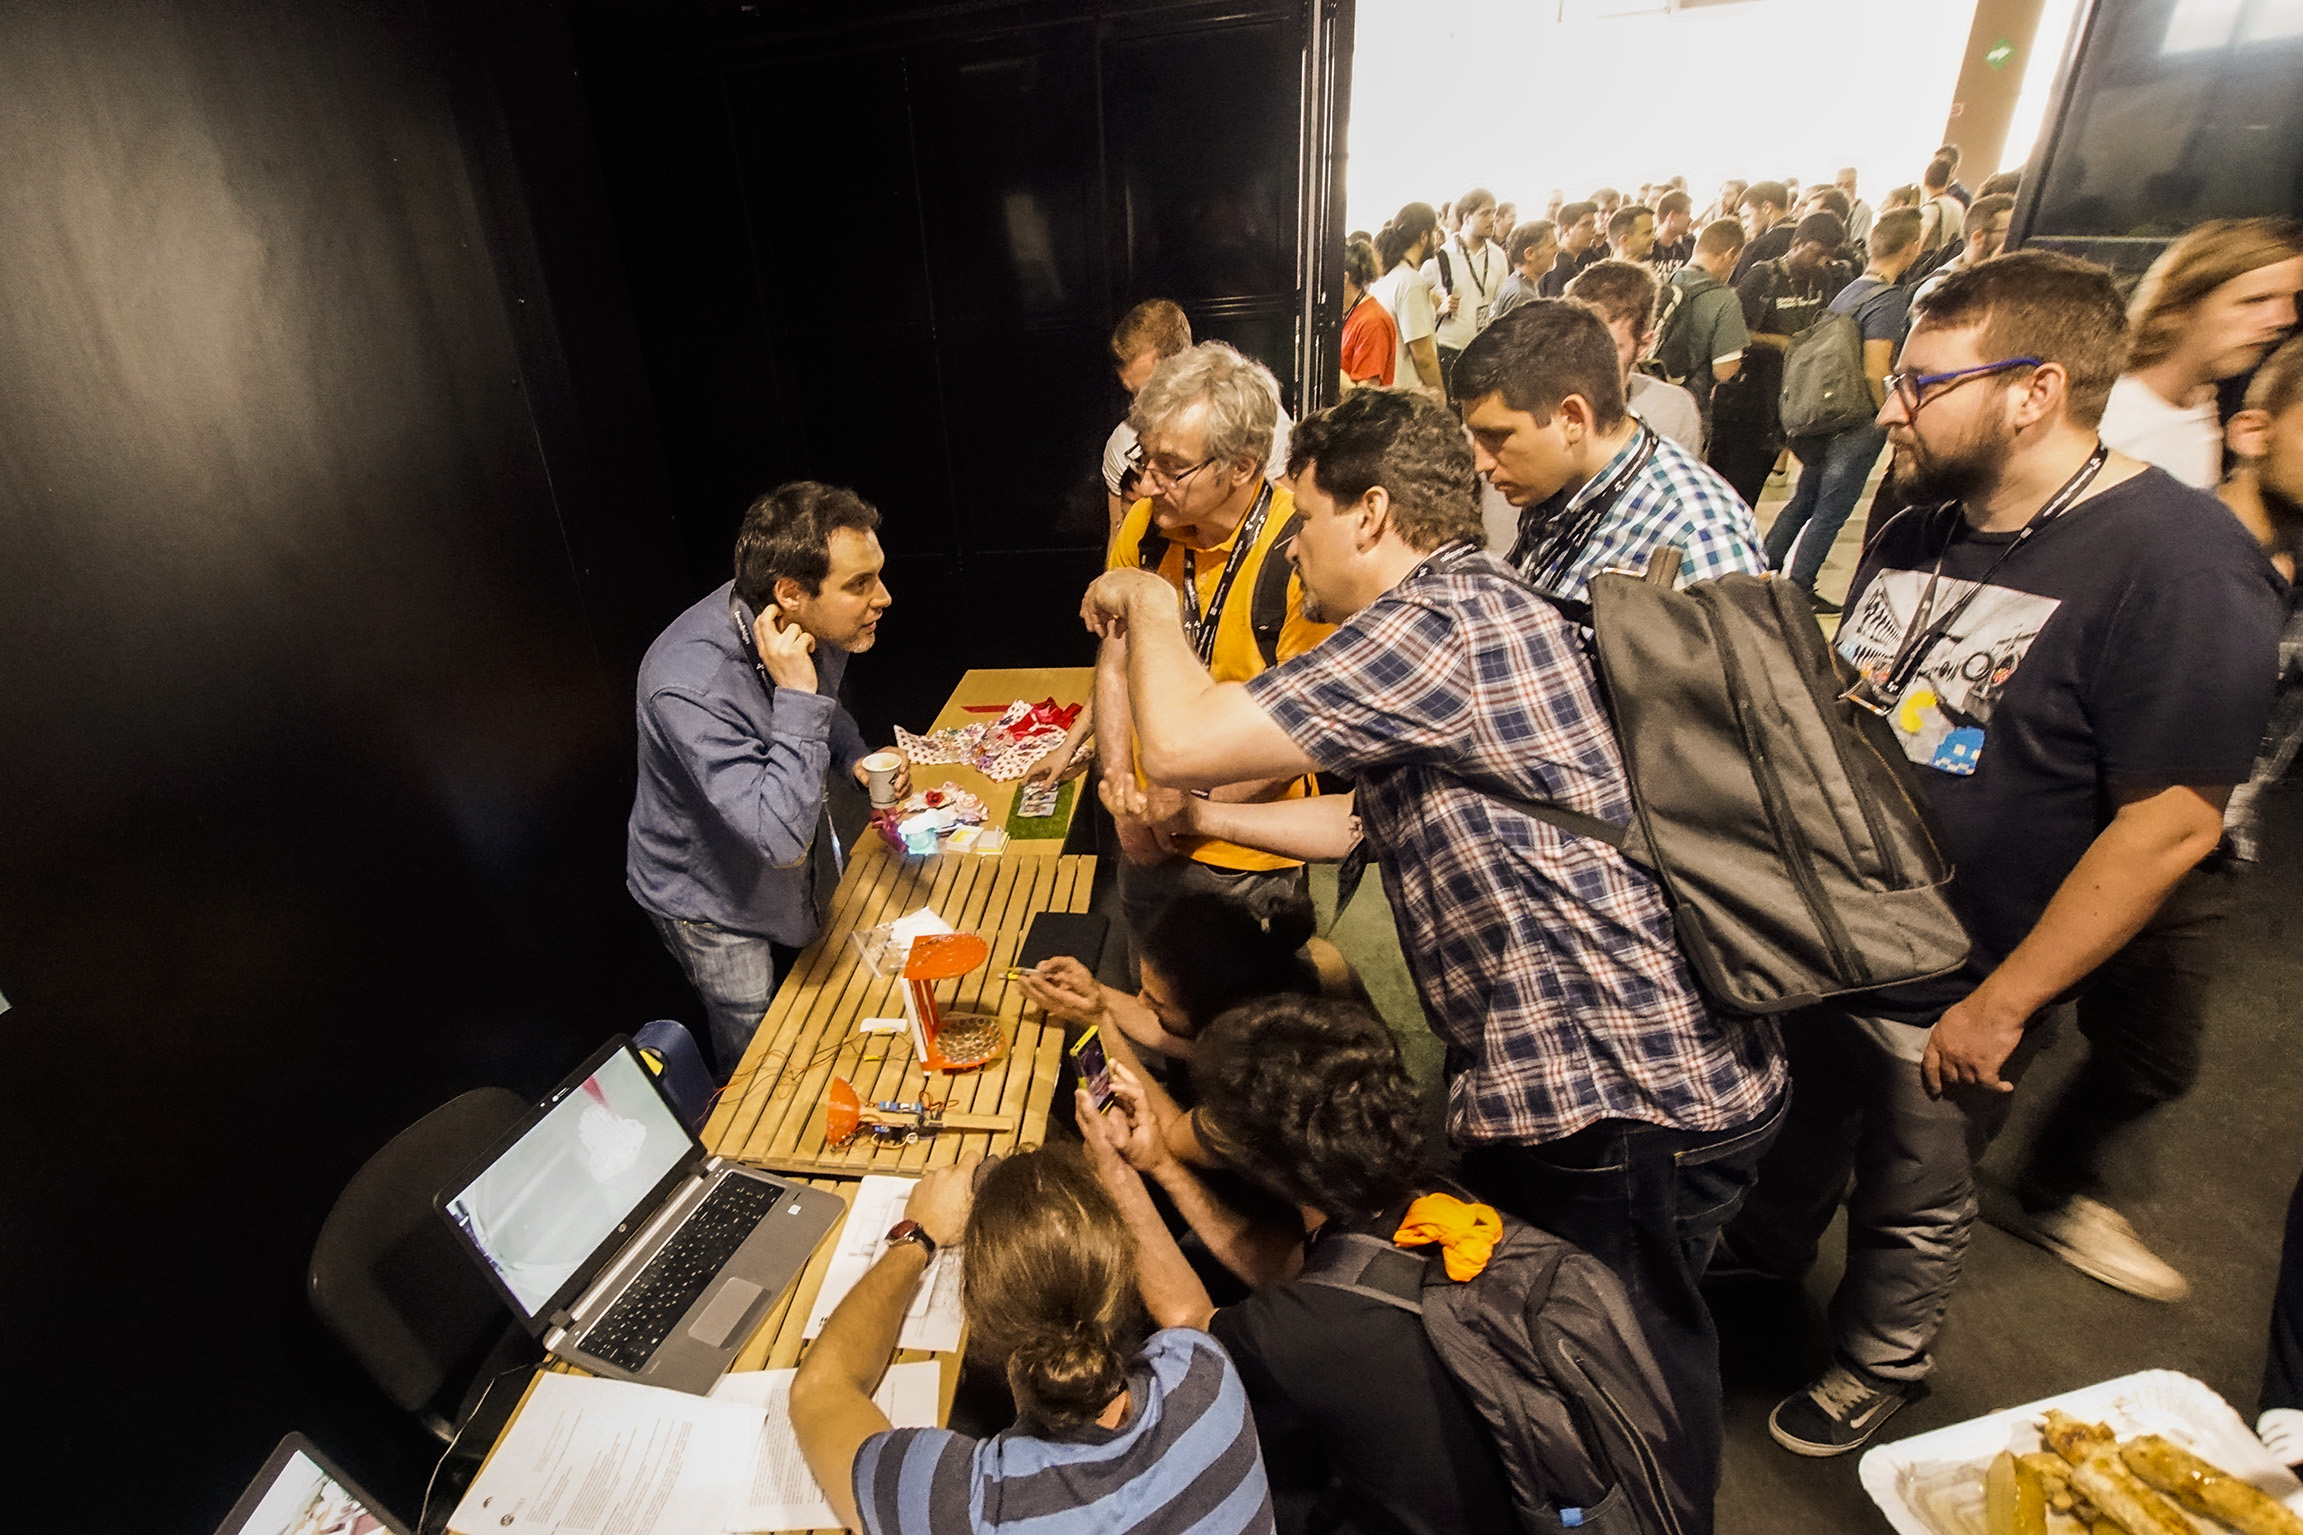
Some of the demo hardware: Acoustic levitation for lab work
The workshops were standing room only as people who weren’t able to grab a ticket audited the course. We had three hands-on session that built wearable circuitry, brough art to PCB design, and dove into the world of FPGAs.
Welcome, Here’s Your Neck-Mounted Retro Computer
Everyone through the door received a custom electronic badge to hack on during Hackaday Belgrade. Voja Antonic designed the hardware and oversaw the manufacture. We had excellent yield which is great because we had nearly (if not more than) 100% attendance at the conference. We ended the day with just 5 badges to spare!
These handheld computers are truly hot! The badges each have 55 really clicky keys. With at least 350 people in the room, that’s approaching 20k momentary push switches and at one point, a brief “silence” fell and all that could be heard were clicking buttons. That and we asked everyone to play the Mario Overworld tune at the same time as hundreds of badges rose in a glorious chorus. There’s also a 16-page user manual to go along with them which included sample code to get started.
Hacking went on throughout the day but as the talk session wrapped up we transformed the hall into a Hacker Village. Tables were brought in and immediately filled. Live music filled the room as Bogdan Rosu and Richard Hogben each played IDM sets. If you’ve been watching Hackaday videos you’ve heard their work and their performances this night were epic.
What is better than hacking to live music?
Still going strong as midnight approaches
Rich and Bogdan join forces for the final live music set
So much hacking, so little time
Head to head game called ‘Shoot my Valentine’
Head to head Tic Tac Toe
There were other hardware demos on display too
This badge was put on WiFi by lunchtime
[Flummer]’s badge displays minimalist style
Detail of [Larissa Koncz]’s Interactive Poetic Glove from the workshop
The world’s slowest sinewave, calculated in BASIC: [Tom van Dijk]
So much ASCII art!
[Frederic] and [Manoel] got their badges talking over AFSK, when the RF interference didn’t get them…
The RevSpace crew at work in the quiet workshop room
There was food, there was beer, and there were the tools of our lifestyle; laptops, programmers, jumper wires, blinky add-ons, and the excitement that goes along with all of them. The badge hacking presentations began at midnight and the place was still alive with excitement. It is truly great to see how supportive our community is of exploring hardware and trying things out. Publish your badge hacks and stories from the conference on Hackaday.io as we’ll be featuring those in the coming days and want to make sure we have all the juicy details.
Why Belgrade?
Keep your eye on Hackaday as there is much more coverage to come on this wonderful event. Many have asked: “Why Belgrade?”. It’s a fantastic city and the engineering community in the area is passionate about getting together to learn and share ideas. This includes the Supplyframe engineers who live in Belgrade and did the heavy lifting to organize and staff Hackaday Belgrade. You all did an amazing job and everyone at the con owes you a debt of gratitude, thank you so much! We also want to thank Supplyframe and SevenBridges, our sponsors for the event.
To all who attended, it wouldn’t have happened without you! I can speak for everyone on the Hackaday crew in saying the culture we share is energizing, encouraging, and humbling. It’s exactly the kind of recharge everyone looks for to keep life interesting! We’ll see you at the next one. Now over the next five months we have our sights set on the Hackaday Superconference. See you there!

 Perhaps unsurprisingly given the prevalence and cost of these devices, the answer is quite simple. The key interaction is between a permanent magnet mounted to the end of the waving arm/pendulum and a many-turn wire coil attached to the body. As the magnet swings over the coil, its movement induces a voltage. A small blob of analog circuitry reacts by running current through the coil. The end effect is that it “senses” the magnet passing by and gives it a little push to keep things moving. As long as there is light the circuit can keep pushing and the pendulum swings forever. If it happens to stop a jolt from the coil starts the pendulum swinging and the rest of the circuit takes over again. [Josh] points to a similar circuit with a


")


![[Flummer]'s badge displays minimalist style](https://i0.wp.com/hackaday.com/wp-content/uploads/2018/05/dscf0774.jpg?w=242&h=182&ssl=1 "DSCF0774")
![Detail of [Larissa Koncz]'s Interactive Poetic Glove from the workshop](https://i0.wp.com/hackaday.com/wp-content/uploads/2018/05/dscf0785.jpg?w=242&h=181&ssl=1 "DSCF0785")
![The world's slowest sinewave, calculated in BASIC: [Tom van Dijk]](https://i0.wp.com/hackaday.com/wp-content/uploads/2018/05/dscf0776.jpg?w=225&h=168&ssl=1 "DSCF0776")

![[Frederic] and [Manoel] got their badges talking over AFSK, when the RF interference didn't get them...](https://i0.wp.com/hackaday.com/wp-content/uploads/2018/05/dscf0748_bright.png?w=126&h=168&ssl=1 "DSCF0748_bright")