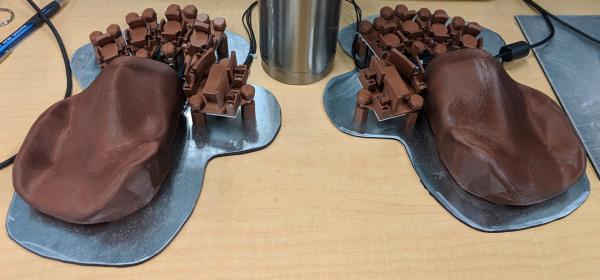
[Levi Janssen] has a secret: he doesn’t like harmonic drives. But rather than abandon the torque-amplifying transmission completely, he decided to see about improving them using 3D-printed compliant mechanisms.
For the uninitiated, harmonic drives, also known as strain-wave gears, are a compact, high-torque gearbox that has become popular with “robotic dog” makers and other roboticists. The idea is to have a rigid, internally-toothed outer ring nested around an externally-toothed, flexible cup. A wave generator rotates within the inside cup, stretching it so that it meshes with the outer ring. The two gears differ by only a couple of teeth, meaning that very high gear ratios can be achieved, which makes them great for the joints of robot legs.
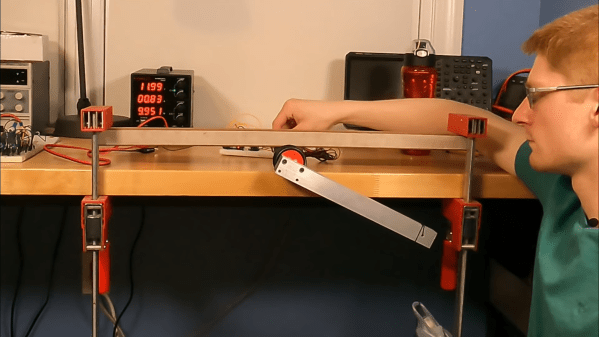
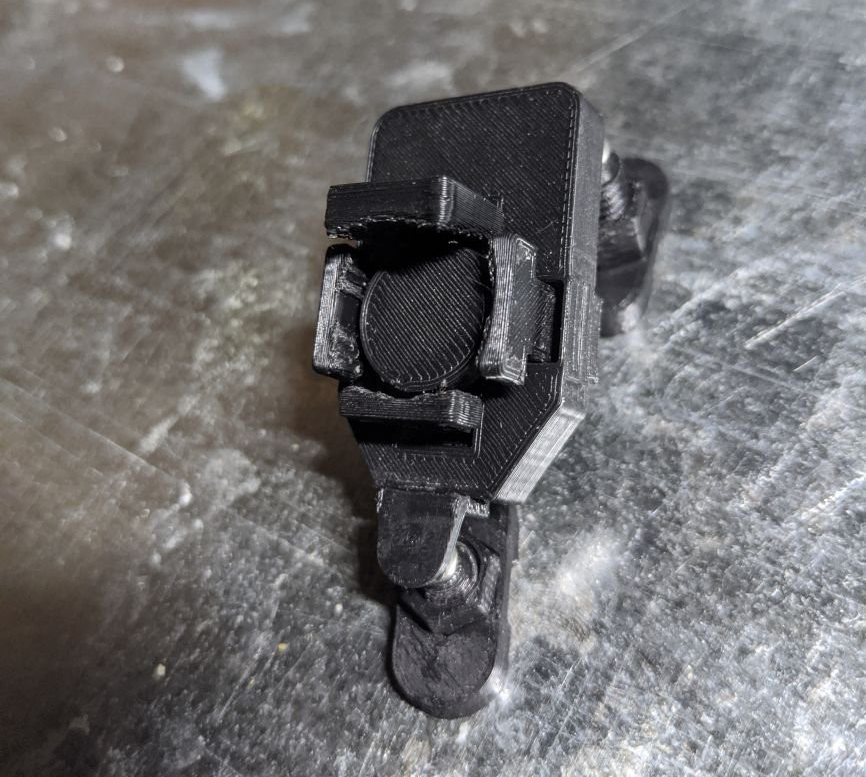
[Levi]’s problem with the harmonic drive is that due to the depth of the flexible spline cup, compactness is not among its virtues. His idea is to couple the flex spline to the output of the drive through a flat spring, one that allows flexion as the wave generator rotates but transmits torque efficiently. The entire prototype is 3D-printed, except for the wave generator bearings and stepper motor, and put to the test.
As the video below shows after the excellent introduction to harmonic drives, the concept works, but it’s not without its limitations. Even lightly loaded, the drive made some unpleasant crunching sounds as the PLA springs gave out. We could easily see that being replaced with, say, a steel spring, either machined or cut on a water-jet machine. That might solve the most obvious problem and make [Levi]’s dream of a compact harmonic drive a reality. Of course, we have seen pretty compact strain-wave gears before.
Continue reading “Harmonic Drive Uses Compliant Mechanism To Slim Down”

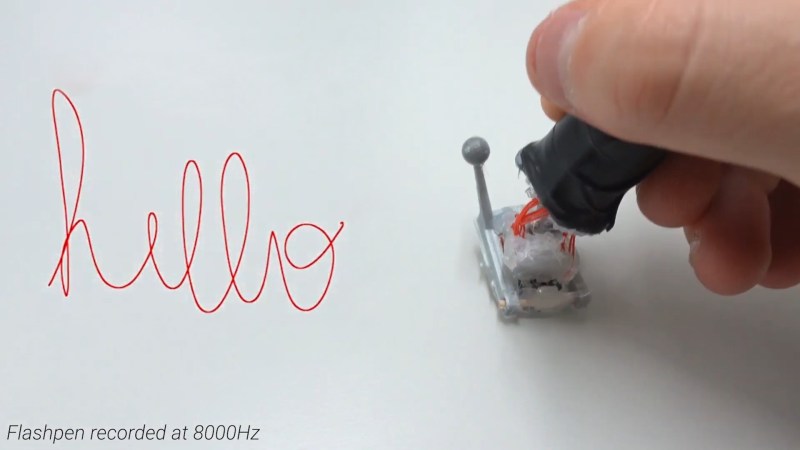
 The fundamental technology behind the pen is simple, with the device using an optical flow sensor harvested from a high-end gaming mouse. This is a device that uses an image sensor to detect the motion of the sensor itself across a surface. Working at an update rate of 8 KHz, it eclipses other devices in the market from manufacturers such as Wacom that typically operate at rates closer to 200Hz. The optical sensor is mounted to a plastic joint that allows the user to hold the pen at a natural angle while keeping the sensor parallel to the writing surface. There’s also a reflective sensor on the pen tip which allows cameras to track its position in space, for use in combination with VR technology.


