Running DOOM In A Keycap Takes Careful Work

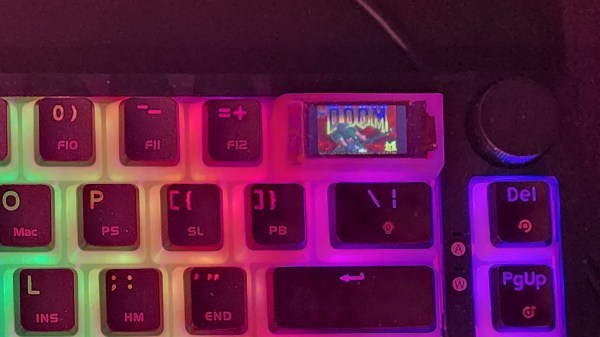
Shoehorning DOOM into different hardware is a classic hacker’s exercise, and [TheKeebProject] managed to squeeze the 1993 classic into a custom keycap with the help of a Raspberry Pi RP2040, a custom PCB, and a clear resin enclosure. It even has a speaker for sound!

All processing is done inside the keycap, which is a clever feat. There is a USB connection, but it’s only for power and keyboard controls, so it’s completely playable without needing a whole lot of external support. The custom PCB and code are based off an earlier RP2040 DOOM project, and [TheKeebProject] has certainly made it their own by managing to get everything so tightly integrated. There’s a quick video mashup embedded below. There’s still a bit of work to do, but the code and design files are all on GitHub should you wish for a closer look.

Making DOOM physically smaller is a good challenge, but we’d like to remind fans that we’ve also seen DOOM shrink in terms of power consumption, all the way down to 1 mW.

Continue reading “Running DOOM In A Keycap Takes Careful Work”

Wooden Keycaps Minus The CNC

What’s the most important part of the keycap? The average user-who-cares might tell you it’s the look and feel, but a keyboard builder would probably say the mounting style. That’s where the rubber meets the road, after all. For anyone trying to make their own keycaps, ‘the mount itself’ is definitely the correct answer. Try printing your own keycaps, and you’ll learn a lot about tolerances when it comes to getting the mount right.

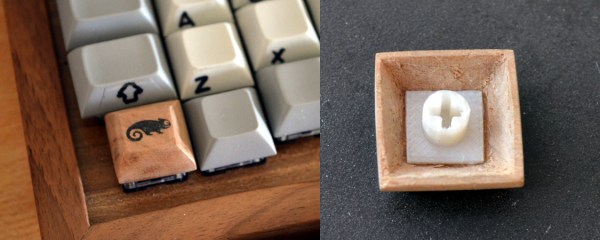
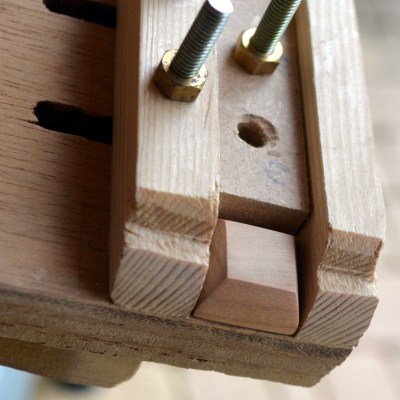
Conversely, you could use a subtractive process like a wood mill to make keycaps. Sounds easy enough, right? But what about all of us who don’t have access to one? [cbosdonnat], who has no CNC, has blazed a cellulose trail, combining hand-tooled wooden keycaps with 3D-printed mounts to create fully-customized keycaps. It’s a great project with concise how-to, especially when it comes to building the jigs needed to keep the keycaps consistently sized and shaped.

It makes a whole lot of sense to start by hollowing out the bottom instead of shaping the business side first or even cutting out the key shape, since the mount is mechanically vital. Why waste time on the look and feel if the foundation isn’t there yet?

Hardwood is a must for DIY keycaps, because the walls need to be thin enough to both fit over the switch and within the matrix, and be sturdy enough not to break with use. We love the look of the varnish-transferred laser-printed logo, and only wish there was a video so we could hear the clacking.

There are all kinds of ways to put legends on DIY keycaps, like waterslide decals for instance.

Custom Inlaid Retro Keycaps: Clay Is The Way

They say experience is the best teacher, and experience tells us they are right. When [Thomas Thiel] couldn’t find any resources about re-creating the groovy ‘caps of thocky old keebs like the Space Cadet and the C64 (or find any to buy), it was time for a little keycap experimentation.

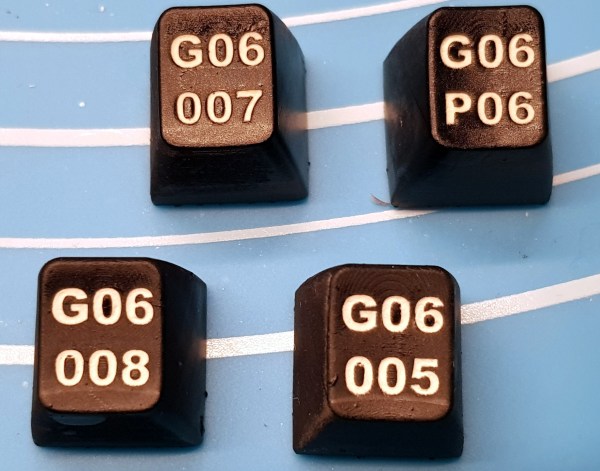
These babies are printed in black resin and the inlay is made with white air-dry clay. After printing, they are sprayed with acrylic, and then [Thomas] works a generous amount of clay into the grooves and seals the whole thing with clear spray. [Thomas] soon figured out that the grooves had to be pretty deep for this to work right — at least 1 mm. And he had better luck thick fonts like Arial Black instead of thin fonts.

Of course, as [Thomas] mentions, you’re not restricted to white or even air-dry clay. You could go nuts with colored clay and make a retro-RGB clackable rainbow.

Still not tactile or custom enough for you? These hand-stitched keycaps are technically re-legendable, though it would take a considerable amount of time.

Vacuum Forming Key Cap Covers Doesn’t Quite Work Out

Retrocomputing is as much about physical preservation as it is about electronics and computer science. Plastic is an awful material when it comes to decade-long timescales, and the forces of sun, air and water are unrelenting on these materials. [Drygol] has long experimented with techniques to preserve and refresh keycaps, and decided to try some fun vacuum forming techniques for something new. It sadly didn’t go to plan, however.

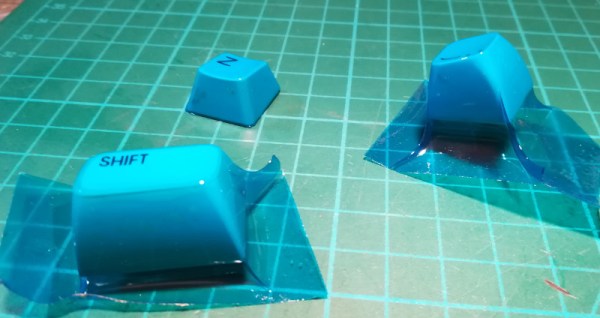
The basic idea was to use a vacuum-forming machine to coat keycaps in a thin layer of translucent plastic, for both aesthetic benefit and to preserve them from falling apart. Initial small-scale tests were promising, creating a key with a tight, form-fitting blue plastic wrap through which the original labels were still visible.

However, scaling up the process proved fraught. Uneven heating of the plastic film and a lack of rigidity in the carriage used to stretch it over the keycaps led to poor results. The final product showed many wrinkles and was distinctly unappealing.

[Drygol] isn’t giving up however, and plans to build a new vacuum table with greater performance. We can imagine this technique being an accessible way to colorize keycaps for a vintage cyberdeck or chiptune rig, without permanently modifying the keys. If you’ve got the inside knowledge on how to make this work, sound off in the comments.

We’ve seen [Drygol]’s work in this space before, too, like this extreme modded Amiga. If you’re executing your own retro repairs, be sure to drop us a line!

Adaptive Macro-Pad Uses Tiny OLED Screens As Keycaps

When we first laid eyes on Keybon, the adaptive macro keyboard, we sort of wondered what the big deal was. It honestly looked like any other USB macro keyboard, with big icons for various common tasks on the chunky keys. But looks can be deceiving, and [Max Kern] worked a couple of surprises into Keybon.

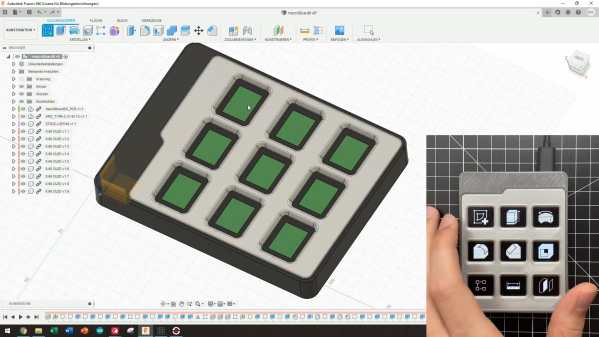
First of all, each one of Keybon’s buttons is actually a tiny OLED display, making the keycaps customizable through software. Each of the nine 0.66″ displays has a resolution of 64 x 48 pixels, which is plenty for all kinds of icons, and each is mounted over an SMD pushbutton switch. He had to deal with the problem of the keycaps just wobbling around atop the switch button without depressing it; this was solved with a 3D-printed cantilever frame that forced the keycaps to pivot only in one axis, resulting in clean, satisfyingly clicky keypresses.

The other trick that Keybon has is interactivity. By itself, it boots up with a standard set of icons and sends the corresponding keystrokes over USB. But when used with its companion Windows application, the entire macro set can be switched out to accommodate whatever application is being used. This gives the users access to custom macros for a web browser, EDA suite, CAD applications, or an IDE. The app supports up to eight macro sets and can be seen in action in the video below.

We love the look and the functionality [Max.K] has built into Keybon, but we wonder if e-ink displays would be a good choice for the keycaps too. They’re available for a song as decommissioned store shelf price tags now, and they might be nice since the icon would persist without power.

Continue reading “Adaptive Macro-Pad Uses Tiny OLED Screens As Keycaps”

Hand-Stitched Keycaps For Truly Luxurious Typing

We’ve seen some very unique custom keycaps recently, but nothing quite like the embroidered ones that [Billie Ruben] has been experimenting with. Using a clever 3D printed design, she’s crafted what could well be one of the most easily customizable keycaps ever made…assuming you’ve got a needle and thread handy.

The idea is to take a standard keycap blank and pop an array of 25 holes in the face. Your thread or yarn is run through these holes, allowing you to create whatever shape you wish within the 5 x 5 matrix. While it’s somewhat tight quarters on the underside of the cap, nothing prevents you from using multiple colors or even materials to do your stitching. As an added bonus, the soft threads should provide a very comfortable and particularly tactile surface to tap on.

Now the most obvious application is to simply stitch up versions of all the alphanumeric keys, but there’s clearly room for some interpretation here. [Billie] has already shown off some simple iconography like a red heart and we’re sure creative folks will have no trouble coming up with all sorts of interesting needlepoint creations to top their prized mechanical keyboards.

The intricate details necessary to make this idea work may be beyond the common desktop FDM 3D printer, so [Billie] ran these prototypes off on a resin printer (she attributes the visible layer lines to a hasty print). She’d love to hear feedback from other keyboard aficionados who’ve made the leap to liquid goo printing, so be sure to drop her a line if you print out a set of your own. It sounds like a new version is in the works which will provide a false bottom to cover the stitching from below, but functionally these should get you started.

Keycap Customizer Brings All Your Caps To The Board

With bright colors and often intricate designs, after the physical shape of a keyboard the most conspicuous elements are surely the keycaps. Historically dictated by the stem of the key switch it attaches to, keycaps come in a variety of sizes, colors, profiles, and designs. As they necessarily include small features with tight tolerances to fit the stem of their key switch, injection molding is the classic manufacturing technique for a keycap. But as hobbyist 3D printing matures and resin printers become more accessible, home keycap manufacturing is increasingly good option. Instead of designing each cap by hand, consider trying [rsheldiii]’s KeyV2 OpenSCAD script to create custom caps with ease.

To cover the basics, KeyV2 can generate full keycap sets with Cherry or Alps stems, in the SA, DSA, DCS profiles (and more!) for any typically sized keyboard. Generating a particular cap of arbitrary profile, position, and size is just a short chain of function calls away. But standard keycap sets aren’t the highlight of this toolset.

If you’re not an OpenSCAD aficionado yet, visit [Brian Benchoffs] great getting-started guide or our other coverage to get a feel for what the tool can do. Part of OpenSCAD’s attraction is that it is the the paragon of parametric modeling. It’s declarative part files ensure that no parameter goes undefined, which is a perfect fit for KeyV2.

The root file upon which all caps are based on has about 150 keycap parameters which can be tweaked, and that’s before more elaborate customization. Making simple “artisan” caps is a snap, as the magic of OpenSCAD means the user can perform any Boolean operations they need on top of the fully parameterized keycap. Combining an arbitrary model with a keycap is one union() away. See the README for examples.

For the prospective user of KeyV2 worried about complexity; don’t be, the documentation is a treat. Basic use to generate standard keycaps is simple, and there are plenty of commented source files and examples to make more complex usage easy. Thinking about a new keyboard? Check out our recent spike in clacky coverage.