Here’s a quick DIY hack if you happen to have multiple computers at home or at the office and are tired of juggling mice and keyboards. [Kedar Nimbalkar] — striving for a solution — put together a keyboard, video and mouse switcher that allows one set to control two computers.
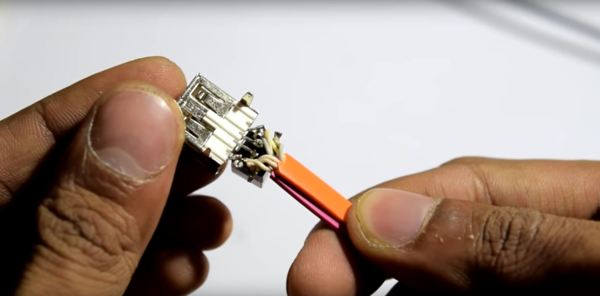
A DPDT switch is connected to a female USB port, and two male USB cables — with the ground and 5V wires twisted together and connected to the switch — each running to a PC. [Nimbalkar] suggests ensuring that the data lines are correctly wired, and testing that the 5V and ground are connected properly. He then covered the connections with some hot glue to make it a little more robust since it’s about to see a lot of use.
Now all that’s needed is a quick press of the button to change which PC you are working on, streamlining what can be a tedious changeover — especially useful if you have a custom keyboard you want to use all the time.
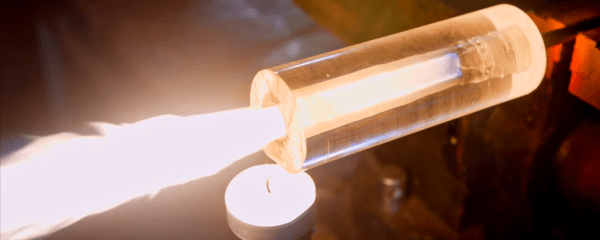
Rocket engines are undeniably cool. Experiencing the roar, seeing the fire, and watching the rocket blast off into the sky… what else can you ask for? Well, for [NightHawkInLight], a transparent rocket body is the answer.
Based on previous work by [Applied Science], he uses an acrylic rod as the rocket body and as the fuel. Bring a flame into the acrylic, apply oxygen from a canister at the other end of the body and voilà! The rocket engine starts nicely, and even better, the intensity of the burn can be controlled via the amount of oxygen provided. Continue reading “Transparent Rocket Engine”→
Gamifying life is silly, fun, and a great way to interact with those strangers who you pass everyday. Here’s one example that might just pop up along your next walk to work. It’s a way to take a very unscientific straw poll on any topic — you won’t even have to use your hands to cast a ballot.
A group called [Vote With Your Feet] has come up with a novel way of casting ballots. Simply walk down the sidewalk and through one of two doorways, each labeled with either side of a dichotomy. Each doorway is able to count the number of people that pass through it, so any issue imaginable can be polled. They already did vim vs emacs (59 to 27), and we’d like to see Keynes vs Hayek, or even Ovaltine vs Nesquik. Users can send the machine new issues for the masses to vote on, so the entertainment is quite literally limited only by your imagination.
The physical build is well documented. Since this is used outside, the choice of a flipdot display (of course always fun to play with) is perfect for this high-contrast in any level of light. Each doorway has a break-beam sensor which is monitored by the Raspberry Pi driving the overhead display (here’s code for it all if you want to dig in).
The point of this art installation like this is to get people to interact with their environment in a novel way, which this project has accomplished exceptionally well. In 3 days, they registered over 10,000 votes which are viewable on their website. If you have a project in mind that calls for data visualization you might want to keep this in your back pocket.
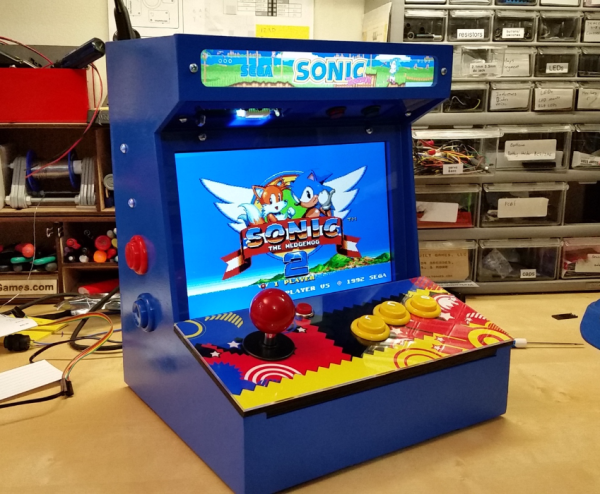
[Ryan Bates] loves arcade games, any arcade games. Which is why you can find claw machines, coin pushers, video games, and more on his website.
We’ve covered his work before with his Venduino project. We also really enjoyed his 3D printed arcade joystick based off the design of a commercial variant. His coin pushing machine could help some us finally live our dream of getting a big win out of the most insidious gambling machine at arcades meant for children.
Speaking of frustrating gambling machines for children, he also built his own claw machine. Nothing like enabling test mode and winning a fluffy teddy bear or an Arduino!
It’s quite a large site and there’s good content hidden in nooks and crannys, so explore. He also sells kits, but it’s well balanced against a lot of open source files if you’d like to do it yourself. If you’re wondering how he gets it all done, his energy drink review might provide a clue.
[fungus amungus] was reading online about printing directly on fabrics with a home printer. He’d read a few hopeful tutorials about printing on them with a laser printer, but he didn’t own one.
Considering that you can occasionally buy an inkjet for less than the ink, he decided to take the plunge and see if he could print on a swatch of fabric with his inkjet. The technique requires a printer, some wax paper, scissors, and an iron.
By adhering the wax paper to the fabric properly, it’s possible to run it through the printer without tears. (We’ll let you pick the heteronym.) The final step is to let the ink sit for an hour before running the iron over it again. This seems to cure the ink and it can even survive a few washings.
Being able to make any pattern of cloth on demand seems like a useful thing to keep in the toolbox!
Hearing aids are probably more high-tech than you think. They are tiny. They have to go through a lot of trouble to prevent feedback. They need a long battery life. The good ones match their amplification to the inverse of your hearing loss (amplifying only the bands where you don’t hear as well).
[NotionSunday] put together a hearing amplifier project that probably doesn’t hit many of those design criteria. However, thanks to a 3D printed case, it looks pretty good. The device uses a dual opamp to boost the output from two microphones and feeds it to a conventional headphone.
Over the last year, Hackaday.io has seen an incredible project. It’s a migratory box of random electronic junk, better known as the Travelling Hackerbox. The idea behind this mobile electronic surplus store is simple: receive the box, take out some cool electronic gizmos, add some of your own, and send it on to the next person on the list. It is the purest expression of the hacker aesthetic, all contained in a cardboard box.
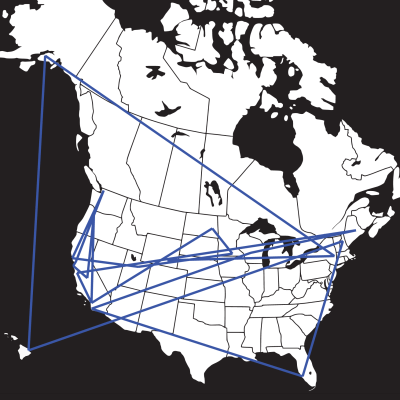
The previous travels of the (second) Traveling Hackerbox
Last week, the Travelling Hackerbox appeared at the Hackaday Superconference where it was torn asunder. Its silicon and plastic innards were spilled for a badge hacking competition. The body of the box is gone from this world but the spirit lives on. Parts were collected, pins straightened, the contents of anti-static bags condensed, and now it’s time for the Travelling Hackerbox to leave the nest. It’s going down to the post office, sending in its passport application, and it’s finally heading out into far-flung lands that are not the United States.
Over the last year, and despite some jerk in Georgia, the Traveling Hackerbox has racked up the miles. From Maine to Flordia, and from Alaska to Hawaii, the Hackerbox has distributed parts to dozens of labs and workstations. If you want to get an idea of the box, the last recipient, Carl Smith, put together a great summary and photo log of what he found in this magical box.
I’ve always promised the Hackerbox would go international after racking up 25,000 miles – the distance around Earth’s equator. Now, it’s finally time. This is happening, and I’m looking for volunteers to take care of the box.
How this is going to go down
Right now, the Travelling Hackerbox is sitting at the Hackaday Overlords office in Pasadena. The next trip will be to Canada, hopefully around Vancouver, where it will eventually make it to the Maritimes. From there, the box will travel to Europe (West to East, possibly ending in Russia). The box will then travel through Africa, ending South Africa, and head over the Indian Ocean to Australia. The rest of Oceania, Southeast Asia, India, and China will be next, possibly followed by South and Central America. With any luck, the Travelling Hackerbox will arrive back at home base by next year.
Of course, this all depends on how many members of the hackaday.io community would like to receive the box and where those people are located. If you want to receive the box, this is the sign-up form [the sign up form is now closed]. This form will be open for the next week, afterwards I will look at the responses, consider each of them, and plan this epic trip around the world.
The current state of the box
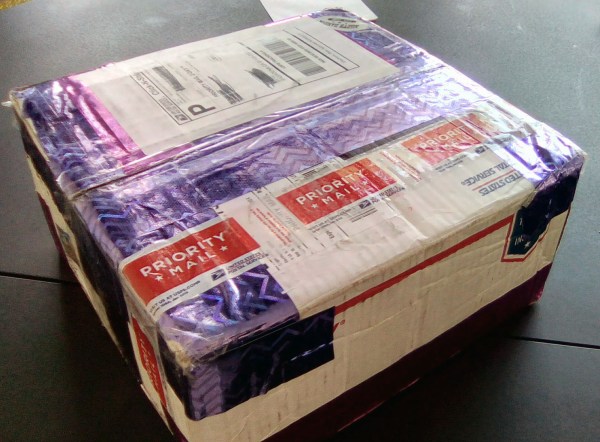
The Travelling Hackerbox was originally based on a US Postal Service flat rate box. Because flat rate boxes are for US destinations only, the physical manifestation of the box must change. At the very least, this gives me an opportunity to laminate a new box in packing tape and reinforce the edges of the cardboard.
The new body for the Travelling Hackerbox is a 12x12x3 inch (about five liters) cardboard box, lovingly protected and reinforced with stickytape. This does reduce the overall volume of the somewhat, which required the disposal of a few parts that weren’t really cool. I assure you, nothing of great value was lost, and I only removed the larger, bulkier components I remember seeing the last time I had it.
All the coming travels will be planned next week when I get a few submissions to the international sign-up form.
 The physical