Turn Your Furniture Into A Light Show With Hyelicht

There’s something about the regimented square shapes of the IKEA Kallax shelf that convinced [Eike Hein] it could benefit from some RGB LED lighting, and while he could have simply used a commercial solution, he decided instead to develop Hyelicht: an incredibly well documented open source lighting system featuring multiple control interfaces and APIs. We’d say it was overkill, but truth be told, we dream of a world where everyone takes their personal projects to this level.

Hyelicht’s default touch UI

In the boilerplate configuration, [Eike] shows off controlling the LEDs using a graphical user interface running on a Waveshare 7″ touch screen mounted to the side of the shelf. That’s the most direct way of controlling the LEDs, as the touch screen is plugged into the Raspberry Pi 4B that’s actually running the software. But the same interface can also be remotely accessed by your smartphone or desktop.

You can also skip the GUI entirely and control the LEDs with a command line interface, or maybe poke Hyelicht’s HTTP REST interface instead. The system can even integrate with the Philips Hue ecosystem, if you prefer going that route.

The 5×5 Kallax shelf is the project’s official reference hardware, but of course it will work with anything else you might wish to cover with controllable LEDs. We’ve seen similar setups used to light storage bins in the past, but nothing that can even come close to the documentation and customization possibilities offered by Hyelicht. This is definitely a project to keep a close eye on if you’ve got the urge to add a little color to your world.

Roku TV Hacked To Run Philips Ambilight Setup

Roku TVs are interesting beasts, which use automatic content recognition on whatever you happen to be watching in order to market online streaming services direct to your loungeroom. [Ammar Askar] realised that this technology could instead be used to feed data to a computer to run a Philips Ambilight setup natively from whatever the TV displays. 

The core of the hack came about because [Ammar’s] TV doesn’t work natively with Philips Ambilight technology. Most off-the-shelf solutions involve feeding sources, like Chromecasts or game consoles, to a HDMI splitter and then to a PC running the Ambilight software, but it gets messy real quick. Instead, [Ammar] realised that the Roku-enabled TV should be more than capable of working with the Ambilight system, given the capability of its inbuilt hardware.

The hack consists of a custom app running on the Roku hardware, which uses the in-built Roku libraries to capture frames of whatever is being displayed on the TV. It then breaks up the screen into sections and averages the color in each area. This data is then passed to a laptop, which displays the relevant colors on its own screen, where the standard Philips Hue Sync app handles the Ambilight duties.

It’s a great hack and [Ammar] doesn’t skimp on the granular fine details of what it took to get this custom code running on the Roku TV. We’d love to see more hacks of this calibre done on smart TVs; after all, there’s plenty of horsepower under the hood in many cases. Alternatively, you could always follow the CIA’s example and turn your Samsung TV into a covert listening device. Video after the break.

Continue reading “Roku TV Hacked To Run Philips Ambilight Setup”

Quarantine Clock Focuses On The Essential

In these dire times of self quarantining, social distancing, and life as know it coming to a halt, time itself can become rather blurry, and even word clocks may seem unnecessarily precise — especially if you happen to have a more peculiar circadian rhythm. And let’s face it, chances are your usual schedule has become somwehat irrelevant by now, so why bother yourself with dates or an exact time anyway? If you can relate to this, then [mwfisher3] has the perfect clock for you, displaying only the day of the week and a rough estimate of how far that day has progressed.

Using a Raspberry Pi and a spare touch screen, [mwfisher3] had an easy game to begin with, so the clock itself is just Chrome running in Kiosk mode, displaying a local web site with the hours of the day mapped to an array of their textual representation. A few lines of JavaScript are then updating the web site content with the current day and “time”, and a Python script is handling the screen’s back light based on the readings from a Philips Hue motion sensor, using the phue library.

While this is definitely one of the simpler clock projects we’ve seen, this simplicity offers actually a great introduction to some easy JavaScript-based web displays on a Raspberry Pi without much fuzz and distraction. But if that’s not your thing, and you like things more mechanical, we’ve recently covered this day clock that follows the same idea, and then there’s also this light box for an artistic approach of getting a rough estimate of the time.

DIY ZigBee Therapy Lights Are Hue Compatible

Working on a project into the wee hours is hardly uncommon for us hackers, but if you’re consistently sleeping until the afternoon, it’s possible you’re suffering from a condition known as Delayed Phase Sleep Disorder (DPSD). Put simply, your body’s internal clock is out of alignment with the world around you. One of the ways to treat this condition is to expose yourself to bright light in the morning, which can help you wake up and feel more refreshed. Unfortunately, these so-called “Bright Light Therapy” boxes tend to be pretty expensive.

Looking for a way to treat his own DPSD, [Edward Shin] decided to build his own light box based on the research he’d done on the various commercial offerings out there. After all, a box full of bright lights that operates on a timer doesn’t seem particularly complex. Of course, in reality there’s a bit more to it than that, but so far the results are certainly promising.

The first decision [Edward] had to make was what kind of light he wanted. Classic light therapy devices, often used to treat Seasonal Affective Disorder (SAD), tend to be full spectrum lights that try and simulate sunlight. But in his research, he found a paper from Nature that explained the melanopsin in the human eye responds primarily to blue and green light. But as intense blue light can apparently lead to macular degeneration, he decided to go with green.

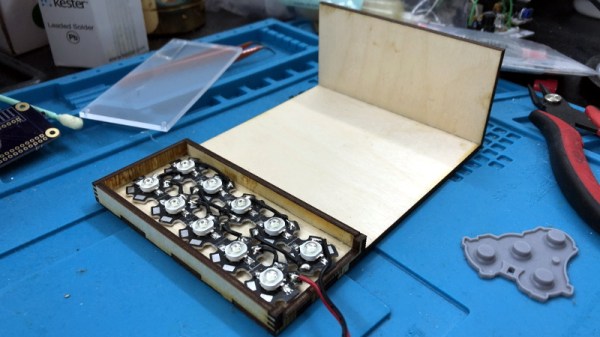
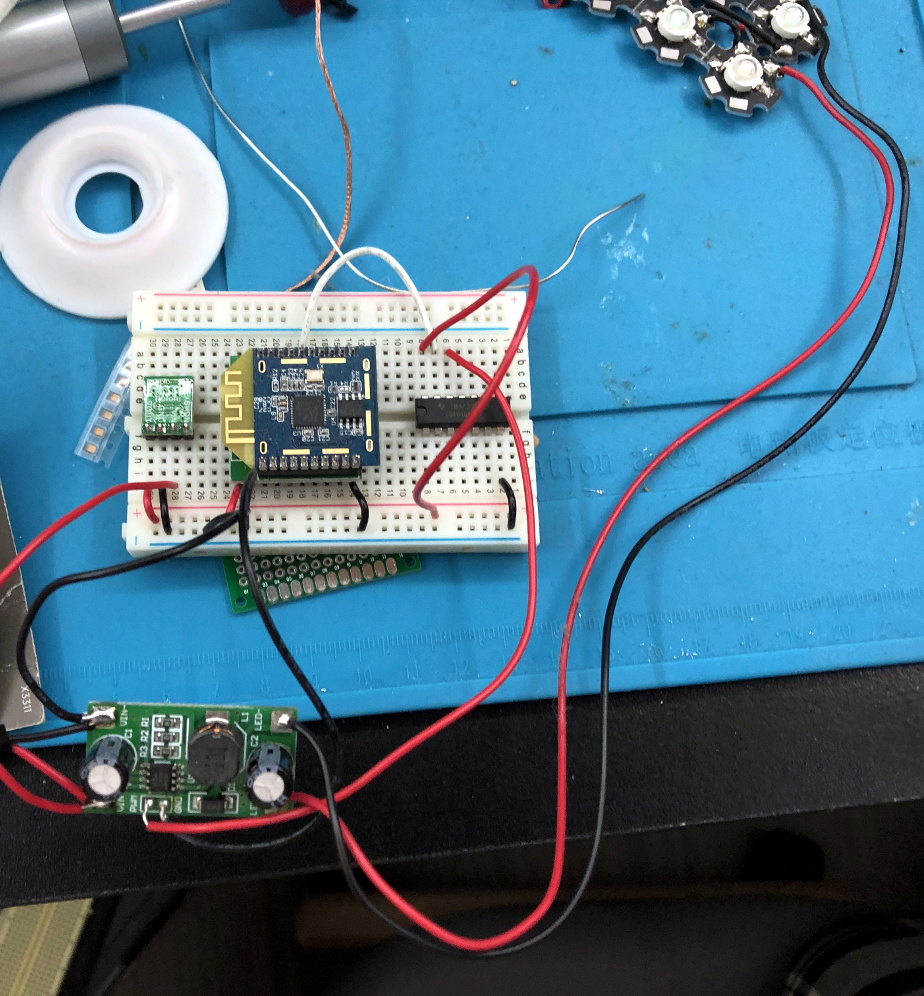
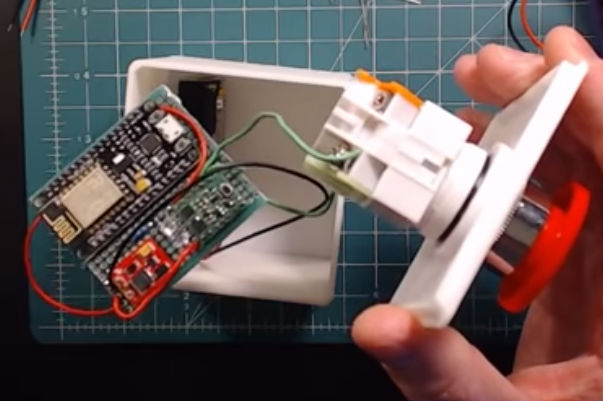
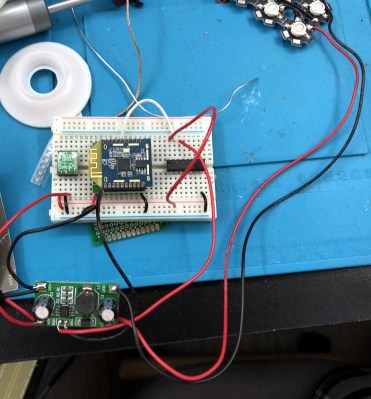
Since [Edward] already uses the Philips Hue system for his home’s lighting, he wanted to bring his therapy light into that ecosystem. The idea was that he could easily schedule his new green light box to go on when he wanted to wake up in the morning. So he used the Mesh Bee from Seeed Studio which not only supports ZigBee, but for which software is available to emulate a Hue bulb. Then he just needed to pair that with a sufficiently beefy LED driver and some 510 nm emitters. Everything is enclosed in a box made of laser cut wood that’s designed to hang from the headboard and shine down onto his face.

Over the years we’ve seen a number of similar projects trying to address SAD, so the idea of a hacker tweaking the concept to tackle DPSD seems a natural enough evolution of the idea. Just remember to speak with a medical professional before coming up with a homebrew treatment plan.

Not Happy With Smart Bulbs? Make Your Own

The idea of the so-called “smart bulb” sounds good; who wouldn’t want to be able to verify the porch light is on if you’re out of town for the night, or check to see if you left the bathroom lights on in your rush out the door in the morning? But in practice, it can be a nightmare. Each brand wants to push their own protocol. Even worse, it seems you can’t get anything done without signing up for three different services, each with its own application that needs to be installed on your phone. It’s a frustrating and often expensive mire to find yourself in.

[Dom Gregori] liked the Hue bulbs offered by Philips, but didn’t want to buy into the whole ecosystem of phone apps and hardware hubs they require. So he decided to create his own open source version that would do everything he wanted, without any of the seemingly unavoidable baggage of the commercial offerings. The final result is a professional looking ESP8266 controlled RGB bulb that hooks into Home Assistant via MQTT.

Looking at his Bill of Materials, it’s actually pretty amazing to see how little it really takes to pull a project like this off. Outside of the Wemos D1 Mini board, [Dom] just needed a few concentric WS2812 rings, and a USB charger small enough to fit into the base of his 3D printed enclosure.

We especially like how he handled the socket-side of the bulb, as that’s the part that would have left us scratching our heads. Rather than trying to salvage the base from an existing bulb, or come up with his own printed piece to stick in the socket, he just used a cheap and readily available light socket adapter. The solution might be a little bulky, but we like how he’s deftly avoided having to handle any AC voltages in this project.

Over the last couple years, we’ve seen more and more smart bulb related content come our way. From the ever popular teardown of a new entry into the market to the sobering realization that your light bulbs might provide the key attackers need to access your network, it’s been fascinating to see the transformation of these once simple pieces of hardware into something far more complex.

Evolution Of The ESP8266 Party Button

Sometimes the best part of building something is getting to rebuild it again a little farther down the line. Don’t tell anyone, but sometimes when we start a project we don’t even know where the end is going to be. It’s a starting point, not an end destination. Who wants to do something once when you could do it twice? Maybe even three times for good measure?

Original version of the Party Button

That’s what happened when [Ryan] decided to build a wireless “party button” for his kids. Tied into his Home Assistant automation system, a smack of the button plays music throughout the house and starts changing the colors on his Philips Hue lights. His initial version worked well enough, but in the video after the break, he walks through the evolution of this one-off gadget into a general purpose IoT interface he can use for other projects.

The general idea is pretty simple, the big physical button on the top of the device resets the internal ESP8266, which is programmed to connect to his home WiFi and send a signal to his MQTT server. In the earlier versions of the button there was quite a bit of support electronics to handle converting the momentary action of the button to a “hard” power control for the ESP8266. But as the design progressed, [Ryan] realized he could put the ESP8266 to deep sleep after it sends the signal, and just use the switch to trigger a reset on the chip.

Additional improvements in the newer version of the button include switching from alkaline AA batteries to a rechargeable lithium-ion pack, and even switching over to a bare ESP8266 rather than the NodeMCU development board he was using for the first iteration.

For another take on MQTT home automation with the ESP8266, check out this automatic garage door control system. If the idea of triggering a party at the push of a button has your imagination going, we’ve seen some elaborate versions of that idea as well.

Continue reading “Evolution Of The ESP8266 Party Button”

Haunting A Smart Mirror With Hue And Alexa

So, your smart mirror has been running for a while, but Halloween is coming up and you want to come up with some cool Halloween stuff to display on the mirror. If you’re looking for ideas, check out [Ben Eagan]’s cool Haunted Smart Mirror which connects the mirror via a Raspberry Pi with Amazon Alexa and Phillips Hue lighting.

[Ben] points to another of his blog pages for those readers interested in the nuances of setting up Alexa with a smart mirror, while concentrating on communication with the Hue bridge and creating the setup for a new Alexa command in this post. Dealing with the Phillips Hue API seems fairly straightforward: Get the IP address of your Hue bridge from your router and the ID of your lights from the Hue app and you’re set to send commands via HTTP. [Ben] includes a Python script to make the lights flicker, which you can modify for your own lights as you wish. Once that’s done, you’ll need to set up the intent that Alexa listens for, and then modify the AWS lambda function that sends commands to the Pi. When the command shows up in the queue on the Pi, any commands [Ben] wants to play are fired off – in this case, a video is played and the Hue lights start to flicker.

There’s no mention of security in the article, so that may be worth a little attention with Alexa and the Hue, but with Halloween coming up fast even if you haven’t built a magic mirror yet, if you’ve got Hue lights, this would be a great, quick, Halloween idea. Especially if you could combine it with your outside lights so that Trick-or-Treaters can join in on the fun. Maybe you’d prefer looking up passing planes using Alexa? Or how about getting your fish to talk?

Continue reading “Haunting A Smart Mirror With Hue And Alexa”