PCB Finishes Hack Chat

Join us on Wednesday, March 11 at noon Pacific for the PCB Finishes Hack Chat with Mark Hughes and Elijah Gracia!

There’s no way to overestimate the degree to which the invention of the printed circuit board revolutionized electronics. What was once the work of craftspeople weaving circuits together with discrete components, terminal strips, and wiring harnesses could now be accomplished with dedicated machines, making circuit construction an almost human-free process. And it was all made possible by figuring out how to make copper foil stick to a flat board, and how to remove some of it while leaving the rest behind.

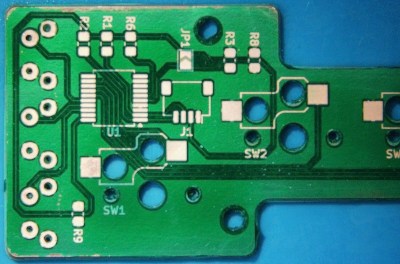
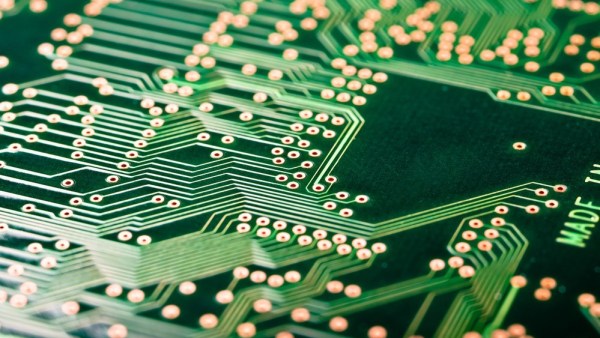
​Once those traces are formed, however, there’s more work to be done. Bare copper is famously reactive stuff, and oxides soon form that will make the traces difficult to solder later. There are hundreds of different ways to prevent this, and PCB surface finishing has become almost an art form itself. Depending on the requirements for the circuit, traces can be coated with tin, lead, gold, nickel, or any combination of the above, using processes ranging from electroplating to immersion in chemical baths. And the traces aren’t the only finishes; solder resist and silkscreening are both important to the usability and durability of the finished board.

For this Hack Chat, we’ll be talking to Elijah Gracia and Mark Hughes from Royal Circuit Solutions. They’re both intimately familiar with the full range of PCB coatings and treatments, and they’ll help us make sense of the alphabet soup​: HASL, OSP, ENIG, IAg, LPI, and the rest. We’ll learn what the different finishes do, which to choose under what circumstances, and perhaps even learn a bit about how to make our homebrew boards look a little more professional and perform a bit better.

join-hack-chatOur Hack Chats are live community events in the Hackaday.io Hack Chat group messaging. This week we’ll be sitting down on Wednesday, March 11 at 12:00 PM Pacific time. If time zones have got you down, we have a handy time zone converter.

Click that speech bubble to the right, and you’ll be taken directly to the Hack Chat group on Hackaday.io. You don’t have to wait until Wednesday; join whenever you want and you can see what the community is talking about.

Dealing With Missing Pin Allocations

Blindsided by missing pin allocations? Perhaps you’re working on a piece of hardware and you notice that the documentation is entirely wrong. How can you get your device to work?

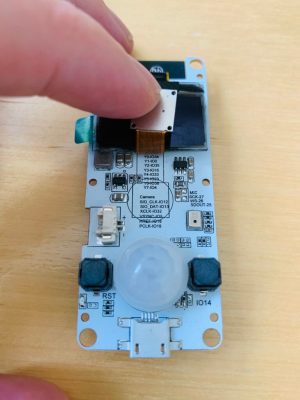
[Dani Eichhorn]’s troubles began when running an IoT workshop using a camera module. Prior to the work, no one had through to check if all of the camera modules ordered for the participants were the same. As it turns out, the TTGO T-CAM module had a number of revisions, with some even receiving a temperature/pressure sensor fixed on top of the normal board.

While the boards may have looked the same, their pin allocations were completely different.Changing the pin numbers wouldn’t have been difficult if they were simply numbered differently, but because the configurations were different, errors started to abound: Could not initialize the camera

As it turns out, even the LillyGo engineers – the manufacturers of the board – may have gotten a bit lost while working on the pin allocations, as [Eichhorn] was able to find some of the pins printed right onto the PCB, hidden behind the camera component.

To find information not printed on the board, a little more digging was required. To find the addresses of the devices connected to the I2C bus, running a program to find peripherals listening on the bus did the trick. This was able to print out the addresses of the SSD1306 OLED display driver and the microphone for the board at hand.

To find the pins of peripherals not printed on the PCB or hidden on the silkscreen, a GPIO scanner did the trick. This in particular worked for finding the PIR (passive infrared) motion sensor.

We picked up a few tips and tricks from this endeavor, but also learned that reverse-engineering anything is hard, and that there isn’t any one method for finding pin allocations when the documentation’s missing.

Hackaday Links Column Banner

Hackaday Links: July 21, 2019

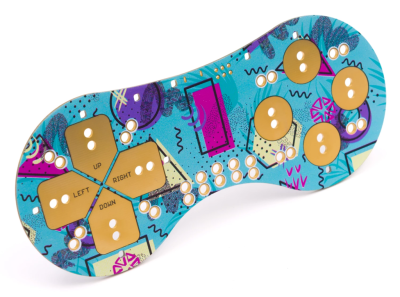
Ordering a PCB used to be a [Henry Ford]-esque experience: pick any color you like, as long as it’s green. We’ve come a long way in the “express yourself” space with PCBs, with slightly less than all the colors of the rainbow available, and some pretty nice silkscreening options to boot. But wouldn’t it be nice to get full-color graphics on a PCB? Australian company Little Bird thinks so, and they came up with a method to print graphics on a board. The results from what looks like a modified inkjet printer are pretty stunning, if somewhat limited in application. But I bet you could really make a splash with these in our Beautiful Hardware contest.

The 50th anniversary of the Apollo 11 landing has come and gone with at least as much fanfare as it deserves. Part of that celebration was Project Egress, creation of a replica of the Columbia crew hatch from parts made by 44 hackers and makers. Those parts were assembled on Thursday by [Adam Savage] at the National Air and Space Museum in an event that was streamed live. A lot of friends of Hackaday were in on the build and were on hand, like [Fran Blanche], [John Saunders], [Sophy Wong], and [Estefannie]. The Smithsonian says they’ll have a recording of the stream available soon, so watch this space if you’re interested in a replay.

From the “Don’t try this at home” department, organic chemist [Derek Lowe] has compiled a “Things I won’t work with” list. It’s real horror show stuff that regales the uninitiated with all sorts of chemical nightmares. Read up on chlorine trifluoride, an oxidizer of such strength that it’s hypergolic with anything that even approaches being fuel. Wet sand? Yep, bursts into flames on contact. Good reading.

Continuing the safety theme, machinist [Joe Pieczynski] offers this lathe tip designed to keep you in possession of a full set of fingers. He points out that the common practice of using a strip of emery cloth to polish a piece of round stock on either a wood or metal lathe can lead to disaster if the ends of the strip are brought into close proximity, whereupon it can catch and act like a strap wrench. Your fingers don’t stand a chance against such forces, so watch out. [Joe] doesn’t share any gory pictures of what can happen, but they’re out there. Only the brave need to Google “degloving injury.” NSFL – you’ve been warned.

On a happier note, wouldn’t it be nice to be able to print water-clear parts on a standard 3D printer? Sure it would, but the “clear” filaments and resins all seem to result in parts that are, at best, clearish. Industrial designer [Eric Strebel] has developed a method of post-processing clear SLA prints. It’s a little wet sanding followed by a top coat of a super stinky two-part urethane clearcoat. Fussy work, but the results are impressive, and it’s a good technique to file away for someday.

Hackaday Prize Entry: PCBs On Demand With Etchr

The ambitious etchr – the PCB Printer is just a concept at the moment, but it’s not often we see someone trying to tackle desktop PCB production in a new way. Creator [Jonathan Beri] is keenly aware that when it comes to creating electronics, the bottleneck for most workflows is the PCB itself. Services like OSH Park make professionally fabricated PCBs accessible at a low cost, but part of the bargain is that turnaround times are often measured in weeks.

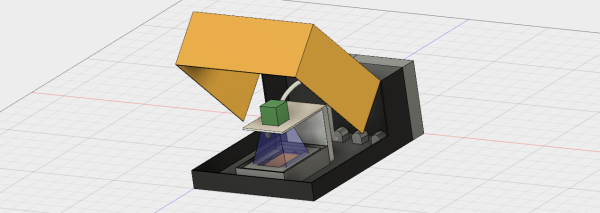
[Jonathan]’s concept for etchr is a small system that automates not only etching a copper-clad board with all the attendant flooding and draining of chemicals, but applying a solder mask and silkscreen layer labeling as well. The only thing left to do would be to drill any required holes.

The idea behind etchr is to first take a copper-clad board with photoresistive film or spray applied to it, and fix it into a frame. A UV projector takes care of putting the traces pattern onto the board (and also handles a UV-curable solder mask in a later step) and the deep frame doubles as a receptacle for any chemical treatments such as the etching and cleaning. It’s an ambitious project, but the processes behind each step are well-understood and bringing them all together in a single machine is an intriguing approach.

Desktop production of PCBs can be done in a few ways, including etching via the toner transfer method (whose results our own Elliot Williams clearly explained how to take from good to great). An alternative is to mill the PCBs out directly, a job a tool like the Othermill is designed specifically to do. It’s interesting to see an approach that includes applying a solder mask.

Algorithm Turns PCBs Into Art

Many of us have held a circuit board up to a strong light to get a sense for how many layers of circuitry it might contain. [alongruss] did this as well, but, unlike us, he saw art.

We’ve covered some art PCBs before. These, for the most part, were about embellishing the traces in some way. They also resulted in working circuits. [alongruss]’s work focuses more on the way light passes through the FR4: the way the silkscreen adds an interesting dimension to the painting, and how the tin coating reflects light.

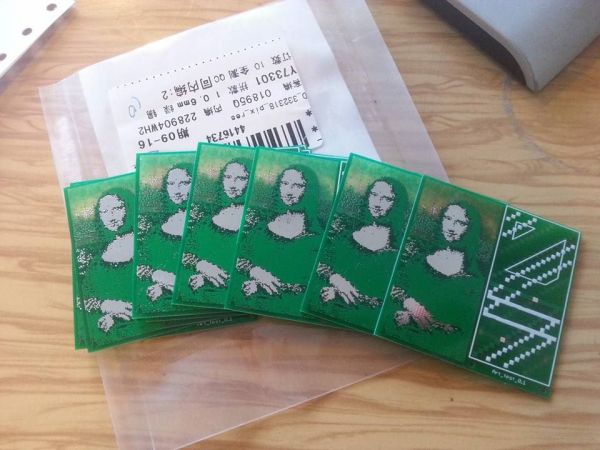
To prove out and play with his algorithm he started with GIMP. He ran the Mona Lisa through a set of filters until he had layers of black and white images that could be applied to the layers of the circuit board. He ordered a set of boards from Seeed Studio and waited.

They came back a success! So he codified his method into Processing code. If you want to play with it, take a look at his GitHub.

Shirt Design Stencil

Shirt Printing With Freezer Paper

There’s a pretty good chance that you’ve wanted to add a graphic or design to a t-shirt some time in your life. There are certainly ways to do it but most of us don’t have silk screening equipment or a steady enough hand to have the end product look cool. Lucky for us, [UrbanThreads] has put together a stenciling tutorial for personalizing garments. The process is easy and inexpensive. The results are good, although it can be time-consuming if the pattern is intricate.

To get started, a black and white graphic is printed on a sheet of paper. The design is then taped to a sheet of the secret ingredient: freezer paper. The two sheets are then placed on a table with the freezer paper up. Since the freezer paper is semi transparent, the printed out design shows through. It’s now time to use an exacto knife and trace the design while cutting through the freezer paper. The two sheets are then removed from each other and the freezer paper is put wax-side-down on the garment and ironed into place. The wax melts and acts as a temporary adhesive to hold the stencil down. At this point, fabric paint can be sprayed or dabbed on with a brush (avoid brushing back and forth as it may lift the stencil). Once the paint is applied, the stencil is removed and the paint is allowed to dry. According to [UrbanThreads] the freezer paper doesn’t leave any wax or residue on the garment.

For more garment modding, check out t-shirt bleaching or get ambitious with this DIY screen printing setup.

Hackaday Links: August 3, 2014

hackaday-links-chain

A ton of people sent in this video of crazy Russians who have taken a microwave, removed the magnetron, taped it to a broom, and turned it on. Don’t try this at home. Or near us.

You know the Google Cardboard kit that’s a real VR headset made of cardboard (and a smart phone)? Google may have gotten their inspiration from Oculus, because every Oculus Rift DK2 ships with a Samsung Galaxy Note 3 inside.

paul allen

Ever design a PCB and be disappointed by the quality of the silkscreen? [Paul Allen] has been defining the edges of his PCB labels with the copper layer, and the examples are dramatic. Etching copper is what you actually pay for when you fab a board, so it should come as no surprise that the quality is a little higher.

Dunk tanks are fun, but how about competitive dunk tanks? [Chad] built a dunk tank (really more of a ‘dunk shower’) out of a 2×4 tripod, a garbage can, and a few parts from a the toilet aisle of Home Depot’s plumbing department. Then he built a second. Set up both dunk showers across from each other, give two people a few balls, and see who gets soaked last. Looks fun.

Want a MAME cabinet, but don’t want it taking up room in your house? Build a MAME coffee table! Here’s the reddit thread. Maybe we’re old-fashioned, but we’d rather have a giant NES controller coffee table.

Last week we saw a 16-bobbin rope braiding machine, but odd braiding machines like this aren’t limited to fibers. Here’s a wire twisting machine for making RS422 cables. It only produces a single twisted pair, but that’s really all you need to create a cable. Somebody get some paracord and make some Cat5.