The United States Postal Service (USPS) is fixture of American life with its roots going back to colonial times. It operates the largest civilian vehicle fleet in the world, delivering about half a billion pieces of mail a day. As with any system of that size it’s always interesting to peek and poke at to see how it works. Unfortunately, it’s not as fun to hack as the phone system once was, but that didn’t stop some hackers pranksters from giving it a go.
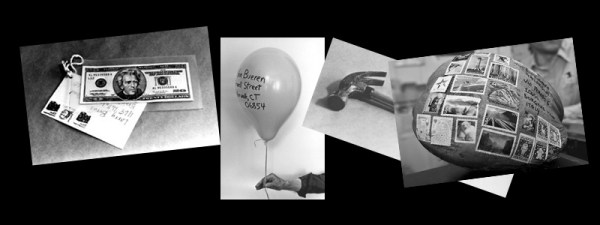
So how do you “hack” the mail? Simple, by testing its own rules. The folks at [Improbable Research] did just that and some of the results were interesting enough that we thought we would share them with you. They started with testing valuable items to see how honest USPS employees would be. First they attached a $20 bill to a post card. Yep, it showed up just 4 days later, and the money was still there. So they decided to see if sentimental items, that normally would be refused by the postal service, might skate through. They were able to send both an un-boxed single rose, and a human tooth (in a clear plastic box) without issue. Both arrived just fine, despite the rule that human remains are not allowed to be shipped via USPS. We’ll let you read some of the other items they tried.
So the next time you’re in Hawaii, forget about sending that generic, boring post card back home. Instead, slap some stamps on a coconut to let your friends know exactly how much fun you’re having.
With that said, we wouldn’t be doing our job looking out for our readers if we didn’t mention that before you try anything too outlandish, you can be fined for abuse of the postal system, even as a recipient. There was a fair amount of fallout when those guys sent a camera through the mail. Have fun, but not at someone else’s expense.