Getting Your Stuff Built: How To Shop, Conduct Business, Stay Alive, And Eat Your Way Through Shenzhen

This is [Bob Baddeley]. He’s an EE with an idea that started as a fun project until someone said “hey, that’s cool”. He started thinking about what it would take to launch it commercially and before he knew it he was involved in a startup accelerator to help him assemble what he needs to make his idea into a business. He spent several weeks in China learning about manufacturing and posted copiously about it.

We’ve seen other engineering trips to Asia, but [Bob’s] experience living there provides a different perspective than a quick trip would. He posted about the thing’s you’d expect, like touring a short-run prototyping facility. But he also talks about the rigors of being a pedestrian in a place where legged transport is marginalized by the gas and pedal powered vehicles that are crammed into every square-inch of the city. In the image above he’s walking on the highway (for some inexplicable reason; deathwish?).

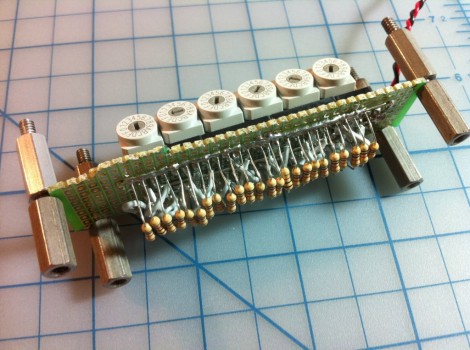
He also got to do a lot of fun stuff. He met a ton of folks, like [Bunnie Huang], [Ian Lesnet], and the team over at Seeed Studios. He even took his protoype to the local Maker Faire. It’s a scoreboard which can be controlled from your smart phone. [Bob] tells us that he didn’t get much interest showing the face of the device as seen in that post. But when he turned it around to show off the point-to-point wire porn he was mobbed by interested hackers. Guts!

This Is Not Real: Lifelike Renderings From Eagle Files

Look at it. Just look at it! This board is a lie. It doesn’t exist (at least not what’s seen in the image here). Instead this is a lifelike rendering made from Eagle CAD files.

We’ve already seen that it is rather easy to pull Eagle CAD files into Google SketchUp thanks to the EagleUp package. You’ll get a 3D model that looks quite nice but it’s hardly photo-realistic. This process starts exactly the same way. But you’re going to want to process the SketchUp file one more time.

A program called Kerkythea does this for you. It’s an open source project aimed at producing realistic renderings. It has a plugin which will process any SketchUp model and apply the textures and shadings that look so wonderful in the image above. It’s not a one-click process, but reminds us of the mountain of options you’d find in a program like Blender3D. You’ll need to map out settings for each different material you’d like to map, but the guides found at the link above do a good job of showing how it’s done.

Making Color Matched Perler Bead Art

You may remember Perler beads from first or second grade; these small plastic beads are placed into a peg board and then ironed to produce a solid multicolored piece of plastic. Recently, Perler beads have seen somewhat of a revival due to a few people creating 8 and 16-bit video game sprites in plastic, but there’s still the enormous effort of color matching beads to make a passable Sonic or Mega Man.

[Jon Wilson] sent in an awesome bead pattern generator that takes those color images of video game sprites – and just about any other picture –  and translates them into Perler bead patterns. One awesome feature is color matching; [Jon] found the RGB values of every color of Perler beads and his program chooses the closest match from the original image.

[Jon] started on a GUI app for his bead pattern generator, but because his kids aren’t into beads anymore the GUI is still unfinished. There is a command line Python script that takes an image and shoots out a PDF of the bead pattern, which should be more than enough for all but the most complicated design.

Kilonode: How To Test A Huge Xbee Mesh Network

So let’s say that you’re a developer on the Xbee team. You need to test the extremes of what the RF radio modules can do when in a large network. But in addition to numerous nodes, you also need to test the effects of distance on the radios. Since it’s not reasonable to distribute hundreds of the devices (each with their own power source) throughout town, you build a test setup like the 1 kilonode Xbee rig which the project manager, [Jared Hofhiens] is showing off.

He’s holding one blade from the rack-mounted system. Each of those squares is an Xbee module, there’s 32 etched onto the board. On the edge furthest from him there are a set of connectors which mate with the rack connectors, hooking the blade up to a set of terminal servers. These servers allow developers to ssh into individual modules. On the near side of the blade there’s a set of attenuation adjustment circuits. They allow adjustments of 0-40 dB of attenuation in 10 dB increments to adjust how strong the RF signals are, simulating distance between modules.

Thirty-two of these cards are mounted in the three racks seen above to make up the 1024 module node. We really appreciate this look behind the scenes and think you’ll enjoy the video tour after the break. If it leaves you wanting more check out how one company builds cloud storage. Continue reading “Kilonode: How To Test A Huge Xbee Mesh Network”

Failed Kayaking Data Logger Is Something We Want To See Succeed

How can your love of hobby electronics and your participation in the Canadian National Kayaking Team be combined? Why not use your technical know-how to provide a performance edge? [Geoff Clarke] decided to rig up a paddle for data capture to see if they could learn anything.

Here you can see that a series of flex sensors were applied to one of the business ends of the paddle. These are connected to a microcontroller which is constantly monitoring them and dumping the data onto an SD card. The design will provide about nine minutes of data before the storage is used up. That sounds like a number that might need improving. We could see this being useful to log a series of practice runs on the same course, but with different athletes. By graphing and comparing the data, you should be able to make observations about how the paddle is being held and when force is applied that could help the rest of the team improve.

But we’re way ahead of ourselves. The rig was given a premature test-run and the flex sensors were destroyed by the salt water. We wish this had worked out and hope that [Geoff] will give it another try after rethinking the water proofing.

WebKit On Chumby Lets Developers Avoid Flash

[Huan Truong] was looking for an Internet interface for one of his projects. In this case it’s a temperature logger, but it could be just about anything. He decided to give the Chumby a try, but was turned off by its use of Flash as the app framework. He decided to open up more options by running WebKit via his custom Chumby’s firmware.

In the video after the break he shows the boot sequence and demonstrates his first app. The device runs through a screen calibration as it powers on. When the app comes up it looks and responds much more like an Android or iPhone app than the Chumby interfaces we’re accustomed to. This technique gives you pretty wide range of app development languages. That’s because all the Chumby really cares about is the index.cgi file that serves as the interface. Development and debugging can be done on a desktop (not that it couldn’t before but Flash development under Linux was always a pain).

It looks like this idea isn’t new, but we don’t recall seeing any other projects that used WebKit as an alternative Chumby interface.

Continue reading “WebKit On Chumby Lets Developers Avoid Flash”

Making Capacitive Touch Sensors With Pencil And Paper

capacitive-touch-sensor

There are few things more frustrating than being in the middle of working on a project and realizing that you are missing some crucial component that ties the whole thing together. According to Murphy’s Law, this sort of thing will only happen when parts are completely impossible to procure.

If you’re ever hunting for a touch sensor but can’t get your hands on one, [Alan Chatham’s] tutorial on simple DIY capacitive touch sensors might be just what you need to keep things moving along.

[Alan’s] sensors rely on the conductive properties of graphite, which is easily found in just about any pencil on the market. The sensors are created by simply drawing on a piece of paper with a pencil, then wiring the images or text up to your favorite microcontroller via some paperclips and a couple of resistors.

Paper and pencil might not make for the most durable means of input, but we’re pretty sure that [Alan’s] capacitive touch sensors would be very helpful in a pinch. He doesn’t have video of the sensors in action just yet, though he says he’ll put something together here shortly.