
[Lou]’s been working on his own 3d printer: fabr. We find it appealing because the entry cost is quit a bit lower than something like the reprap. 80/20 isn’t that cheap, but you don’t need a large commercial laser cutter to build the chassis. The steppers he used appear to be inexpensive ones that can be salvaged from dot matrix printer. To drive it, he’s working on a custom microstepping board and hopes to eventually develop an Arduino shield to control the stepper drivers. That’s right, it’ll get an Arudino to act as the CNC control interface.
Misc Hacks4196 Articles
HandUSB Data Gloves Interface
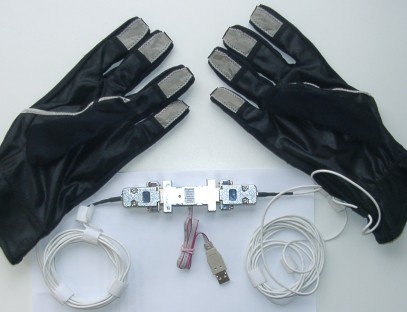
Following today’s earlier post on data gloves, HandUSB is a glove interface designed to relay fingertip touch data to a computer via USB. Although the gloves themselves are not extremely interesting or useful for your average hacker, the project has some good documentation. The electronics are all open source and he has links to the EAGLE files and the AVR Libc code. You can also find a demo program written for DOS. This project uses AVR-USB by Objective Development so if you are looking to move on from your USB-serial chips, this project would be a good resource to study.
[via YourlTronics]
Toool Picksets At The Last HOPE
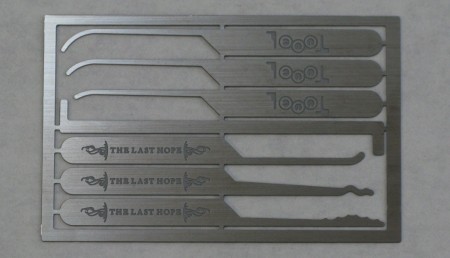
Speaking of laser engraving, the blackbag blog announced that Toool has designed 2 unique picksets for The Last HOPE this year. First is the credit card sized snap-off set seen above. They have named this one The Last HOPE emergency pickset. The other pickset is a new version of the ‘double sided pick’ series. This set consists of picks with the same tool on either end, but they are sized differently. This set will contain 8 picks with promised improvements. If you are interested in more complex picks, check out the centipede.
Subwoofer Makes Cornstarch Dance
People tend not to think about the non-Newtonian properties of foodstuffs, but we’re glad at least one person did. When it comes to cornstarch, it’s indeterminate viscosity when mixed with water made it the perfect solution for a pretty neat trick: making a liquid move in reaction to a subwoofer. The unique motion can be attributed to the physical properties of the solution: when enough force is applied quickly, it acts as a solid. Otherwise, it flows like a liquid. The erratic bouncing of the sound waves combined with a little tactile manipulation create varying degrees and speeds of applied pressure, which in turn create a mass of flowing shapes that almost appear to be alive.
We’ve covered weird fluids before, but this is perhaps most similar to SnOil, a game that uses ferrofluids to achieve a similar result. SnOil, however, does not depend of vibrations to create shapes in the fluid, it uses small electromagnets and magnetically charges liquid instead. We love the ordered appearance of the SnOil unit, but the chaotic motion of the cornstarch and it’s non-Newtonian properties make it appear almost otherworldly. We wonder how ferrofluids would react in a situation similar to the cornstarch above, since it would respond to both the vibration and the voice coil’s magnetic field.
[via Neatorama]
Map Abstraction API In Javascript
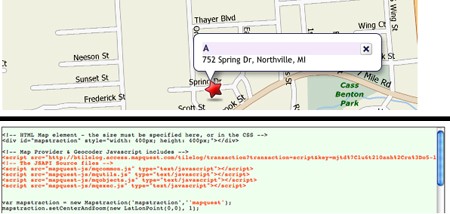
Maybe you’ve tinkered a bit with the Google Maps API. Most of the software produced with it is not all that useful or entertaining, but a few gem have shone through. Still, wouldn’t it be better if applications produced with it could be easily ported to other online mapping services like Mapquest or Yahoo! Maps?
This is possible with Mapstraction, a Javascript API that works with nine mapping services and plans to incorporate more into the fold. Mapstraction has open-source features that normalize functions across the biggest services, which makes searching for map data a consistent, predictable experience no matter which service you use.
Some of Mapstraction’s current features are what you would expect: point, line, and polygon support, image overlay, GeoRSS and KML feed importing, and several others. We’re really looking forward to future versions with OpenStreetMap support. Currently Mapstraction works with only commercial mapping services, but OpenStreetMap combined with Mapstraction directly hits the sweet spot; a customizable, open source map.
[via Hackszine]
Breath Controlled LED Candles

Instructables user [cedtlab] has posted an interesting LED project that simulates birthday candles. The circuit runs on an AVR ATTiny45, and is powered by 4 AA or AAA batteries. By using a Charliplexing technique, they are able to drive all 20 LEDs with only 5 pins of the ATTiny. A thermistor is used for detecting breath by measuring temperature changes, and then blocks of LEDs turn off depending on the change detected. They have provided schematics and source code for everything. Make sure to check out the video of the “ficticious birthday party” after the break.
Portable Air Conditioner
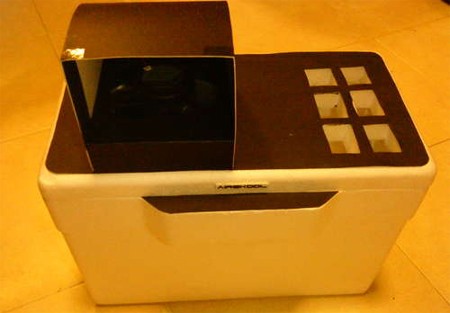
The dog days of Summer are looming just over the horizon like a hot sticky wave of impending doom, but you don’t have to take it lying down. Building a portable air conditioner is cheap easy, and we daresay refreshing.
You’ll need the following materials: a condenser, heater core, or radiator, a styrofoam cooler, a submersible water pump, a few case fans, some adapters to power the works, and a few other materials. The pump circulates cold water through the condenser as the fan pushes air through it and the rest of the box.
We’ve never been huge fans of swamp coolers like this one since they offer no true refrigeration cycle. What’s more, they pump a good deal of humidity into the air, which makes the heat worse in the long run, or creates a vicious cycle of cooling and humidifying. Still, when the heat is scrambling our brains, it’s hard to say no to any relief, however ephemeral.


