The piano is a bit of an oddball within the string instrument family. Apart from rarely seeing people carry one around on the bus or use its case to discretely conceal a Tommy Gun, the way the strings are engaged in the first place — by having little hammers attached to each key knock the sound of of them — is rather unique compared to the usual finger or bow movement. Still, it is a string instrument, so it’s only natural to wonder what a piano would sound like if it was equipped with guitar strings instead of piano wire. Well, [Mattias Krantz] went on to actually find out the hard way, and shows the results in this video.
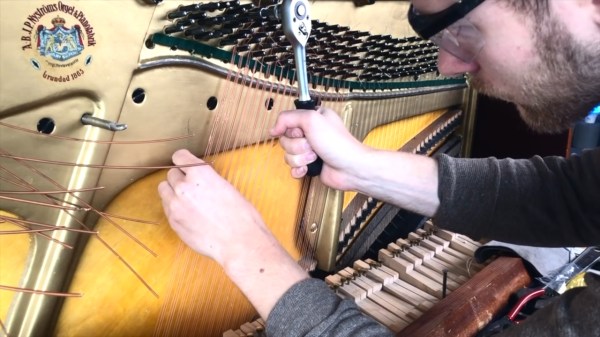
After a brief encounter with a bolt cutter, the point of no return was reached soon on. Now, the average piano has 88 keys, and depending on the note, a single key might have up to three strings involved at once. In case of [Mattias]’ piano — which, in his defense, has certainly seen better days — a total of 210 strings had to be replaced for the experiment. Guitars on the other hand have only six, so not only did he need 35 packs of guitar strings, the gauge and length variety is quite limited on top. What may sound like a futile endeavor from the beginning didn’t get much better over time, and at some point, the strings weren’t long enough anymore and he had to tie them together. Along with some inevitable breakage, he unfortunately ran out of strings and couldn’t finish the entire piano, though it seems he still managed to roughly cover a guitar’s frequency range, so that’s an appropriate result.
We’re not sure if [Mattias] ever expected this to actually work, but it kinda does — there is at least some real sound. Are the results more than questionable though? Oh absolutely, but we have to admire the audacity and perseverance he showed to actually pull through with this. It took him 28 hours just to get the guitar strings on, and another good amount of time to actually get them all in tune. Did it pay off? Well, that depends how you look at it. It definitely satisfied his and other’s curiosity, and the piano produces some really unique and interesting sounds now — but check for yourself in the video after the break. But that might not be for everyone, so luckily there are less final ways to change a piano’s sound. And worst case, you can always just turn it into a workbench.
(Thanks for the tip, [Keith])
Continue reading “Fail Of The Week: Putting Guitar Strings On A Piano”