Video: Soldering Our PIC Development Board

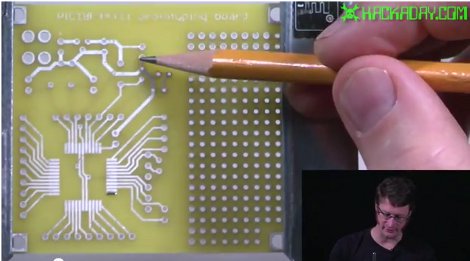
For those of you who followed along with our Eagle CAD series, here is the final payoff where we assemble the circuit board that was designed. In this video, [Jack] explains where things will go on the board and then shows you how to solder the parts. For the advanced folks out there who haven’t moved to solely surface mount parts when you can get away with it, he shows an easy way to solder the processor, which is a TQFP-44 part. This can seem like a daunting task but it really isn’t.

If you would like to make your own board like this, you can find the files here. Please note that although this board shouldn’t have any issues, we haven’t tested it ourselves yet. [Jack] is going to do some videos about a different topic for a few weeks but will pick back up with this board again when they are done.

Video is after the break. Continue reading “Video: Soldering Our PIC Development Board”

Sustainability Hacks: Heliostats

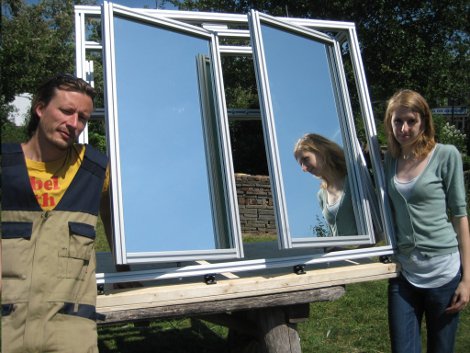
Solar panels are a popular item among people who are trying to do more with less but, at least in the past, they have been pretty expensive to install. For some uses, you can forget using solar panels and use the sunlight directly with very little efficiency loss. A device that lets you do that is called a heliostat, which is really just a fancy mirror that you can set to reflect sunlight to wherever you might want it. You could aim it through a window so that it hits your ceiling and diffuses throughout the room or you could point it towards a location where you could collect the sun’s energy to heat something directly.

For a really good rundown on how heliostats work and how you can build one, check out this page where you can find all sorts of information. Heck, they even have an Arduino controlling some of them!

Announcing Our Next Theme – Sustainability Hacks

Our last theme, ATtiny hacks, received a really good response but it is time to move on. Today we are announcing our next theme, which will be Sustainability Hacks. In this theme we will be showing projects that allow us to have a lighter footprint. This could be things like projects that run on renewable resources, projects that control systems that allow us to use less energy such as an automated fan to preempt the need for more aggressive cooling. We are also interested in showing projects that push power consumption to the limit. Like our other themes, we need your help for this to be successful. If you have a project that you think we might be interested in, please let us know on our tip line.

As food for thought, driving is simply part of life for most of us. There are ways to make it have less impact on the earth though. One example of this that isn’t seen very often these days but will probably become more commonplace as fuel prices go up is boat-tailing. This is the process of reshaping the rear of a vehicle to make it more aerodynamic. You can catch a video after the break that makes up for its lack of sound with a pretty good run down on their process.

Continue reading “Announcing Our Next Theme – Sustainability Hacks”

Working With The µOLED-128-G1 Display

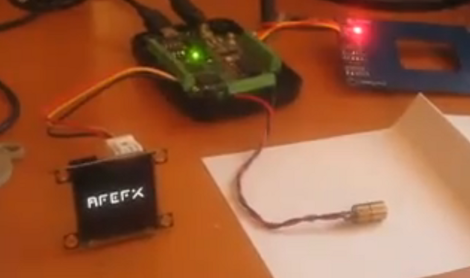
If you’re not already familiar with the 4D Systems µOLED-128-G1 display, [Gary] put together a project that shows some of the features it offers. This is a smart display, having its own onboard microcontroller and a microSD slot. The SD card stores image and video data, while the microcontroller takes care of displaying them based on simple serial commands it receives. This means you can hook it up to a computer or microcontroller and show still or animated sequences with minimal programming effort. We’ve embedded a video after the break, or you can look in on this slot machine project from last year that used the same module.

[Gary] is using a PIC microcontroller programmed with PIC Basic Pro. But most of the work is done with a 4D Systems program called Graphics Composer. You build out the images and animations you want to see on the screen, which are then formatted for the display and written to the SD card. [Gary] mentions that the card is not written using a traditional filesystem, so if you know of another way to write data to and from this card we’d love to hear about it in the comments. The image editing software will also spit out the serial commands necessary to pull your freshly minted graphics up on the display.

Continue reading “Working With The µOLED-128-G1 Display”

Weekly Roundup 9/24/11

In case you missed them, here are the most popular posts from this past week.

Our most popular post is about a hand-made security robot that any good hacker would be proud of. This robot was built by a father-daughter team and has an interesting holonomic drive train that allows it to drive in any direction at any time.

Our next most popular post was about eight breadboard hacks that let you do more with your breadboard than you previously thought possible.

Following that is a post dealing with what you can do with a dead laptop battery. Surprisingly, not all of the cells are dead so there is still useful life in some of them.

Next we have a post about an electronic cello that uses a combination of a magnetic pickup for the bow and resistive strips for the strings. There is even a video of it being played.

Finally, for those of you looking to grow things indoors throughout the year, we have a post about a hydroponic setup.

Modifying DD-WRT’s Protected GUI

hacking_the_ddwrt_gui

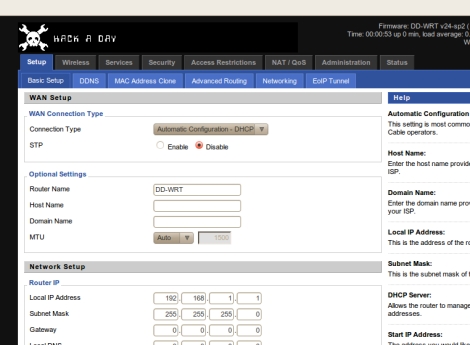
[Craig] is always keeping busy by deconstructing and poking around in various firmware images. This time around he has taken on the task of modifying the DD-WRT package, a popular replacement firmware for SOHO routers.

While the firmware is released under the GPL, [Craig] cites that it’s pretty difficult to build from source. Instead, he says that the typical course of action is to extract files from the firmware image, alter them, then reconstruct the image. This works for most things, but the DD-WRT GUI files are protected in order to prevent modification.

Since the phrase “you are not allowed to do that” doesn’t exist in his vocabulary, [Craig] set out to see if he could make his way around the protections and change the GUI code. It took quite a bit of digging around using IDA Pro and readelf, but he was eventually able to extract, tweak, then reinsert individual pages back into the firmware image.

The process is pretty time consuming, so he put together a tool called webdecomp that automates the extraction and rebuilding of DD-WRT’s web page file. If you’re interested in rocking a custom Hackaday-branded router interface like the one shown above, be sure to swing by his site and grab a copy of webdecomp.

Video: Eagle CAD Layout

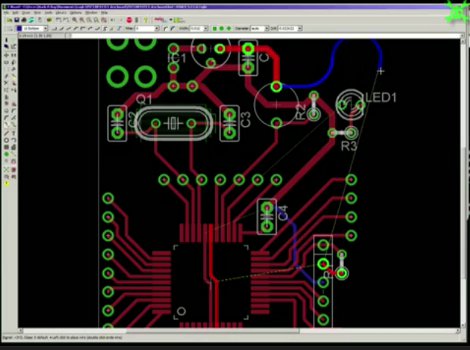
This week’s video is the last in a series of videos where we show how to use Eagle CAD. Today we will look a the Layout portion of the program and will create a circuit board from the schematic that we created previously. We start by creating a layout file and then moving all of the parts to appropriate places on the circuit board. After that, [Jack] shows how to route the traces. Along the way, he talks about the tools that he is using and various ways to use them. The end result is a prototyping board for the PIC18F44J11.

Like the others, this video is fairly long at 29 minutes, so make sure to have some time dedicated towards watching it if you do.

In next week’s video, we will be showing this board as it arrived to us from a manufacturer and will do a tutorial on how to solder.

If you have missed our previous videos, you can find them here:

Schematic part I
Schematic and Custom part creation
CAM Processor

We have also created many supplemental videos explaining how to use many of the tools in the tool palettes. You can find them on our Youtube channel:

Check out the video after the break!
Continue reading “Video: Eagle CAD Layout”