Weekly Roundup 10/1/11

In case you missed them, here are our most popular posts from the past week.

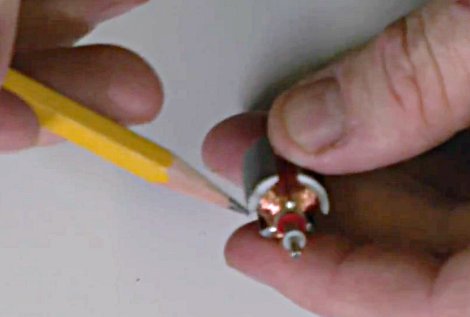
Our most popular post was about a Chinese man who is attempting to build an octocopter that he can fly around by pairing motorcycle engines to propellers. There were a considerable number of comments on this one!

Next we have a post about a project where a 12-series PIC is used with a single inductor to create a working RFID tag.

Our third most popular post was [Bertho’s] tutorial about capacitive sensing. This is his entry into the Dangerous Prototypes 7400 Logic competition so you’ll really get to see the nuts and bolts of how this type of sensing works.

Next is a post that is about a pretty unique lathe made out of concrete. If you have the weight capacity in your workspace, this could be a nice addition to your tools.

In fifth place is a post about [Eric’s] second revision of his word clock that tells time in German!

Sustainability Hacks – External Wood Burner

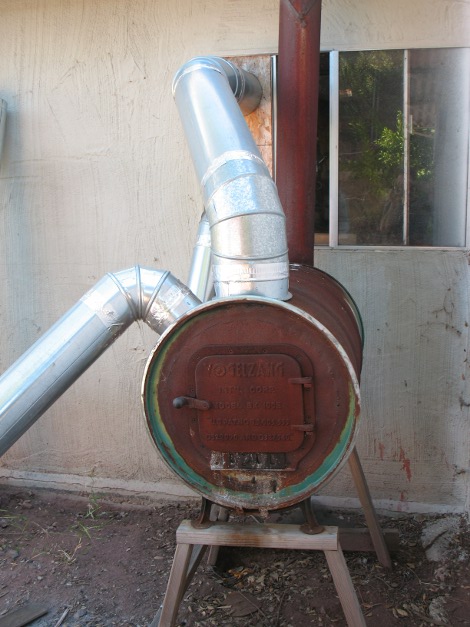
Sometimes sustainability is about making do with what you have. This is the wood burner that I use for my personal workshop. In my area, it is mandated by law that we have to clear brush on a yearly basis. I live on a pretty large lot so we have plenty of brush to be cleared every year. Add to that the occasional tree that falls down and all of the scraps from my shop and you have all the wood that you need to heat a shop like mine. With the exception of the work that I put into gathering firewood, my heat is free and is carbon neutral. This is somewhat of a double hack because as you have probably noticed, the wood burner is sitting outside of my workshop. My workshop is fairly large but I have it so packed full of tools that I just didn’t have room inside so I came up with this solution.

More details after the break.
Continue reading “Sustainability Hacks – External Wood Burner”

Basic Micro ATOM Nano Giveaway

basic_micro_atom_nano_giveaway

UPDATE:
As several readers have already noted, these things sold out very quickly – in less than 15 minutes!  Big thanks to Basic Micro!

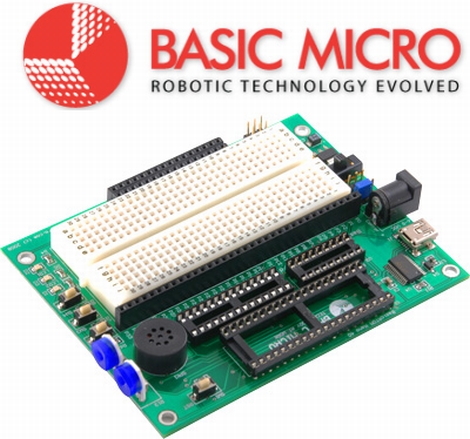
If you have been considering the purchase of a Basic ATOM Nano product, but you weren’t quite ready to lay down the cash for a dev board and Nano microcontroller, boy to we have a deal for you. The kind folks at Basic Micro informed us that they have 55 Basic ATOM Nano Development boards, complete with Nano 28 microcontrollers that they would like to give away to the Hack a Day community for the low, low cost of $0.

That’s right. Zero. Zip. Zilch.

The dev boards come complete with an LCD header, a small solderless breadboard, USB connectivity, a pair of servo connectors, and more! The Nano 28 is based on the PIC16F886 microcontroller, and features an 8MHz clock,  24 I/O pins, 14K of flash memory, 368 bytes of memory, and 256 bytes of EEPROM storage.

The total value of the package is just around $50, so this is an incredible deal! Basic Micro will even ship your kit to you for free via USPS.

Just add this item to your shopping cart on the Basic Micro site, and use the coupon code “freehack” at checkout – they’ll take care of the rest.

There are a few caveats to this giveaway, and they are as follows:

1) To participate, you must reside within the contiguous United States – i.e. anywhere in the lower 48 (Sorry readers from Alaska or Hawaii!)

2) The offer is limited to one kit per individual. Let’s not be greedy here, give your fellow hackers a chance at this deal as well.

3) Once these dev boards are sold out, they are gone for good. There are no rain checks or back orders available.

4) You must build something cool with your kit and share it with us in our forums or via the tip line*

*Not really, but it would be pretty cool if you did.

[Thanks to Dale at Basic Micro for putting this together for us!]

Video: Soldering Our PIC Development Board

For those of you who followed along with our Eagle CAD series, here is the final payoff where we assemble the circuit board that was designed. In this video, [Jack] explains where things will go on the board and then shows you how to solder the parts. For the advanced folks out there who haven’t moved to solely surface mount parts when you can get away with it, he shows an easy way to solder the processor, which is a TQFP-44 part. This can seem like a daunting task but it really isn’t.

If you would like to make your own board like this, you can find the files here. Please note that although this board shouldn’t have any issues, we haven’t tested it ourselves yet. [Jack] is going to do some videos about a different topic for a few weeks but will pick back up with this board again when they are done.

Video is after the break. Continue reading “Video: Soldering Our PIC Development Board”

Sustainability Hacks: Heliostats

Solar panels are a popular item among people who are trying to do more with less but, at least in the past, they have been pretty expensive to install. For some uses, you can forget using solar panels and use the sunlight directly with very little efficiency loss. A device that lets you do that is called a heliostat, which is really just a fancy mirror that you can set to reflect sunlight to wherever you might want it. You could aim it through a window so that it hits your ceiling and diffuses throughout the room or you could point it towards a location where you could collect the sun’s energy to heat something directly.

For a really good rundown on how heliostats work and how you can build one, check out this page where you can find all sorts of information. Heck, they even have an Arduino controlling some of them!

Announcing Our Next Theme – Sustainability Hacks

Our last theme, ATtiny hacks, received a really good response but it is time to move on. Today we are announcing our next theme, which will be Sustainability Hacks. In this theme we will be showing projects that allow us to have a lighter footprint. This could be things like projects that run on renewable resources, projects that control systems that allow us to use less energy such as an automated fan to preempt the need for more aggressive cooling. We are also interested in showing projects that push power consumption to the limit. Like our other themes, we need your help for this to be successful. If you have a project that you think we might be interested in, please let us know on our tip line.

As food for thought, driving is simply part of life for most of us. There are ways to make it have less impact on the earth though. One example of this that isn’t seen very often these days but will probably become more commonplace as fuel prices go up is boat-tailing. This is the process of reshaping the rear of a vehicle to make it more aerodynamic. You can catch a video after the break that makes up for its lack of sound with a pretty good run down on their process.

Continue reading “Announcing Our Next Theme – Sustainability Hacks”

Working With The µOLED-128-G1 Display

If you’re not already familiar with the 4D Systems µOLED-128-G1 display, [Gary] put together a project that shows some of the features it offers. This is a smart display, having its own onboard microcontroller and a microSD slot. The SD card stores image and video data, while the microcontroller takes care of displaying them based on simple serial commands it receives. This means you can hook it up to a computer or microcontroller and show still or animated sequences with minimal programming effort. We’ve embedded a video after the break, or you can look in on this slot machine project from last year that used the same module.

[Gary] is using a PIC microcontroller programmed with PIC Basic Pro. But most of the work is done with a 4D Systems program called Graphics Composer. You build out the images and animations you want to see on the screen, which are then formatted for the display and written to the SD card. [Gary] mentions that the card is not written using a traditional filesystem, so if you know of another way to write data to and from this card we’d love to hear about it in the comments. The image editing software will also spit out the serial commands necessary to pull your freshly minted graphics up on the display.

Continue reading “Working With The µOLED-128-G1 Display”