Moving Mousepad Is An Elegant Aimbot

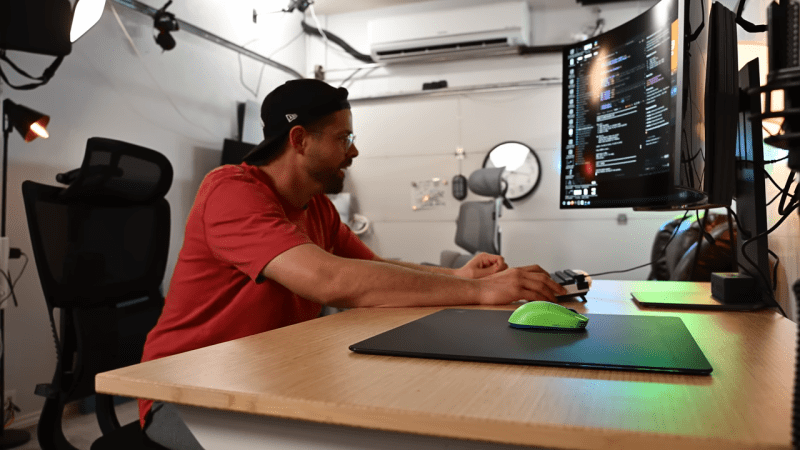
These days, it can be hard to remain competitive in online shooters without spending your entire life dedicated to the sport. This leads some to explore the world of competitive aids. (AKA: cheating.) A great example is [Nick], who built a mechanical aimbot to help in this regard.

[Nick’s] build moves a mousepad underneath the mouse opposite to the desired movement direction, in order to simulate the mouse movements required to aim at targets in game. This is achieved with the aid of a XDraw A4 pen plotter, which served as a cheap prebuilt X-Y motion platform. The plotter responds to simple serial commands, which makes it easy to control. The X-Y gantry was mounted underneath the desk so the mousepad sits seamlessly on top of the desk, sliding neatly on low-friction mouse skate stickers.

With the mousepad control system built, it was then necessary to figure out how to turn it into an aimbot. [Nick] already had a machine vision tool to detect enemies in shooting game, so it was merely modified to make the right mousepad movements to get the crosshairs right where they needed to be before firing. In testing, it proved more than capable at helping a new player achieve far superior aim, as a good aimbot should.

We’ve featured similar projects before that use complex mechanical contraptions to aim for you. Yes, it’s still cheating, but it’s a lot harder to detect than a traditional aimbot. That doesn’t make it right, per se, just more subtle. Video after the break. Continue reading “Moving Mousepad Is An Elegant Aimbot”

a torn-up printer with a very long image of different frames

Playing DOOM On A Receipt Printer

Gaming is a wonderful thing. Unfortunately for many of us, work takes up our valuable time, which should be allocated to our gaming. What if there was a better way? Well, printers can print an image quickly, and receipt printers can print a lot of images. This sounds like an effective display for DOOM in a pinch. [Bringus Studios] managed to find such a printer and got the classic shooter running.

Getting the printer’s attached computer, which was only designed for printing the cost of your chicken sandwich, to run Half-Life was far from easy. [Bringus] struggled through the process of swapping operating systems from Windows 7 to Linux just to return to Windows 7 after a painful process of maintaining compatibility between 32 and 64 bit software. Driver issues followed through the entire process just to get anything running at all.

But we can’t play DOOM while at work on a normal screen. The printer MUST display our glorious 480p gameplay. To achieve such a workflow, [Bringus] implemented a script to print out a frame of the display, allowing for “visible gameplay”. Along with some heat issues from the nature of thermal receipts, eventually the printer displayed the glory of DOOM.

Playing games on a thermal printer might be one of the weirdest things you’ve seen today, but what if we could reverse the script a bit and create a printer from something else? Here at Hackaday, we have exactly the thing for you: a printer made from a vintage typewriter!

Continue reading “Playing DOOM On A Receipt Printer”

Building A High-Performance Shifter For Sim Racing

These days, sim racing is more realistic than ever. There are better screens, better headsets, and better steering wheels with better force-feedback, all of which help make you feel like you’re driving the real thing. If you’re looking for a stick shifter to complete such a setup, [DAZ Projects] might have just what you’re looking for. 

To create a robust shifter with great feel, the build relies on 3D printed parts as well as lots of quality metal hardware. At the heart of the build is a linear rail for the front-to-back movement, with a printed slider on top with a carefully-profiled indexer to ensure the stick properly ca-chunks into the right gear. A ball joint locates the shift lever itself, while allowing for smooth movement left-to-right. Centering is via simple extension springs. The H-pattern shift is enforced with machined steel rods. Detecting the position of the stick is handled via microswitches, with an Arduino Leonardo reading the switches and reporting itself as a USB device that should work with any modern sim.

It’s funny to think that such a mechanism would once have been a very serious machining job. These days, you can just squirt all this stuff out on a printer in a few hours. For the parts that can’t be extruded, [DAZ Projects] has provided a parts list on Google Docs.

We’ve featured some great racing sim builds over the years, from button pads to pedal boxes.

Continue reading “Building A High-Performance Shifter For Sim Racing”

Illustrated Kristina with an IBM Model M keyboard floating between her hands.

Keebin’ With Kristina: The One With The Ultimate Portable Split

What do you look for in a travel keyboard? For me, it has to be split, though this condition most immediately demands a carrying solution of some kind. Wirelessness I can take or leave, so it’s nice to have both options available. And of course, bonus points if it looks so good that people interrupt me to ask questions.

A pair of hands poised above a blue split keyboard that packs easily for travel in a 3D-printed case. The case doubles as a laptop stand.
Image by [kleshwong] via YouTube
Depending on your own personal answers to this burning question, the PSKEEB 5 just may be your endgame. And, lucky for you, [kleshwong] plans to open source it soon. All he asks for is your support by watching the video below and doing the usual YouTube-related things.

You’ll see a couple of really neat features, like swing-out tenting feet, a trackpoint, rotary encoders, and the best part of all — a carrying case that doubles as a laptop stand. Sweet!

Eight years in the making, this is the fifth in a series, thus the name: the P stands for Portability; the S for Split. [kleshwong] believes that 36 keys is just right, as long as you have what you need on various layers.

So, do what you can in the like/share/subscribe realm so we can all see the GitHub come to pass, would you? Here’s the spot to watch, and  you can enjoy looking through the previous versions while you wait with your forks and stars.

Continue reading “Keebin’ With Kristina: The One With The Ultimate Portable Split”

The Quirky Peripherals In Medical PC Setups

Modern hospitals use a lot of computers. Architecturally speaking, they’re pretty typical machines—running the same CPUs and operating systems as any other PCs out there. However, they do tend to have some quirks when it comes to accessories and peripherals, as [tzukima] explores in a recent video.

The video starts by looking at typical power cables used with hospital computers and related equipment. In particular, [tzukima] talks about the common NEMA 5-15P to IEC-320-C13 style cable, which less sophisticated users might refer to as a kettle cord. In hospital-grade form, these cables are often constructed with translucent plug housings, with large cylindrical grips that make them easier to grip.

Digging further through business supply catalogs lead [tzukima] to discover further products aimed at hospital and medical users. In particular, there are a wide range of keyboards and mice that are designed for use in these environments. The most typical examples are regular peripherals that have simply been encased in silicone to make them easier to wash and disinfect where hygiene is paramount. Others, like the SealShield keyboard and mouse, use more advanced internally-sealed electronics to achieve their washable nature and IP68 ratings. These are peripherals that you can just throw in a dishwasher if you’re so inclined.

It’s a great look at weird hardware that most of us would never interact with.

Continue reading “The Quirky Peripherals In Medical PC Setups”

Illustrated Kristina with an IBM Model M keyboard floating between her hands.

Keebin’ With Kristina: The One With The Curious Keyboards

I love first builds! They say so much about a person, because you see what’s paramount to them in a keyboard. You can almost feel their frustration at other keyboards come through their design choices. And the Lobo by [no-restarts] is no exception to any of this.

There’s just something about this Corne-like object with its custom case and highly-tappable and variously tilted keycaps. The list of reasons for being begins innocently enough with [no-restarts] wanting a picture of their dog on the case.

A nicely-tented split keyboard with really interesting, 3D-printed keycap profiles.
Image by [no-restarts] via reddit
From there, things get really personal. You may notice the thumb cluster is slightly different — [no-restarts] doesn’t like the thumb tuck required by the Corne to reach the innermost keys. I really dig the homing bumps on the middle thumb keys. Another difference is the splayed layout, as [no-restarts] is especially prone to pinky splay. Finally, there are a pair of OLEDs hiding on the inner sides of the case, which are designed to be visible when tented.

Overall, [no-restarts] is happy with it, but has some ideas for revision. Yep, that sounds about right. The Lobo is all hand-wired, and there’s a PCB with hot swap sockets in its future. If you’re interested in the case files, GitHub is your friend.

Continue reading “Keebin’ With Kristina: The One With The Curious Keyboards”

All-Screen Keyboard Has Flexible Layouts

Most keyboards are factory-set for a specific layout, and most users never change from the standard layout for their home locale. As a multilingual person, [Inkbox] wanted a more flexible keyboard. In particular, one with the ability to change its layout both visually and logically, on the fly. Thus was born the all-screen keyboard, which can swap layouts on demand. Have a look at the video below to see the board in action.

The concept is simple enough: It’s a keyboard with transparent keys and a screen underneath. The screen displays the labels for the keys, while the transparent plastic keys provide the physical haptic interface for the typist. The device uses a Raspberry Pi to drive the screen. [Inkbox] then designed a plastic frame and transparent keys, which are fitted with magnets, which in turn are read by Hall effect sensors under the display. This eliminates the need for traditional key switches, which would block light from the screen below.

Unfortunately for [Inkbox], the prototype was very expensive (about $1,400 USD) and not particularly functional as a keyboard. However, a major redesign tackled some of these issues. Version two had a smaller screen with a different aspect ratio. It also jettisoned the Hall effect sensors and uses plastic keys capacitively operating a traditional touch screen. Some design files for the keyboard are available on Github for the curious.

An all-screen keyboard is very cool, if very complicated to implement. There are other ways to change your layout that aren’t quite as fancy, of course. You can always just make custom keycaps and remap layouts on a regular mechanical keyboard if desired. Still, you have to admire the work that went into making this thing a reality.

Continue reading “All-Screen Keyboard Has Flexible Layouts”