Hacking Game Port Peripherals To Work With Modern PCs

gameport_hack

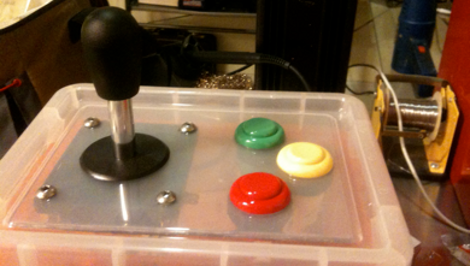
[Atiti] has a bad habit of hanging on to old things. Some people call this sort of behavior “hoarding”, but around here we understand his affliction. It turns out that in his collection of old computer peripherals, he located a Thrustmaster Formula 1 racing wheel he used back in the day. Analog racing wheels can cost a pretty penny nowadays, depending on what you buy, so he decided to see if he could hack this outdated controller to work with his new PC.

You see, the problem with this wheel is that it utilized a “game port” connecter to interface with the computer. If you don’t remember the game port, go dig up an old PCI sound card and take a look on the back. That 15-pin connector? That’s a game port. Microsoft discontinued support for the game port once Vista was released, so [Atti] had to figure out how in the world he would get it to work on his new PC.

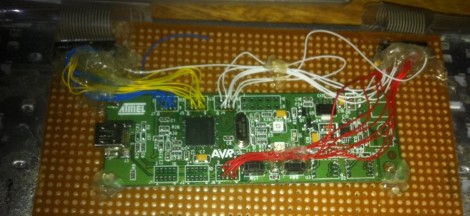
His solution was an Arduino, which is used to read the analog signals output by the wheel. Those signals are processed and sent to a parallel port joystick emulator, enabling him to use the wheel with any game supporting a standard joystick.

Obviously he could have just gone out to the store and bought a USB wheel, but where’s the fun in that?

Stay tuned for a video demo of his refreshed wheel in action.

Continue reading “Hacking Game Port Peripherals To Work With Modern PCs”

HIDUINO: Your Arduino Is Now A MIDI Interface

[Dimitri Diakopoulos] dropped into our tip line to let us know his HIDUINO project. The HIDUINO is a set of firmware for the ATmega8u2 used in the new revisions of the Arduino  (Uno, and Mega2560 for example).  Once the HIDUINO is loaded your Arduino can show up as any HID compliant device you wish, no extra drivers necessary. This means that using this firmware, music software such as Max, Ableton, Reaktor etc can read and write MIDI directly to/from the Arduino. Currently the project is for direct USB-MIDI communication but could be altered to act as a variety of HID devices.

Flashing the ATmega8u2 with your own device type or name requires a bit of work on the developers part like owning an ISP programmer, soldering header pins to the board, and re-flashing the ATmega8u2 every time you want to load new code into the Arduino. Users without an ISP can still flash HIDUINO using Atmel’s FLIP software (Windows) or the DFU programmer (Mac OS X and Linux) and a precompiled HIDUINO firmware. They still have to solder a jumper on the underside of the board to use the DFU bootloader.

This firmware could certainly benefit anyone building an Arduinome , Joystick, or any variety of devices that users simply want to interface to a PC without additional software.

A guide for ISP flashing can be found at [Dimitri]’s site.

Bubble Display

As hackers we have come up with some pretty wild and unique ways to display data, but that never stops us from creating even wilder ways such as this Bubble Display. Inspired by a Hackaday article called Liquid Display the bubble display started out as a one column lexan tank so the team could check out different liquids, and build methods, which gave them the opportunity to test out their wet/dry vacuum in the basement as well.

After the leaks were solved in the prototype, different fluids were tried out to see what would work best,  glycerine (though the most expensive out of the 3 items tested) gave the best performance in how the bubbles rose to the top, and the uniformity of each individual bubble.

The final tank design features (24?) channels to keep bubbles from interacting with each other and are fitted with some Parker A005-C23-2P pneumatic valves hooked up to a standard air compressor. Electrically it’s pretty standard, with the solinoid driver stuff all run by a PIC18F4455 clocked at 48MHz.

Software wise the device has 3 modes, one mode allows users to enter text or simple bitmaps from a computer using a homebrew GUI written in Visual Basic, there is also a demo loop for when you still want to show it off, but there is not someone there to constantly bang data into it, and finally a live keyboard mode which acts as a bubble music visualizer when there is a keyboard connected via MIDI. Check all 3 out in a short video after the break.

Continue reading “Bubble Display”

Kinect, Mouse, And Nerf Gun Combine For House Of The Dead

[Tony Blanch] built his own motion controller for playing House of the Dead. It should work with any shooter that follows the ‘rail’ type of game play (your character is not free walking, but moves along a set path beyond your control).

Two parts come together to make this happen. The first is the Nerf dart gun that you see above. The circuit board fitted into the top portion of the plastic housing is from a five-button wireless mouse. The buttons are used to sense trigger pulls from the player. The second portion of the controller is a Kinect. It has been set up to work with a Windows 7 machine. [Tony] used the Flexible Action and Articulated Skeleton Toolkit (FAAST) to bind and track the gun controller, moving the mouse cursor on the screen to match the movements of the weapon. Check out the video after the break to see how responsive this system is.

This is a very interesting departure from the gun controllers we’ve seen before.

Continue reading “Kinect, Mouse, And Nerf Gun Combine For House Of The Dead”

Direct To PCB Resist Printing Requires Minimal Additional Components

epson_inkjet

Printing PCBs using the toner transfer method works pretty well, but there are some downsides, such as incomplete trace transfers and the like. HackHut user [rucalgary] decided to go the inkjet route instead, and picked up an Epson printer on clearance at his local electronics shop. This method is not new by any means, but his printer conversion is one of the simplest we’ve seen as it does not rely on any additional sensors to function.

Once he got home, he tore the printer down immediately, removing the paper input and output trays as well as the scanner bed. After all of the extraneous parts were removed, he got to work raising up the printer head, as well as the printer head rest mechanism. He mentions that the latter component is absolutely crucial to proper functionality down the line. Once the print head and its associated components were relocated, he added a pair of aluminum rails for feeding his print tray into the machine.

With everything complete, he filled up a spare cartridge with ink (he says that MISPRO yellow works best) and ran some test boards through. He is quite pleased with how things turned out, and is more than happy to give you a quick tour of his completed printer via the video below.

Continue reading “Direct To PCB Resist Printing Requires Minimal Additional Components”

Writing Python Drivers For Input Devices

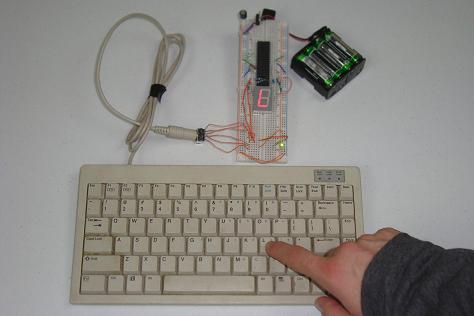
[Stealth] put together a post explaining how he writes drivers for input peripherals. He’s using Python which makes the process fairly painless (we’ll get to that in a minute) but the value of his post is in the explanation surrounding how to interpret the data. Once you know how the communications are coming in from a device you can write the driver using any language you want. [Stealth] wrote in to let us know about this post after reading the PlayStation 3 Sixaxis controller sniffing hack. He’s pretty much doing the same thing but the background information is much more bountiful.

There are a couple of prerequisites to the process. First, [Stealth] is working in a Linux environment. That’s not to say you couldn’t do this on another OS, but you’re going to need to do some research to find out how to tap into the data stream from the device. Secondly, the input you are working with must already be set up and working on the machine. That means if there isn’t any support at all for the peripheral (in this case a USB joystick) you’re not going to be able to sniff the commands. That being said, a short Python snippet is all you need to dump the raw data coming in from the device. With data in hand it’s time to do some pattern hunting. As you start to figure out the size and scope of the incoming packets you can try out your own code to make sure you’ve got it right. Check out the demo video after the break which features a joystick button mapper written in Python.

Continue reading “Writing Python Drivers For Input Devices”

Mini SATA Power Adapter Does Away With HDD Docking Stations

sata_power_adapter

[Marc] is pretty unsatisfied with hard drive docking stations as a whole. He says they are typically slow and unreliable, causing him all sorts of grief while he is troubleshooting a questionable hard drive. He decided to take some of the mystery out of the troubleshooting equation and built a standalone SATA power module.

Aware that SATA drives require 5v and 12v for operation, he disassembled one of his docking stations to see how it provided both voltages. He discovered that it used a simple PWM buck converter and decided to replicate it in the smallest space possible. His plan was to use a standard 12v wall wart to power the circuit, passing that 12v straight to the drive. A simple voltage step-down circuit would be built to provide the required 5v.

[Marc] reports that the power adapter is performing nicely, and he is quite happy with the size as well. He says that one major benefit of this sort of adapter is that it can be used to power any SATA drive, not just hard drives. He does mention that if he built another one, he might consider regulating the 12v output as well, so that he can power the adapter with a laptop power supply instead of a separate dedicated wall wart.