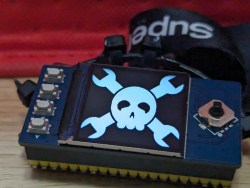
Programmer’s Macro Pad Bangs Out Whole Functions

Macro pads are handy for opening up your favorite programs or executing commonly used keyboard shortcuts. But why stop there?

That’s what [Jeroen Brinkman] must have been thinking while creating the Programmer’s Macro Pad. Based on the Arduino Pro Micro, this hand-wired pad is unique in that a single press of any of its 16 keys can virtually “type” out multiple lines of text. In this case, it’s a capability that’s being used to prevent the user from having to manually enter in commonly used functions, declarations, and conditional statements.

For example, in the current firmware, pressing the “func” key will type out a boilerplate C function:

int () { //
;
return 0;
}; // f 

It will also enter in the appropriate commands to put the cursor where it needs to be so you can actually enter in the function name. The other keys such as “array” and “if” work the same way, saving the user from having to enter (and potentially, even remember) the correct syntax.

The firmware is kept as simple as possible, meaning that the functionality of each key is currently hardcoded. Some kind of tool that would let you add or change macros without having to manually edit the source code and flash it back to the Arduino would be nice…but hey, it is a Programmers Macro Pad, after all.

Looking to speed up your own day-to-day computer usage? We’ve covered a lot of macro pads over the years, we’re confident at least a few of them should catch your eye.

Illustrated Kristina with an IBM Model M keyboard floating between her hands.

Keebin’ With Kristina: The One With The Leather Keyboard

Are you eager to get your feet wet in the keyboard surf, but not quite ready to stand up and ride the waves of designing a full-size board? You should paddle out with a macro pad instead, and take on the foam face-first and lying down.

A beautiful purple galaxy-themed macro pad with nine switches and three knobs.
Image by [Robert Feranec] via Hackaday.IO
Luckily, you have a great instructor in [Robert Feranec]. In a series of hour-long videos, [Robert] guides you step by step through each part of the process, from drawing the schematic, to designing a PCB and enclosure, to actually putting the thing together and entering a new world of macros and knobs and enhanced productivity.

Naturally, the fewer keys and things you want, the easier it will be to build. But [Robert] is using the versatile Raspberry Pi 2040, which has plenty of I/O pins if you want to expand on his basic plan. Not ready to watch the videos? You can see the schematic and the 3D files on GitHub.

As [Robert] says, this is a great opportunity to learn many skills at once, while ending up with something terrifically useful that could potentially live on your desk from then on. And who knows where that could lead?

Continue reading “Keebin’ With Kristina: The One With The Leather Keyboard”

DIY Split Keyboard Made With A Saw

Split keyboards are becoming more popular, but because they’re still relatively niche, they can be rather expensive if you want to buy one. So why not make your own? Sure, you could assemble one from a kit, but why not take a cheap mechanical keyboard, slice it in half and just waves hands connect the two halves back together? If this thought appeals to you, then [nomolk]’s literal hackjob video should not be ignored. Make sure to enable English subtitles for the Japanese-language video.

Easy split keyboard tip: just reconnect both halves... (Credit: nomolk, YouTube)
Easy split keyboard tip: just reconnect both halves… (Credit: nomolk, YouTube)

In it, the fancy (but cheap) mechanical keyboard with Full RGB™ functionality is purchased and tested prior to meeting its demise. Although the left side with the cable and controller still works, the right side now needs to be connected, which is where a lot of tedious wires have to be soldered to repair traces.

Naturally this will go wrong, so it’s important to take a (sushi) break and admire the sunset before hurling oneself at the tracing of faulty wiring. This process and the keyboard matrix is further detailed on the blog entry (in Japanese) for this process.

Although this was perhaps easier than the other split keyboard project involving a membrane keyboard, this tongue-in-cheek project demonstrates the limits of practicality with this approach even if it could be cleaned up more with fancier wiring.

We give it full points for going the whole way, however, and making the keyboard work again in the end.

Continue reading “DIY Split Keyboard Made With A Saw”

Illustrated Kristina with an IBM Model M keyboard floating between her hands.

Keebin’ With Kristina: The One With The Grasshopper Typewriter

Do you consider your keyboard to be a fragile thing? Meet the glass keyboard by [BranchNo9329], which even has a glass PCB. At least, I think the whole thing is glass.

The back side of an all-glass keyboard. Yeah.
Image via [BranchNo9329] via reddit
There are so frustratingly few details that this might as well have been a centerfold, but I thought you all should see it just the same. What we do have are several pictures and a couple of really short videos, so dive in.

I can tell you that [BranchNo2939] chose a glass substrate mainly due to curiosity about its durability compared with FR4. And that the copper circuitry was applied with physical vapor deposition (PVD) technology.

Apparently one of [BranchNo2939]’s friends is researching the bonding of copper on to glass panels, so they thought they’d give a keyboard a go. Right now the thing is incomplete — apparently there’s going to be RGB. Because of course there’s going to be RGB. Continue reading “Keebin’ With Kristina: The One With The Grasshopper Typewriter”

A Foot Pedal To Supplement Your Keyboard

It’s 2025, and you’re still probably pressing modifier keys on your keyboard like a… regular person. But it doesn’t have to be this way! You could use foot pedals instead, as [Jan Herman] demonstrates.

Now, if you’re a diehard embedded engineer, you might be contemplating your favorite USB HID interface chip and how best to whip up a custom PCB for the job. But it doesn’t have to be that complicated! Instead, [Jan] goes for an old school hack—he simply ripped the guts out of an cheap USB keyboard. From there, he wired up a few of the matrix pads to 3.5 mm jack connectors, and put the whole lot in a little metal project box. Then, he hooked up a few foot pedal switches with 3.5 mm plugs to complete the project.

[Jan] has it set up so he can plug foot pedals in to whichever keys he needs at a given moment. For example, he can plug a foot pedal in to act as SPACE, ESC, CTRL, ENTER, SHIFT, ALT, or left or right arrow. It’s a neat way to make the project quickly reconfigurable for different productivity tasks. Plus, you can see what each pedal does at a glance, just based on how it’s plugged in.

It’s not an advanced hack, but it’s a satisfying one. We’ve seen some other great builds in this space before, too. If you’re cooking up your own keyboard productivity hacks, don’t hesitate to let us know!

Illustrated Kristina with an IBM Model M keyboard floating between her hands.

Keebin’ With Kristina: The One With The Cheesy Keyboard

Let’s just kick things off in style with the fabulously brutalist Bayleaf wireless split from [StunningBreadfruit30], shall we? Be sure to check out the wonderful build log/information site as well for the full details.

Bayleaf, a stunning low-profile split keyboard.
Image by [StunningBreadfruit30] via reddit
Here’s the gist: this sexy split grid of beautiful multi-jet fusion (MJF) keycaps sits on top of Kailh PG1316S switches. The CNC-machined aluminium enclosure hides nice!nano boards with a sweet little dip in each one that really pull the keyboard together.

For the first serious custom build, [StunningBreadfruit30] wanted a polished look and finish, and to that I say wow, yes; good job, and nod enthusiastically as I’m sure you are. Believe it or not, [StunningBreadfruit30] came into this with no CAD skills at all. But it was an amazing learning experience overall, and an even better version is in the works.

I didn’t read the things. Is it open-source? It’s not, at least not at this time. But before you get too-too excited, remember that it cost $400 to build, and that doesn’t even count shipping or the tools that this project necessitated purchasing. However, [StunningBreadfruit30] says that it may be for sale in the future, although the design will have an improved sound profile and ergonomics. There’s actually a laundry list of ideas for the next iteration. Continue reading “Keebin’ With Kristina: The One With The Cheesy Keyboard”

Build Your Own Air Mouse, Okay?

Are you using a desk mouse like some kind of… normal computer user? Why, beg the heavens? For you could be using an air mouse, of your very own creation! [Misfit Maker] shows the way. Check out what he made in the video below.

An air mouse is a mouse you use in the air—which creates at least one major challenge. Since you’re not sliding along a surface, you can’t track the motion by mechanical friction like a ball mouse or by imaging as in an optical mouse. Instead, this build relies on a gyroscope sensor to track motion and translate that into pointer commands. The build relies on an ESP32-C3 as the microcontroller at the heart of things. It communicates with an MPU6050 gyroscope and accelerometer to track motion in space. It then communicates as a human interface device over Bluetooth, so you can use it with lots of different devices. The mouse buttons—plus media control buttons—are all capacitive touch-sensitive, thanks to an MPR121 touch sensor module.

There’s something neat about building your own tools to interface with the machines, almost like it helps meld the system to your whims. We see a lot of innovative mouse and HID projects around these parts.

Continue reading “Build Your Own Air Mouse, Okay?”