A loudspeaker with a supercapacitor PCB next to it

Hackaday Prize 2023: Supercapacitors Let Solar Speaker Work In Darkness

Solar panels are a great way to generate clean electricity, but require some energy storage mechanism if you also want to use their power at night. This can be a bit tricky for large solar farms that feed into the grid, which require enormous battery banks or pumped storage systems to capture a reasonable amount of energy. It’s much easier for small, handheld solar gadgets, which work just fine with a small rechargeable battery or even a big capacitor. [Jamie Matthews], for instance, built a loudspeaker that runs on solar power but can also work in the dark thanks to two supercapacitors.

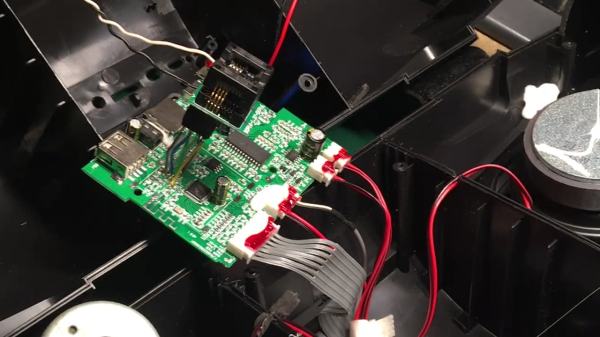
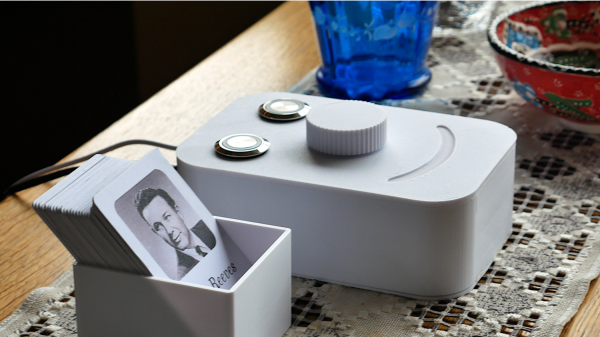
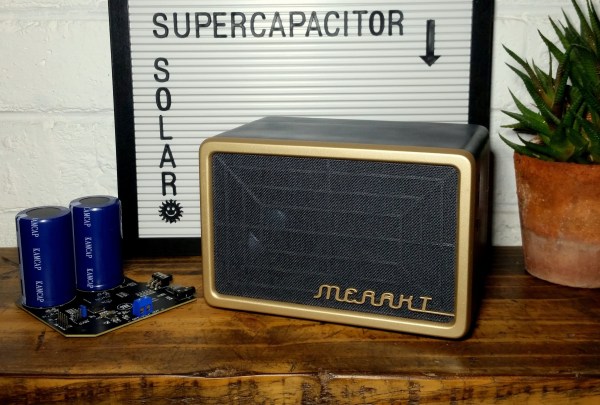
The speaker’s 3D-printed case has a 60 x 90 mm2 solar panel mounted at the front, which charges a pair of 400 Farad supercaps. Audio input is either through a classic 3.5 mm socket or through the analog audio feature of a USB-C socket. That same USB port can also be used to directly charge the supercaps when no sunlight is available, or to attach a Bluetooth audio receiver, which in that case will be powered by the speaker.

A speaker's passive radiator next to a solar panel
The solar panel sits right next to the passive radiator before both are covered with speaker fabric.

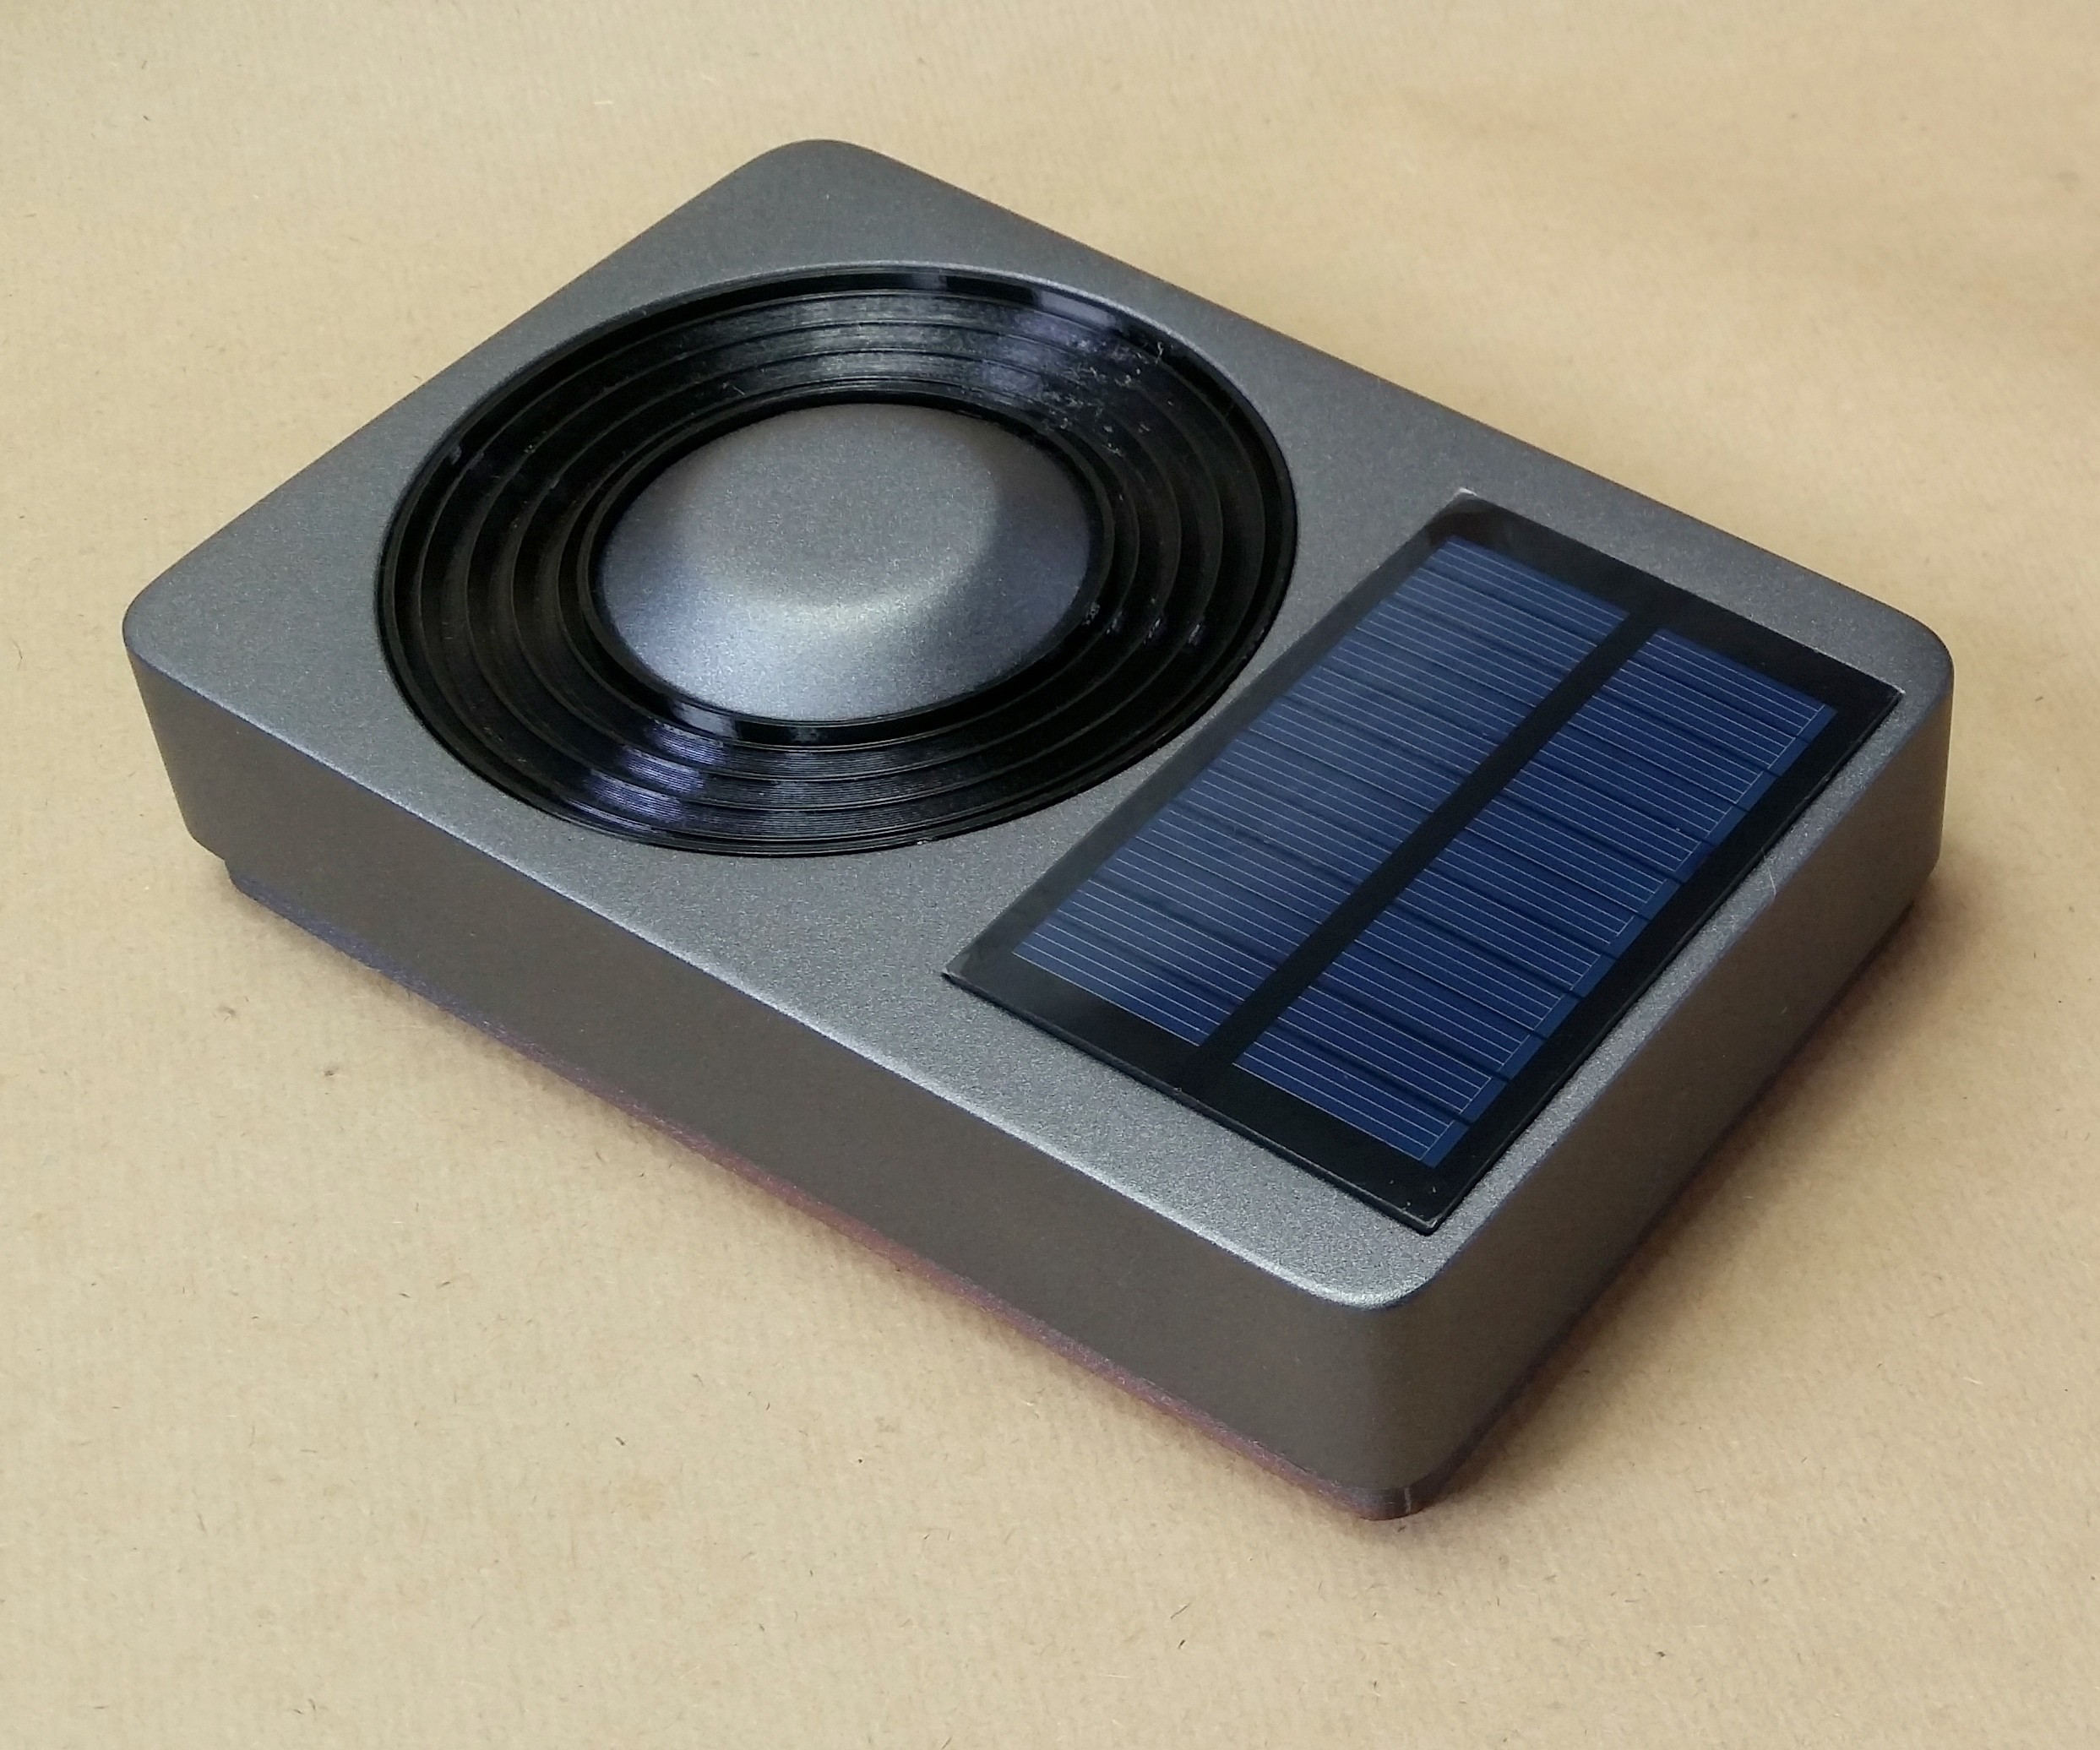
The speaker’s outer shell, the front bezel, and even the passive radiator are 3D-printed and spray-painted. The radiator is made of a center cap that is weighed down by a couple of M4 screws and suspended in a flexible membrane. [Jamie] used glue on all openings to ensure the box remains nearly airtight, which is required for the passive radiator to work properly. Speaker fabric is used to cover the front, including the solar panel – it’s apparently transparent enough to let a few watts of solar power through.

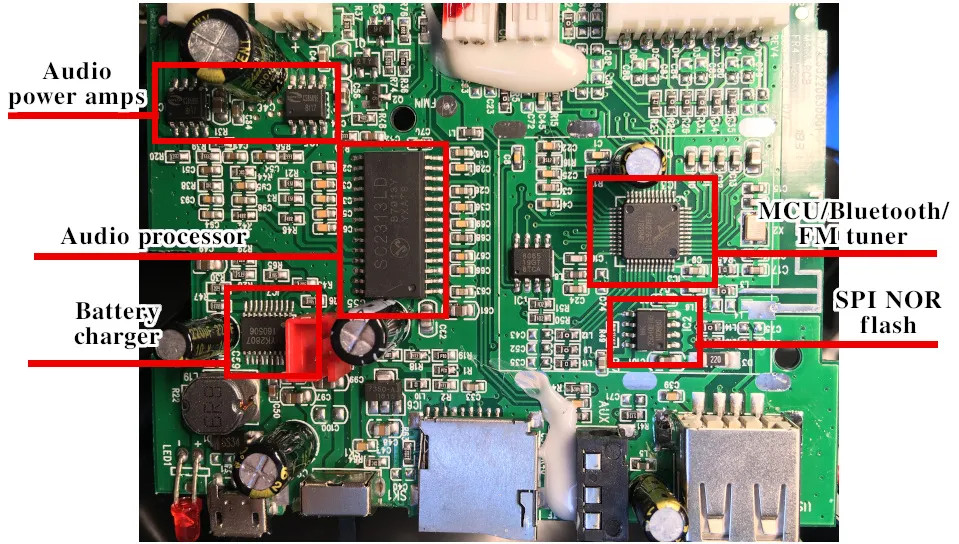
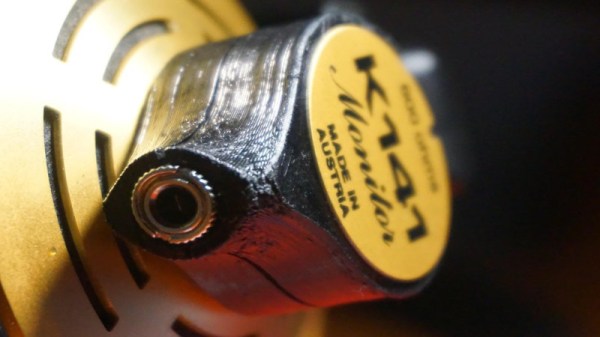
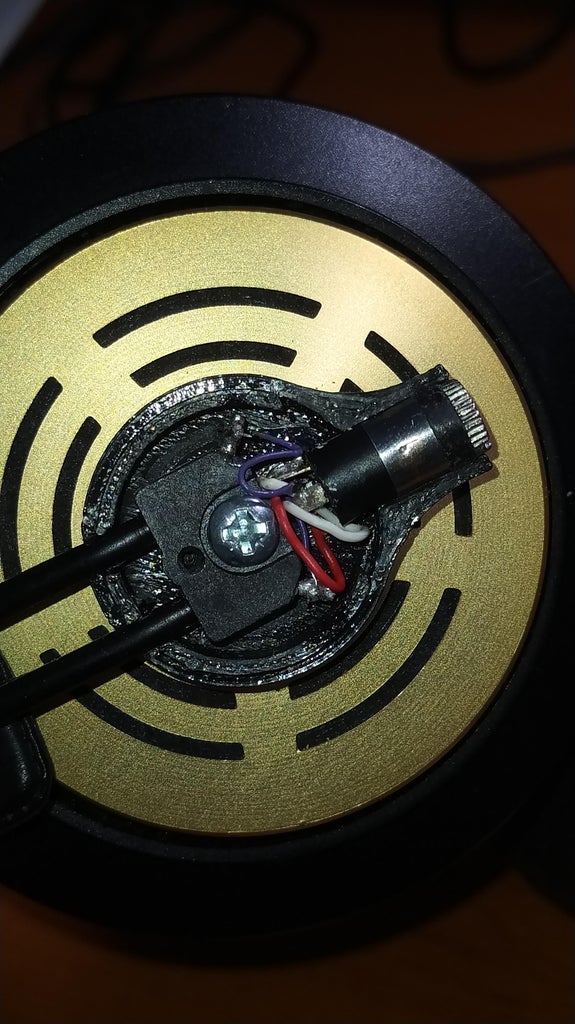
A salvaged three-inch Bose driver is the actual audio source. It’s driven by a TI TPA2013D1 chip, which is a 2.7 W class-D amplifier with an integrated boost converter. This enables the chip to keep a constant output power level across a wide supply voltage range – ideal for supercapacitor operation since supercaps don’t keep a constant voltage like lithium batteries do.

[Jamie] has used the speaker for more than nine months so far and has only had to charge it twice manually. It probably helps that he lives in sunny South Africa, but we’ve seen similar solar audio projects work just fine in places like Denmark. If you’re taking your boombox to the beach, a sunscreen reminder feature might also come in handy.

A collage of three images. On top is the main PCB of the headphones, with a charger IC and the main MCU. On the bottom left, it shows ACOK and EN signals going to pullup resistors near the MCU. On bottom right, it shows the charger chip with its pinout overlaying it, highlighting the pads to be probed and later cut.

One Hacker’s Battle To Slightly Improve A Sadistic Sony Headset

One thing you won’t read in reviews of pricey Sony WH-1000XM3 headphones – if you choose them, you’re going to find yourself in a one-sided abusive relationship. A button press or low-battery notification makes the headphones scream at you, ignoring the actual sound volume of what you’re currently listening to. Once they’re discharged, they suddenly emit loud noises, lecture you about how the battery is low, then shut down. Oh, and you can’t use them as they’re charging – if your voicecall lasts longer than expected, you might find yourself being shouted at and forced to fumble around with wires, silently pleading for call participants to wait while you change over to a different headset.

On-PCB footprint for the IC, with two pads carefully cut in half as mentioned in the article[MisterHW] decided to dig in and figure out how to work around at least some of the shortcomings. Naturally, the “no charge while using” limit looked like low-hanging fruit, and a hefty usability improvement too – plus, he suspected the charge cutoff to be masking noise issues already abundant on these headphones. Some painful disassembly later, he was inspecting the charger IC , the MP2625, responsible for power management. Its signals were connected to the MCU using via-in-pad – and some pads had to be cut in half to disconnect the vias.

However, the laborious pad cutting and subsequent careful soldering didn’t turn out to be fruitful. Even with external control of the output inhibition pins, the shutoff still continued – something affected the circuit, whether it was VBUS detection, some other unnoticed via-connected pins on the charger, or sensing on D+/D-. About to run out of life force for this mod, [MisterHW] added a Qi charging circuit, powering a TP4056 wired in parallel with the MP2625. The mod, dubbed HW-1000XM3, made these headphones all that more reliable and less annoying – charger and MCU none the wiser.

Now, all that’s needed to charge these headphones is to slap a magnetic charger coil onto them, and it doesn’t interfere with voicecalls as much as the screaming and forced shutoffs do. Hopefully, Sony eventually learns to test their headphones by having humans use them – it’s far from the only gripes with this lineup, after all. We also hope that the voice notifications will be conquered eventually – this summer, we’ve seen a hacker firmware mod a Bluetooth speaker to make the sounds more pleasant. If your headphones are based on a relatively popular module, repurposing them might be even easier than that!

The speaker PCB inside of the speaker, with a flash chip ZIF holder soldered to the SPI flash pads on the PCB

Bluetooth Speaker Domesticated Through Firmware Mod

This might sound like a familiar problem – you get a Bluetooth speaker, and it sounds nice, but it also emits all kinds of weird sounds every now and then. [Oleg Kutkov] got himself a Sven PS460 speaker with FM radio functionality, but didn’t like that the “power on” sound was persistently loud with no respect for the volume setting, and the low battery notification sounds were bothersome. So, he disassembled the speaker, located a flash chip next to the processor, and started hacking.

Using a TL866 and minipro software, he dumped the firmware, and started probing it with binwalk. The default set of options didn’t show anything interesting, but he decided to look for sound file signatures specifically, and successfully found a collection of MP3 files! Proper extraction of these was a bit tricky, but he figured out how to get them out, and loaded the entire assortment into Audacity.

From there, he decided to merely make the annoying sounds quieter – negating the “no respect for the volume setting” aspect somewhat. After he exported the sound pack out of Audacity, the file became noticeably smaller, so he zero-padded it, and finally inserted it back into the firmware. Testing revealed that it worked just as intended! As a bonus, he replaced the “battery low” indicator sound with something that most of us would appreciate. Check out the demo video at the end of his write-up.

Domesticating your Bluetooth speakers tends to be called for. If you can’t do that for whatever reason, you can rebuild them into an audio receiver – or perhaps, build your own Bluetooth speakers, with aesthetics included and annoyance omitted from the start.

Adding An Audio Jack To Classic Headphones Is A Nifty Upgrade

One of the most common ways to junk a pair of headphones is to damage the cord. Obviously, the lead can be repaired, but it involves busting out the soldering iron and can be tedious when dealing with the tiny little coated wires.

It does involve soldering, but ideally, you only have to do it once.

[mauriziomiscio.mm] has a way of dealing with the problem in a once-and-done fashion, by installing a female audio jack into his vintage headphones. The benefit is that if the cable is damaged, it can simply be unplugged and replaced with a new one, and is commonly seen on headphones from companies like KRK. 

The hack is simple when applied to a classic pair of AKG K141 headphones. The little plastic casing on one earpiece is popped off, and replaced with a 3D-printed version that stoutly holds a female TRS jack in place. This can then be soldered up to the wiring inside the headphones.

With everything assembled, the headphones can now use an easily-replaceable cable, and one needn’t worry about having to bust out the soldering iron if the lead is damaged in future. It’s a particularly useful hack for those who use their headphones on the road, always throwing them into backpacks between gigs.

If that’s not hardcore enough, consider attaching a headphone jack to an old 8-track player for the most ridiculous Walkman you can imagine. If you’ve been working on your own portable audio hacks, be sure to drop us a line!

iPodRPi by production

IPod Mod Puts Pi Zero In New Bod

We sure love to see nicely designed products get a new lease on life. Just as the new Raspberry Pi Zero 2 was being announced, [production] was stuffing an original RPi Zero into an old iPod’s case.

[production] cites several previous, similar projects that showed how to interface with the click-wheel, a perfectly fitting color display from Waveshare, and open-source software called Rockbox to run on the pi. We all stand on the shoulders of giants.

iPodRPi by production interior wiring

Some nice innovations to look for are the Pi Zero’s micro-SD card and a micro-USB charging port aligned to the large slot left from the iPod’s original 40 pin connector. Having access for charging and reflashing the card without opening the case seems quite handy. There’s a nice sized battery too, though we wonder if a smaller battery and a Qi charger could fit in the same space. Check the project’s Hackaday.io for the parts list, and GitHub for the software side of things, and all the reference links you’ll need to build your own. It looks like [production] has plans to turn old iPods into Gameboy clones, you may want to check back for progress on that.

If you just want to rock like it’s 2004, there are options to just upgrade the battery and capacity but keep your vintage iPod too.

Continue reading “IPod Mod Puts Pi Zero In New Bod”

Drive High-Impedance Headphones With This Stylish USB DAC

For anyone with an interest in building audio projects, it’s likely that an early project will be a headphone amplifier. They’re relatively easy to build from transistors, ICs, or tubes, and it’s possible to build one to a decent quality without being an electronic engineering genius. It’s not often though that we see one as miniaturized as [daumemo]’s USB-C DAC and headphone amplifier combo, that fits within a slightly elongated 3.5 mm jack cover as part of a small USB-to-headphone cable.

The DAC is an off-the-shelf board featuring an ALC4042 IC, it has a line-level output and a handy place to tap off a 5 volt line for the amplifier. This final part is a tiny PCB with two chips, a TPS65135 that produces clean +5 and -5 volt rails, and an INA1620 which is a high-quality audio amplifier set up for 2x gain. All this has been designed onto a very small PCB, which sits inside a 3D-printed housing along with the 3.5 mm earphone socket. The result is a very neat unit far better able do drive high-impedance headphones than the output from an unmodified DAC, but still looking as svelte as any commercial product. We like it.

This may be one of the most compact USB-to-headphone amplifiers we’ve seen, but it’s by no means the first.

Juuke – An RFID Music Player For Elderly And Kids

[ananords] and his girlfriend wanted to make a simple and easy to use music player for her grandmother. Music players like CD players and MP3s have gotten just a bit too difficult to handle, so they wanted to find a much simpler solution.

They conceived the idea of creating a little jukebox called Juuk, with a simple and easy to use interface. They created individual RFID cards with the artist’s photo on the front face, making it easy to select different options from the music library. Juuk has a built-in RFID reader that will recognize each RFID card and play the appropriate musical number from an SD card.

This simple interface is much more user-friendly than those awful touchscreen devices that we’re all forced to fiddle with today and also has a cool retro appeal that many of our readers are sure to appreciate. Juuk also has a pretty ergonomic interface with a big, easy-to-use knob for controlling the volume and two appropriately illuminated buttons, one green and one red, for simple stop and play options.

We love when our hacks are able to blend form with function and emphasize high usability. Check out some of our other assistive tech on the blog.

Continue reading “Juuke – An RFID Music Player For Elderly And Kids”