Digital Attenuator Goes From Manual To Arduino Control

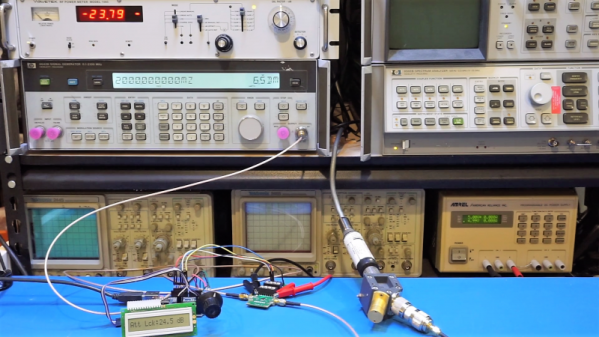
[Kerry Wong] comes across the coolest hardware, and always manages to do something interesting with it. His widget du jour is an old demo board for a digital RF attenuator chip, which can pad a signal in discrete steps according to the settings of some DIP switches. [Kerry]’s goal: forget the finger switch-flipping and bring the attenuator under Arduino control.

As usual with his videos, [Kerry] gives us a great rundown on the theory behind the hardware he’s working with. The chip in question is an interesting beast, an HMC624LP4E from Hittite, a company that was rolled into Analog Devices in 2014. The now-obsolete device is a monolithic microwave integrated circuit (MMIC) built on a gallium arsenide substrate rather than silicon, and attenuates DC to 6-GHz signals in 64 steps down to -31.5 dBm. After a functional check of the board using the DIP switches, he whipped up a quick Arduino project to control the chip with its built-in serial interface. It’s just a prototype for now, but spinning the encoder is a lot handier than flipping switches, and once this is boxed up it’ll make a great addition to [Kerry]’s RF bench.

If this video puts you in an RF state of mind, check out some of [Kerry]’s other videos, like this one about temperature-compensated crystal oscillators, or the mysteries of microwave electronics.

Continue reading “Digital Attenuator Goes From Manual To Arduino Control”

Harley-Hardened Wire Helps High-Gain Antenna Hack

What does a Harley-Davidson motorcycle have to do with building antennas? Absolutely nothing, unless you happen to have one and need to work-harden copper wire to build a collinear antenna for LoRa.

We’ll explain. Never being one to settle, [Andreas Spiess] needed a better antenna for his LoRa experiments. Looking for high gain and an omnidirectional pattern, he bought a commercial colinear antenna, which is a wire with precisely spaced loops that acts like a stack of dipoles. Sadly, in a head-to-head test [Andreas] found that the commercial antenna was no better than lower gain antennas in terms of range, and so he decided to roll his own.

Copper wire is a great material for antennas since it can be easily formed without special tools and it solders like a champ. But the stuff you get at the home center is nowhere near stiff enough for a free-standing vertical whip. This is where the Harley came in: [Andreas] used his Hog to stretch out the 1.75-mm diameter (a little bigger than #14 AWG) copper wire. Not only did the work-hardening stiffen the wire, it reduced its diameter to the 1.4 mm needed for the antenna design. His vector network analyzer told him that ground-plane elements and a little fiddling with the loop diameter were needed to get the antenna to resonate at 868 MHz, but in the end it looks like the antenna is on track to deliver 5-dBi of gain.

Of course there are plenty of other ways to stretch out a wire — you could just stretch it out with hanging weights, or even with a go-kart motor-powered winch if you’re ambitious. But if you’ve got a bike like that, why not flaunt it?

Continue reading “Harley-Hardened Wire Helps High-Gain Antenna Hack”

The Biggest Corner Antenna We’ve Ever Seen

Radio waves are received on antennas, for which when the signal in question comes over a long distance a big reflector is needed. When the reception distance is literally astronomical, the reflector has to be pretty darn big. [The Thought Emporium] wants to pick up signals from distant satellites, the moon, and hopefully a pulsar. On the scale of home-built amateur radio, this will be a monstrous antenna. The video also follows the break.

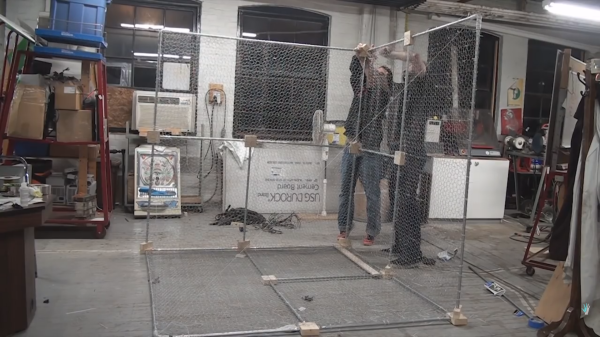
In hacker fashion, the project is built on a budget, so all the parts are direct from a hardware store, and the tools are already in your toolbox or hackerspace. Electrical conduit, chicken wire, PVC pipes, wood blocks, and screws make up most of the structure so put away your crazy links to Chinese distributors unless you need an SDR. The form of the antenna is the crucial thing, and the shape is three perpendicular panels as seen in the image and video. The construction in the video is just a suggestion, but it doesn’t involve welding, so that opens it to even more amateurs.

Even if you are not trying to receive a pulsar’s signature, we have hacks galore for radios and antennas.

Continue reading “The Biggest Corner Antenna We’ve Ever Seen”

Global Radio Direction Finding In Your Browser

Radio direction finding is one of those things that most Hackaday readers are likely to be familiar with at least on a conceptual level, but probably without much first-hand experience. After all it’s not everyday that you need to track down a rogue signal, let alone have access to the infrastructure necessary to triangulate its position. But thanks to the wonders of the Internet, at least the latter excuse is now a bit less valid.

Triangulated location of “The Buzzer”

The RTL-SDR Blog has run a very interesting article wherein they describe how the global network of Internet-connected KiwiSDR radios can be used for worldwide radio direction finding. If you’ve got a target in mind, and the time to fiddle around with the web-based SDR user interface, you now have access to the kind of technology that’s usually reserved for world superpowers. Indeed, the blog post claims this is the first time such capability has been put in the hands of the unwashed masses. Let’s try not to mess this up.

To start with, you should have a rough idea of where the signal is originating from. It doesn’t have to be exact, but you want to at least know which country to look in. Then you pick one of the nearby public KiwiSDR stations and tune the frequency you’re after. Repeat the process for a few more stations. In theory the more stations you have the better, but technically three should be enough to get you pretty close.

With your receiving stations selected, the system will then start Time Difference of Arrival (TDoA) sampling. This technique compares the time the signal arrives at each station in relation to the KiwiSDR’s GPS synchronized clock. With enough of this data from multiple stations, it can estimate the origin of the signal based on how long it takes to reach different parts of the globe.

It’s not perfect, but it’s pretty impressive for a community run project. The blog post goes on to give examples of both known and unknown signals they were able to triangulate with surprising accuracy: from the US Navy’s VLF submarine transmitter in Seattle, Washington to the mysterious “Buzzer” number station hidden somewhere in Russia.

We’ve covered small-scale triangulation using Wi-Fi, and even a project that aimed to use drones to home in on rescue beacons, but the scale of the KiwiSDR TDoA system is really on a whole new level. Use it wisely.

A Microwave Erector Set

RF design isn’t always easy, especially at higher frequencies. Despite improvements in simulation tools, there’s still no substitute for prototyping and trying out different things. That wasn’t so bad when that meant nailing some nails in a piece of wood and wiring up discrete components. But at today’s microwave frequencies and with today’s IC packaging that simply doesn’t work. Solving this problem is what drives a company called X-Microwave. They have a standard grid pattern PCB for a wide range of RF circuits and accessories to tie them all together. Probably the best way to get a feel for the system is to watch the simple video below. There’s also a free simulator tool worth taking note of that you’ll see in a bit.

Before you get too excited, we’ll warn you that while this stuff is cheap if you need it, it isn’t an impulse buy. The baseboards and probes (the connectors) run from $150 to $300. You can get kits, too, but a bare-bones two-port system is going to start at about $550, which is about $100 off the component parts and includes some extras. Then you need less expensive parts to make the boxes around things if you need them. Oh. Then you also need the PCBs which are not cheap, either. Their prices vary widely as you’d expect, but — for example — we saw amplifiers as low as $80 and as high as nearly $1000. So a complete system could get pretty pricey.

Continue reading “A Microwave Erector Set”

Bandpass Filters From The CNC Mill

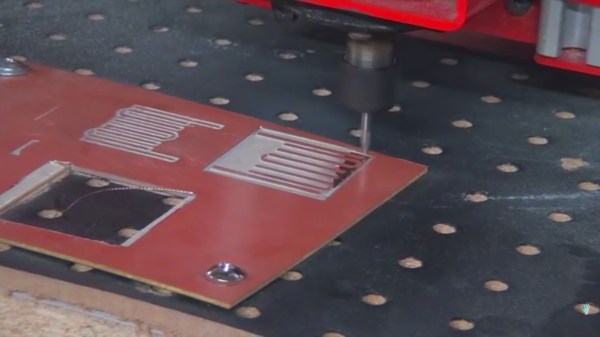
A bandpass allows a certain electrical signal to pass while filtering out undesirable frequencies. In a speaker bandpass, the mid-range speaker doesn’t receive tones meant for the tweeter or woofer. Most of the time, this filtering is done with capacitors to remove low frequencies and inductors to remove high frequencies. In radio, the same concept applies except the frequencies are usually much higher. [The Thought Emporium] is concerned with signals above 300MHz and in this range, a unique type of filter becomes an option. The microstrip filter ignores the typical installation of passive components and uses the copper planes of an unetched circuit board as the elements.

A nice analogy is drawn in the video, which can also be seen after the break, where the copper shapes are compared to the music tuning forks they resemble. The elegance of these filters is their simplicity, repeatability, and reproducability. In the video, they are formed on a CNC mill but any reliable PCB manufacturing process should yield beautiful results. At the size these are made, it would be possible to fit these filters on a business card or a conference badge.

Continue reading “Bandpass Filters From The CNC Mill”

Ham-designed Gear Used In Thailand Cave Rescue

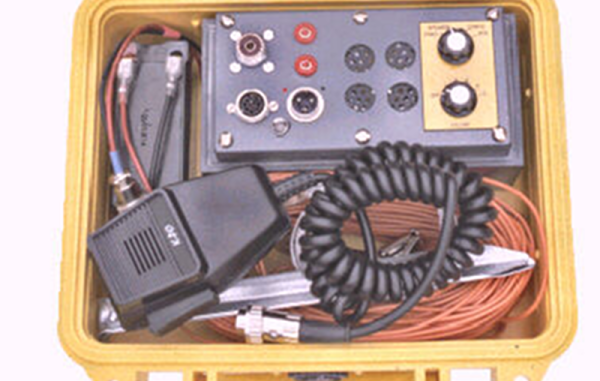
Unless you live in a cave, you’ve probably heard a little about the thirteen people — mostly children — trapped in the Tham Luang Nang Non cave in Thailand. What you may have missed, though, is the hacker/ham radio connection. The British Cave Rescue Council (BCRC) was asked for their expert help. [Rick Stanton], [John Volanthen] and [Rob Harper] answered the call. They were equipped with HeyPhones. The HeyPhone is a 17-year-old design from [John Hey, G3TDZ]. Sadly, [G3TDZ] is now a silent key (ham radio parlance for deceased) so he didn’t get to see his design play a role in this high-profile rescue, although it has apparently been a part of many others in the past.

The HeyPhone is actually considered obsolete but is still in service with some teams. The radio uses USB (upper sideband, not universal serial bus) at 87 kHz. The low frequency can penetrate deep into the ground using either induction loop antennas like the older Molephone, or — more commonly — with electrodes injecting RF energy directly into the ground.

Continue reading “Ham-designed Gear Used In Thailand Cave Rescue”