Ah, dogs. They sure like to bark, don’t they? [rrustvold]’s dog likes to bark at the door when a package arrives. Or when someone walks by the house, or whenever the mood strikes, really. To solve the barking issue, at least near the front door, [rrustvold] built a spray bottle turret to teach the dog through classical conditioning.
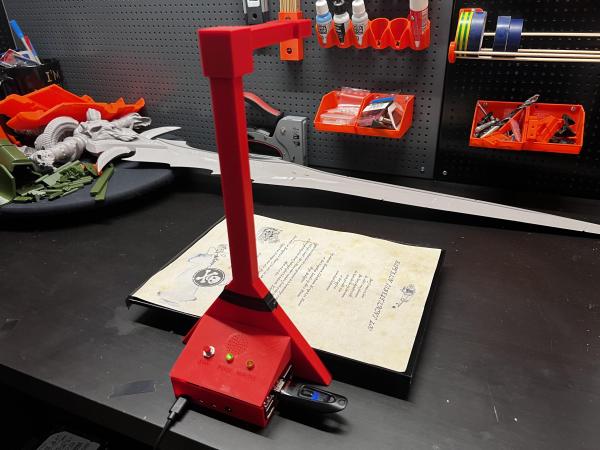
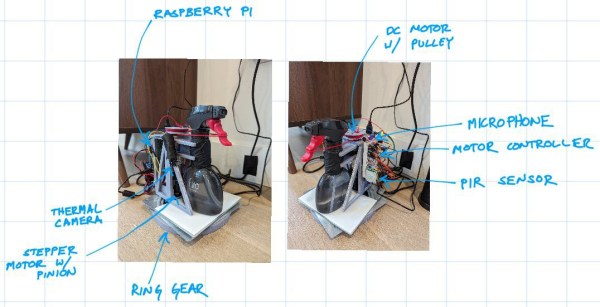
As you can see from the image, it’s all about pulling the trigger on a standard spray bottle at the right time. This machine only sprays when two conditions are met: it hears noise (like barking) and detects motion (like overzealous tail wagging). It also has heat-seeking abilities thanks to a Raspberry Pi thermal camera.
To do the actual spraying, there’s a DC motor mounted behind the bottle which turns a pulley that’s mounted to its shaft. Around the pulley is a string that wraps around the spray bottle’s trigger. To complete the build, everything is mounted on a lazy Susan so there’s nowhere for Fido to hide-o.
If you’ve a dog whose bite is worse than its bark, consider building a custom dog door to keep it out of the cat box.
The 2024 Home Sweet Home Automation contest has officially wrapped — we’re counting the votes now, so stay tuned for an announcement about the winners shortly.