The Dark Pi Rises

Ever wonder how an aerospace engineer would build a telepresence rover? Well, if [algorythmic] can be used as our reference, he’d cram a Raspberry Pi AND an Arduino into an RC truck frame.  The arduino is being used for motor control while the Raspberry pi is doing the communicating back and forth to the base. He’s using a ps3 controller as his interface and has slightly modified his PS3 eye for better night viewing.

Before you start shouting that using the raspberry pi AND the arduino is massive overkill, let us remind you that people don’t necessarily go buy/build all the parts for each project with a long-term goal in mind. He could have had both sitting there and realized that he didn’t need to add parts to either of them.

With the Raspberry Pi at the helm, this opens up all kinds of possibilities for adding features to make this an autonomous vehicle. Looking around his blog a little bit, it seems he’s done some visual recognition as well as voice control in the past. This could be interesting!


 

Control Raspi GPIO Pins In The Browser

Now instead of wrangling Python or PHP to do your bidding, [Eric] came up with a way to control the GPIO pins on his Raspberry Pi in a browser.

[Eric] calls his project WebIOPi, and it’s the perfect tool if you’d just like to blink a LED or control a relay over the internet. Simply by pointing his browser to the IP of his Raspi, [Eric] can turn GPIO pins on and off, directly from his desktop browser.

All the code for WebIOPi is available on [Eric]’s Google code page. The UI of [Eric]’s project is fully customizable, so it’s entirely possible to control your garage door from a smart phone simply by loading up a web page hosted on your Raspi and pressing a button.

Right now WebIOPi is only able to turn GPIO pins on and off. That will change as [Eric] implements UART, SPI, and I2C in his project, making it possible to do a lot of cool stuff without having to write much – if any – code.

Building A PBX Setup Around The Raspberry Pi

We’re not sure why this use didn’t immediately come to mind when we got our hands on a Raspberry Pi board, but the hardware is almost perfect as a PBX system. PBX, or Private Branch Exchange, is basically an in-house phone system. This guide which [Ward] put together shows you how to do some interesting things with it.

When talking about PBX setups the most common software package is Asterisk. That’s what’s at work here, rolled up with a bunch of other helpful software in an RPi targeted distro called Incredible PBX. All it takes to get up and running is to partition and burn the image to an SD like any other RPi distro. The configuration ends up being most of the work, starting with changing the default password, and moving on to customizing the environment to match your phone numbers and your needs. As with PBX setups on other embedded Linux devices, Google Voice is your best friend. The service will set you up with a free phone number.

This guide doesn’t delve into hardware connected hand sets. You’ll need to use a SIP phone. But that’s easy enough as there are free apps for most smart phones that will do the trick.

[Thanks Jamie]

Raspberry Pi As An AVR Programmer

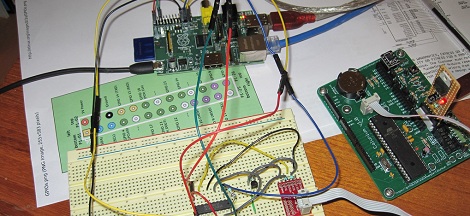
AVR programmers can be bought for just a few dollars on the Internet, but if you’re building an expansion board with an AVR for your Raspi, this is the build for you. It’s a safe way of programming an AVR via the Raspi’s GPIO pins that uses an extremely minimal circuit.

The AVR ISP interface looks a lot like an SPI interface, and the easiest way to program an AVR with a Raspi would be to bitbang all the commands from the GPIO pins. Sometimes, though, the logic of the AVR and Raspi would be at different levels, so while bitbanging may work in a pinch it’s not something anyone should use regularly.

To get the Raspi and AVR talking to each other safely, [Steve] built a small circuit from a 74244 buffer and a FET. With the added support for Linux GPIO avrdude programming, it’s a snap to program an AVR with a Raspi.

A few days ago we ran across a hugely overwrought PIC programmer for the Raspi, so we’re glad to see another round in the PIC/AVR holy war go to the AVR camp.

Thanks [Mateusz] for sending this one in.

An Adafruit Raspberry Pi Extravaganza

The folks at Adafruit are busy as a bee working on bringing some of their really cool boards to the Raspberry Pi platform. Here’s a few that came in over the last few days:

16 servos is almost too many

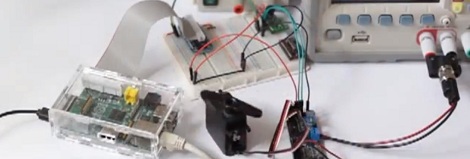
Servos require a PWM output but the Raspi only has hardware support for PWM on a single GPIO pin; certainly not enough to build a gigantic, city-leveling robot. [Kevin] over at Adafruit put together a tutorial for using this 16 channel servo driver with the Raspi.

12 bit DAC

With only one PWM pin and no analog out, it was only a matter of time before someone hooked up the Adafruit 12 bit DAC to the Raspberry Pi.

16×2 LCD displays

Both the servo and DAC builds use the Adafruit I2C library and a bit of Python. Of course it’s possible to treat the GPIO pins on the Raspberry Pi as digital outs, just as [Mikey] did with his Raspi LCD display tutorial.

So, what distro are you using?

Of course all these builds use Adafruit’s Occidentalis distro, a maker-friendly Linux distro we’ve posted about before. It’s too useful to languish as a single Hackaday post, so here it is again.

Expand Your Pi With A Gertboard

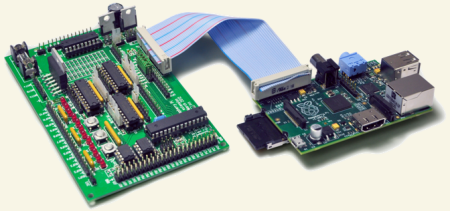
[Gert van Loo], the person who designed the alpha hardware for the Raspberry pi model B, has put out an expansion board for the Raspberry pi that we think many of you might be interested in seeing. Dubbed the Gertboard, this expands the Raspi  with some GPIO goodness.

We have seen TONS of tutorials for the Raspberry pi, and a few projects as well. We’re hoping that we’ll start seeing more projects where the Raspberry pi is the brain, but only part of the project, start becoming more frequent. The board is pretty cool, now lets see what you guys can build with all that power!

[thanks Zimm3rmann]

Raspberry Pi As A PIC Programmer

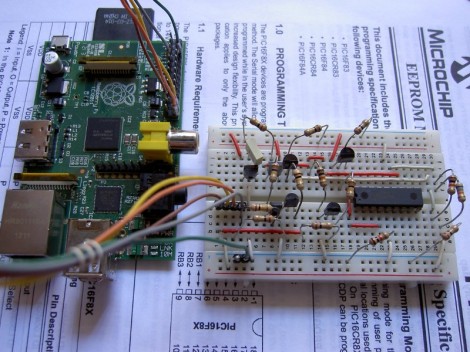
[Giorgio Vazzana] turned his Raspberry Pi into a PIC programmer using a rather small collection of common parts. It supports about a dozen different chips from the 16F family. But we’d guess that software is the limiting factor when it comes to supporting more chips.

Generally the problem with PIC programming is the need for a 12V supply. He chose to use an external 12V supply and a 78L05 linear regulator to derive the 5V rails from it. With the power worked out there are some level conversion issues to account for. The RPi provides 3.3V on the GPIO header pins, but 5V logic levels are needed for programming. He built transistor and voltage divider circuits to act as level converters. The programming software bit bangs the pins with a write time of less than eight seconds per 1k words of program data. So far this does not work with ICSP, but he plans to add that feature in a future version.