Salvaging a beefy motor is one life’s greatest pleasures for a hacker, but, when it comes to using it in a new project, the lack of specs and documentation can be frustrating. [The Post Apocalyptic Inventor] has a seemingly endless stockpile of scavenged motors, and decided to do something about the problem.
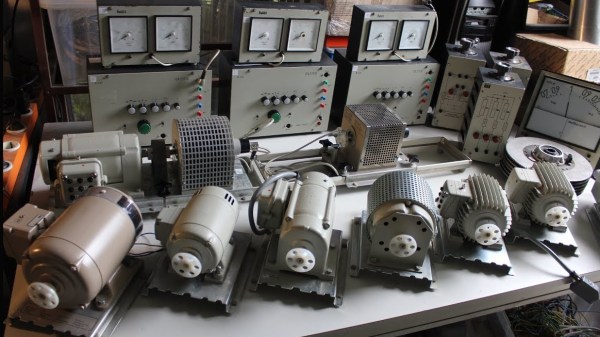
Once again applying his talent for junk revival, [TPAI] has spent the last year collecting, reverse-engineering and repairing equipment built in the 1970s, to produce a complete electric motor test setup. Parameters such as stall torque, speed under no load, peak power, and more can all easily be found by use of the restored test equipment. Key operating graphs that would normally only be available in a datasheet can also be produced.
The test setup comprises of a number of magnetic particle brakes, combined power supply and control units, a trio of colossal three-phase dummy loads, and a gorgeously vintage power-factor meter.
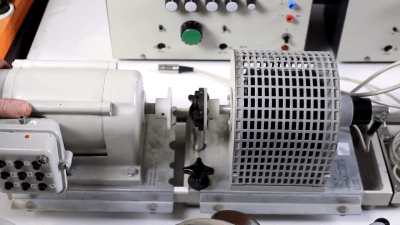
Motors are coupled via a piece of rubber to a magnetic particle brake. The rubber contains six magnets spaced around its edge, which, combined with a hall sensor, are used to calculate the motor’s rotational speed. When power is applied to the coil inside the brake, the now magnetised internal powder causes friction between the rotor and the stator, proportional to the current through the coil. In addition to this, the brake can also measure the torque that’s being applied to the motor shaft, which allows the control units to regulate the brake either by speed or torque. An Arduino slurps data from these control units, allowing characteristics to be easily graphed.
If you’re looking for more dynamometer action, last year we featured this neatly designed unit – made by some Cornell students with an impressive level of documentation.
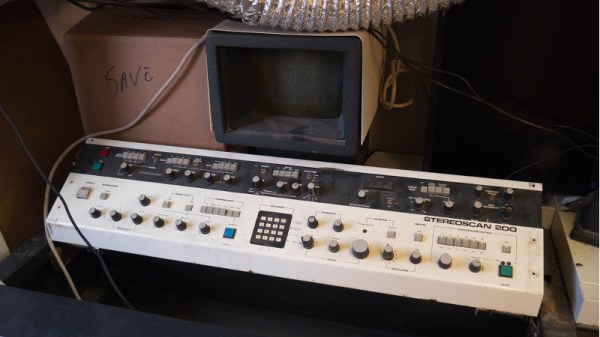
We don’t know about you, but when our friends ask us if we want to help them fix something, they’re usually talking about their computer, phone, or car. So far it’s never been about helping them rebuild an old electron microscope. But that’s exactly the request [Benjamin Blundell] got when a friend from a local hackerspace asked if he could take a look at a vintage Cambridge Stereoscan 200 they had found abandoned in a shed. Clearly we’re hanging out with the wrong group of people.
As you might imagine, the microscope was in desperate need of some love after spending time in considerably less than ideal conditions. While some of the hackerspace members started tackling the hardware side of the machine, [Benjamin] was tasked with finding a way to recover the contents of the scope’s ROM. While he’s still working on verification, the dumps he’s made so far of the various ROMs living inside the Stereoscan 200 have been promising and he believes he’s on the right track.
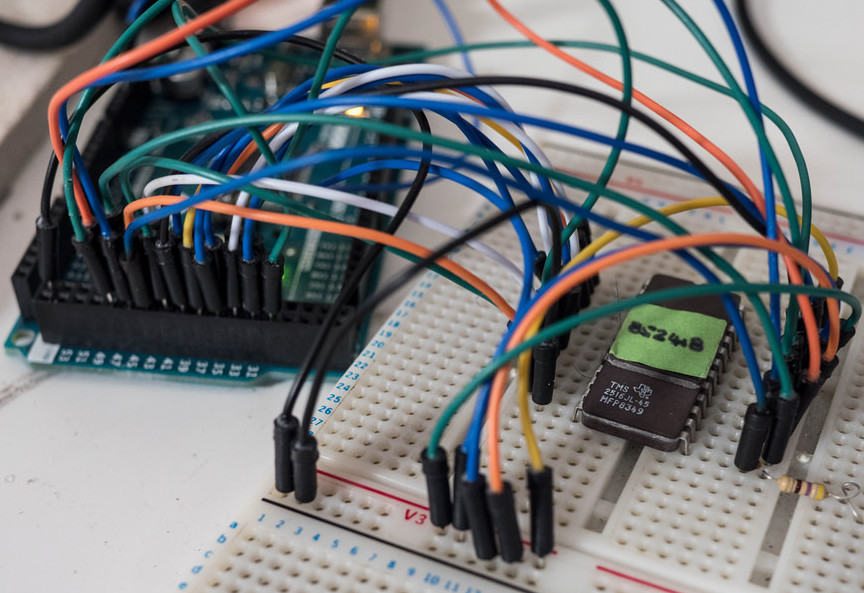
The microscope uses a mix of Texas Instruments 25L32 and 2516 chips, which [Benjamin] had to carefully pry out after making sure to document everything so he knew what went where. A few of the chips weren’t keen on being pulled from their home of 30-odd years, so there were a few broken pins, but on the whole the operation was a success.
Each chip was placed in a breadboard and wired up to an Arduino Mega, as it has enough digital pins to connect without needing a shift register. With the wiring fairly straightforward, [Benjamin] just needed to write up some code to read the contents of the chip, which he has graciously provided anyone else who might be working on a similar project. At this point he hasn’t found anything identifiable in his ROM dumps to prove that they’ve been made successfully, all he really knows right now is that he has something. At least it’s a start.
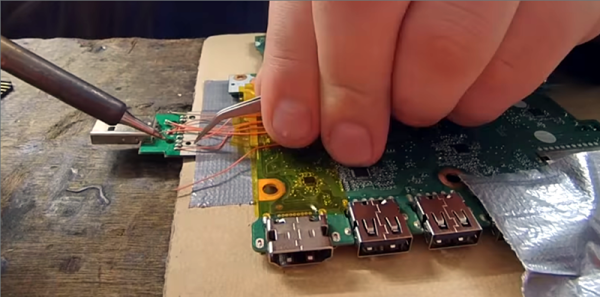
What happens when you drop your laptop in the pool? Well, yes, you buy a new laptop. But what about your data. You do have backups, right? No, of course, you don’t. But if you can solder like [TheRasteri] you could wire into the flash memory on the motherboard and read it one last time. You can see the whole exploit in the video below.
There’s really three tasks involved. First is finding the schematic and board layout for motherboard. Apparently, these aren’t usually available from the manufacturer but can be acquired in some of the seedier parts of the Internet for a small fee. Once you have the layout, you have to arrange to solder wires to the parts of the flash memory you need to access.
Frankencars are built from the parts of several cars to make one usable vehicle. [Jim Belosic] has crossed the (finish) line with his Teslonda. In the most basic sense, it is the body of a Honda Accord on top of the drive train of a Tesla Model S. The 1981 Honda was the make and model of his first car, but it wasn’t getting driven. Rather than sell it, he decided to give it a new life with electricity, just like Victor Frankenstein.
In accord with Frankenstein’s monster, this car has unbelievable strength. [Jim] estimates the horsepower increases by a factor of ten over the gas engine. The California-emissions original generates between forty and fifty horsepower while his best guess places the horsepower over five-hundred. At this point, the Honda body is just holding on for dear life. Once all the safety items, like seatbelts, are installed, the driver and passengers will be holding on for the same reason.
This kind of build excites us because it takes something old, and something modern, and marries the two to make something in a class of its own. And we hate to see usable parts sitting idle.
It should probably go without saying that we’ve got nothing against the occasional bout of elaborate troubleshooting and repair, in fact it’s one of the most common things we cover here. As it turns out, people aren’t overly fond of being fleeced, and there are a lot of smart people out there who will put a lot of work in to keep from having to toss a favorite piece of gear into the trash. We can’t fault them for that.
But we have to say, we generally don’t see those kind of elaborate repairs for something brand new. Unfortunately, that’s exactly what [Marek Baczynski] had to do when trying to review the new iRangeX transmitter for his YouTube channel “dronelab”. He found a transmitter that was so poorly designed and constructed that he had to address a laundry list of issues to make the thing halfway tolerable. As you might expect, he’s not suggesting anyone go run and pick this one up.
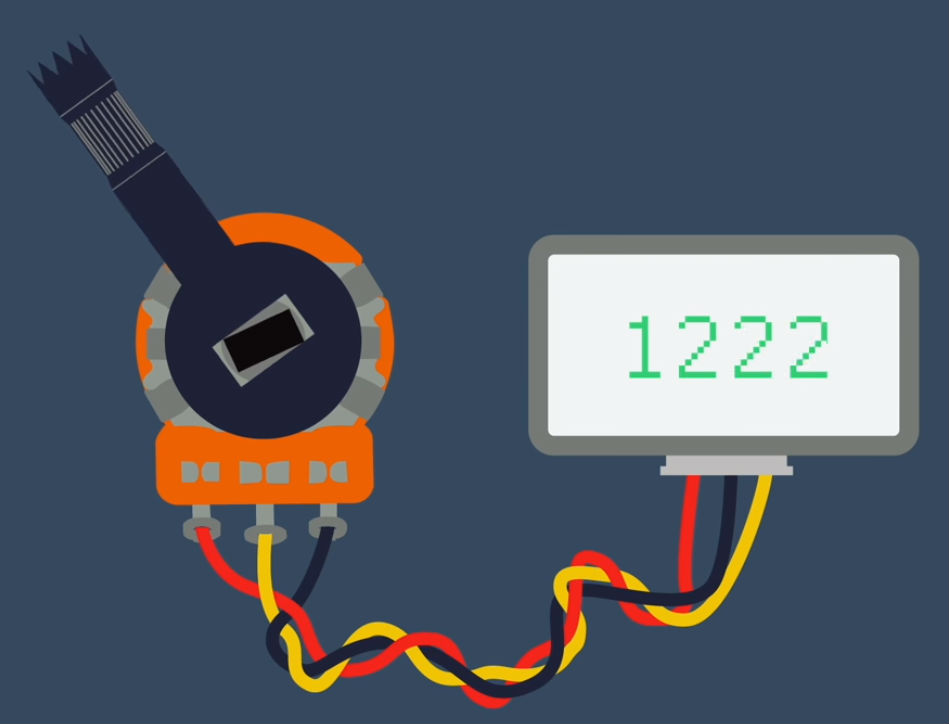
The biggest problem is a fundamental flaw with how the gimbals are constructed. Due to poorly mated surfaces between the potentiometer and the stick itself, the accuracy of the controller is very low. The potentiometers don’t even return to zero when the sticks are released. Some tape was used to tighten up the connection and make the controller usable, but such poor tolerances are hard to forgive when accurate control is essentially the whole point of the device.
The other issues took a bit more debugging to figure out. The TX made an absolutely terrible screeching sound when turned on, but [Marek] was sure he was hearing a little bit of melody under the din. Putting the signal through the oscilloscope, he was able to confirm his suspicions. As it turns out, the buzzer used in the TX has a built in tone generator that was overriding the intended melody. Switching it out for a basic buzzer fixed the issue. Similarly, an issue where the radio wouldn’t turn on if it was recently turned off was tracked back to a resistor of the wrong value. Putting a higher lower value resistor in its place sorted that out as well.
It’s hard to imagine how this device made it out of the factory with so many wrong or unsuitable components, but here we are. Not that this would be acceptable at any price point, but as [Marek] points out in the video, it isn’t as if this radio is even all that cheap. For nearly $90 USD, it doesn’t seem unreasonable to expect something that actually works.
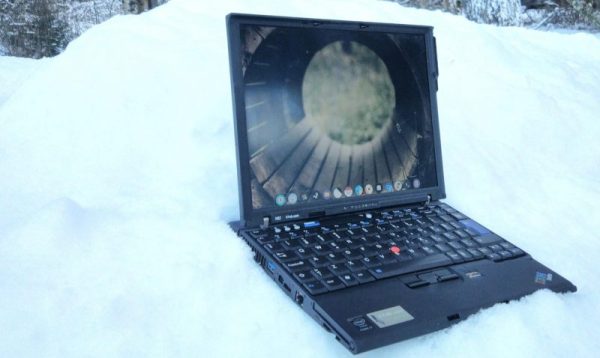
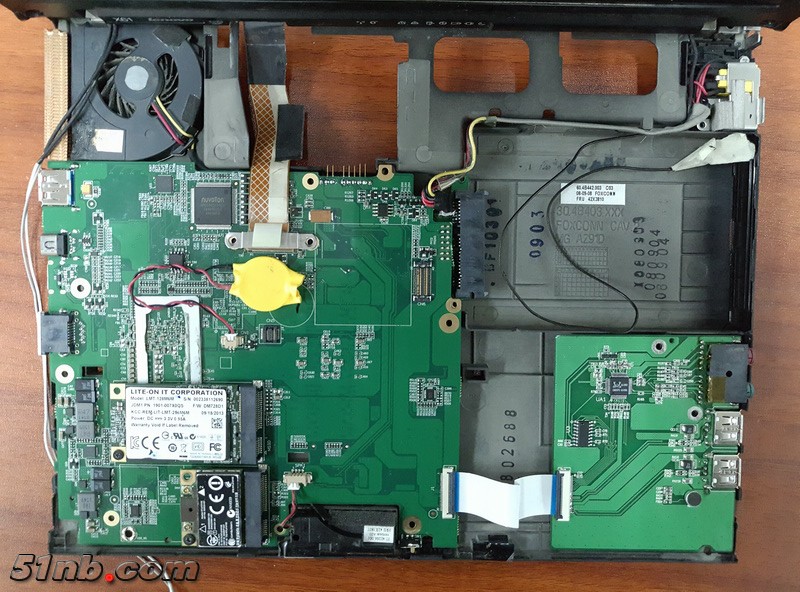
We often see people funneling their passion into keeping beloved devices in operation long past their manufacturer’s intent. These replacement Thinkpad motherboards (translated) bring old (yet beloved) Thinkpads a much desired processor upgrade. This is the work of the user [HOPE] on the enthusiast forum 51nb. The hack exemplifies what happens when that passion for legendary gear hits deep electrical expertise and available manufacturing. This isn’t your regular laptop refurbishment, [HOPE] is building something new.
ThinkPads are known for their zealous following (as our own [Brian Benchoff] underscored last year). Lenovo has steered the venerable brand into the future while the laptop market has drifted deeper and deeper into the wilds of tight integration at the expense of user modification. Along the way 4:3 screens were traded for media-friendly 16:9, TrackPoints were traded for trackpads, and the classic ThinkLight gave way to real keyboard backlights. These progressions left a shrinking but vocal group of old school Thinkpad enthusiasts — the cult of Thinkpad — clinging to beloved devices like 2007’s X61 and T60 ignored by a changing market.
In an astounding turn of ingenuity [HOPE] has revitalized these classic ThinkPads by entirely replacing their motherboards. And not just for one particular model, there are options available for at least 3 families of computers. The new devices are referred to by model numbers never used by IBM or Lenovo; the X60/61 motherboard makes an X62, the X200/201 motherboard makes an X210, and the T60 motherboard makes a T70. Depending on the customer’s preference either a bare motherboard or a fully assembled unit is available.
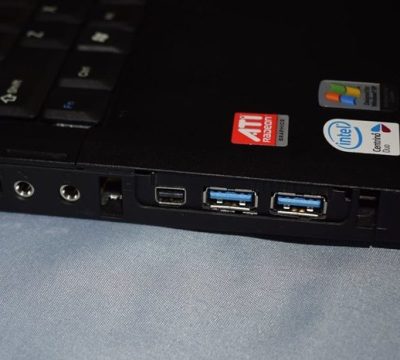
Classic stickers with non-classic ports
Depending on the exact model in question these motherboards slot directly into the original chassis but add recent generation Intel Core I processors, DDR4, USB 3.0/3.1, Thunderbolt 3 and more. Often they reuse the original heat sinks and fans, and expose these ports through the same chassis apertures the original motherboards used. Considering these machines are a decade older than the hardware being crammed inside them the level of integration is truly impressive. The end result looks like it could have come out of a Lenovo factory just before Spring Festival. If you look closely at the image at the top of this article, you might notice they even included an improved “Intel Inside” sticker on the palm rest and a model number label at the lower left of the display!
There is an implicit economic statement here that’s worth calling out. A motherboard for anything more significant than a basic microcontroller is an incredibly complicated piece of technology. When the bar is moved from “small ARM processor” up to “modern x86 system” this counts extra. Not only are they complex electrically but the fabrication processes required to physically create them are at the edge of what you’d find at your favorite cheap PCB fab house. We’re talking CPUs studded with about 1100 pins, DDR4 and PCI-E with extremely tight electrical timing requirements driving elaborate board layouts, and a plethora of off-board peripheral parts. On top of those constraints the board itself must be small enough to fit inside, not a purpose-built enclosure, but an existing laptop body with whatever combination of mounting brackets and connector placements Lenovo decided on. That a hobbyist (we assume) can make their own devices in this range to sell for $500-$700 is nothing short of astounding.
Fresh replacements being installed
This shouldn’t be possible. More accurately, it’s likely possible because there are other drivers which make the cost of PCB fabrication and assembly lower and more accessible than ever. The general march of technology certainly, but perhaps the presence of mobile devices and a desire to repair and improve them. After all and if the rumors are to be believed, anyone who can find the right Huaqiangbei stall can get the NAND replaced in their iPhone, a once complex process made simple.
It’s difficult to track the progression of each model as they are primarily covered on the 51nb forums (a Facebook page called [Lcdfans] makes some of the information available in English). However it’s possible to find hands-on information like [koobear]’s review on Reddit.
[Jason Gin] recently wrote in to tell us about his adventures replacing the eMMC storage chip on a cheap Windows tablet, and we have to say, it’s an impressive amount of work for a device which apparently only cost him $15. Surely much better pieces of hardware have been tossed in the trash for less serious failures than what ailed his DigiLand DL801W tablet. We’d love to see the lengths this guy would go to restore something a bit higher up the food chain.
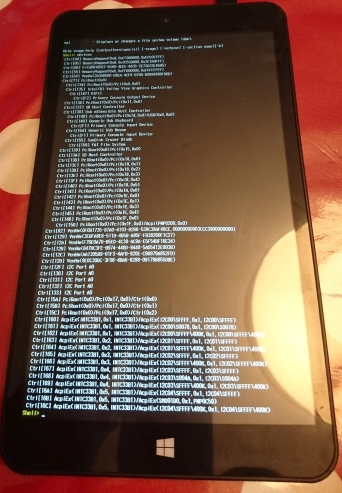
As any good hacker knows, you can’t fix the problem until you understand it. So the first step [Jason] took was to conduct some troubleshooting. The tablet would only boot to the EFI shell, which didn’t do him much good since there was no on-screen keyboard to interact with it. But he had the idea of trying to connect a USB keyboard via an OTG adapter, and sure enough that got him in. Once he was able to enter commands into the EFI shell, he attempted to read from a few different sectors of the eMMC drive, only to get the same nonsense repeating data. So far, not looking good.
But before he fully committed to replacing the eMMC drive, he wanted a second opinion. Using the same USB OTG adapter, he was able to boot the tablet into a Windows 10 environment, and from there got access to some drive diagnostic tools. The software reported that not only was the drive reporting to be half the appropriate size, but that writing to the chip was impossible.
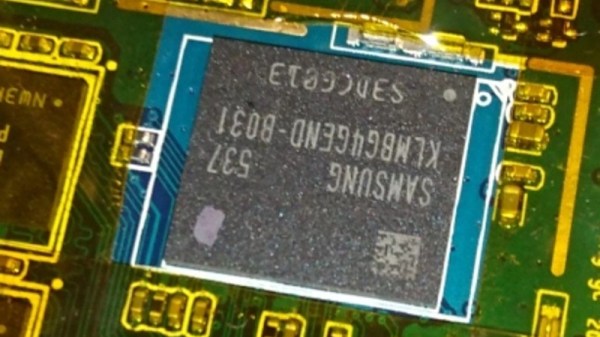
With the fate of the tablet’s Foresee NCEMBS99-16G eMMC chip now confirmed, [Jason] decided it was time to operate. After pulling the tablet apart and masking off the PCB with Kapton tape to protect it from the heat, he slowly went in with his hot air rework station to remove the failed chip. But rather than put another low-end chip in its place, he used this opportunity to replace it with a Samsung KLMBG4GEND-B031. Not only does this chip have twice the capacity of the original, it should be noticeably faster.
With the new Samsung eMMC chip installed, [Jason] put the tablet back together and was able to successfully install Windows 10 onto it. Another piece of tech saved from the big landfill in the sky.