How To Find Where A Wire In A Cable Is Broken

Determining that a cable has a broken conductor is the easy part, but where exactly is the break? In a recent video, [Richard] over at the Learn Electronics Repair channel on YouTube gave two community-suggested methods a shake to track down a break in a proprietary charging cable. The first attempt was to run a mains power detector along the cable to find the spot, but he didn’t have much luck with that.

The second method involved using the capacitance of the wires, or specifically treating two wires in the cable as the electrodes of a capacitor. Since the broken conductor will be shorter, it will have less capacitance, with the ratio theoretically allowing for the location of the break in the wire to be determined.

In the charging cable a single conductor was busted, so its capacitance was compared from both sides of the break and compared to the capacitance of two intact conductors. The capacitance isn’t much, on the order of dozens to hundreds of picofarads, but it’s enough to make an educated guess of where the rough location is. In this particular case the break was determined to be near the proprietary plug, which ruled out a repair as the owner is a commercial rental shop of e-bikes.

To verify this capacitor method, [Richard] then did it again on a piece of mains wire with a deliberate cut to a conductor. This suggested that it’s not a super accurate technique as applied, but ‘good enough’. With a deeper understanding of the underlying physics it likely can be significantly more accurate, and it’s hardly the only way to find broken conductors, as commentators to the video rightly added.

Continue reading “How To Find Where A Wire In A Cable Is Broken”

Fixing a hoodie zipper with a drinking straw and hot glue.

Hack That Broken Zipper!

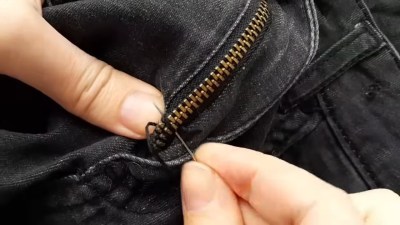
We’ve all been there. That sad day when the zipper on our favorite hoodie, bag, or pair of pants breaks in some seemingly irreparable way. But there is hope, and [Magic Stitches] is gonna show you how to make some common repairs using household items and, in some cases, just a little bit of easy hand sewing. After a warm up with a kitchen fork, the video moves on to more significant problems.

The first problem — a chewed-away zipper bottom — is quite common, but requires no sewing to fix. As you’ll see in the video below, all it takes is a drinking straw, some hot glue, a lighter, and a pair of scissors to recreate the plastic bit that keeps the zipper from splitting in twain.

Sewing the teeth of a zipper together after cutting the tape just enough to slide the head back on. Now the second issue concerns a pair of pants wherein the head has come off the static side of the zipper. This one seems impossible to fix, but [Magic Stitches] cuts into the static side about five teeth from the bottom, slides the head back on, and sews the bottom of the zipper together.

This one we take a little bit of an issue with, because it assumes that you can get your jeans on over your hips without needing the zipper head to be fully down. But what else are you going to do but throw the jeans away upcycle the jeans into a fanny pack or something to immortalize them?

Continue reading “Hack That Broken Zipper!”

Repairing An Old Heathkit ‘Scope

With so many cheap oscilloscopes out there, the market for old units isn’t what it used to be. But if you have a really old scope, like the Heathkit O-10 that [Ken] found in his basement, there is vintage cred to having one. [Ken’s] didn’t work, so a repair session ensued. You can see the results in the video below.

You can tell this is in an old scope — probably from the mid 1950s — because of its round tube with no graticle. Like many period scopes, the test probe input was just 5-way binding posts. The O-10 was the first Heathkit “O-series” scope that used printed circuit boards.

The device looked pretty good inside, except for a few dents. Of course, the box has tubes in it, so every power up test involves waiting for the tubes to warm up. [Ken] was very excited when he finally got a single green dot on the screen. That did, however, require a new CRT.

It wasn’t long after that he was able to put a waveform in and the scope did a good job of reproducing it. The unit would look good in an old movie, but might not be the most practical bench instrument these days.

These Heathkit scopes and their cousins were very popular in their day. The $70 price tag sounds cheap, but in the mid-1950s, that was about a month’s rent in a four-room house. While primitive by today’s standards, scopes had come a long way in 9 or 10 years.

Continue reading “Repairing An Old Heathkit ‘Scope”

The FTC Take Action, Is Time Finally Up For John Deere On Right To Repair?

Over the last decade we have brought you frequent reports not from the coolest of hackerspaces or the most bleeding edge of engineering in California or China, but from the rolling prairies of the American Midwest. Those endless fields of cropland waving in the breeze have been the theatre for an unlikely battle over right to repair, the result of which should affect us all. The case of FEDERAL TRADE COMMISSION, STATE OF ILLINOIS, and STATE OF MINNESOTA, v. DEERE & COMPANY  relates to the machinery manufacturer’s use of DRM to restrict the repair of its products, and holds the promise to end the practice once and for all.

This is being written in Europe, where were an average person asked to name a brand that says “America”, they might reach for the familiar; perhaps Disney, McDonalds, or Coca-Cola. These are the flag-bearers of American culture for outsiders, but it’s fair to say that none of them can claim to have built the country. The green and yellow Deere tractors on the other hand represent the current face of a company with nearly two hundred years of farming history, which by virtue of producing some of the first mass-produced plows, had perhaps the greatest individual role in shaping modern American agriculture and thus indirectly the country itself. To say that Deere is woven into the culture of rural America is something of an understatement, agricultural brands like Deere have an enviable customer base, the most loyal of any industry.

Thus while those green and yellow tractors are far from the only case of DRM protected repairability, they have become the symbolic poster child for the issue as a whole. It’s important to understand then how far-reaching it is beyond the concerns of us technology and open-source enthusiasts, and into something much more fundamental. Continue reading “The FTC Take Action, Is Time Finally Up For John Deere On Right To Repair?”

Repairing A Samsung 24″ LCD Monitor With Funky Color Issues

The old cable in place on the Samsung monitor. (Credit: MisterHW)

Dumpster diving is one of those experiences that can net you some pretty cool gear for a reasonable price. Case in point the 24″ Samsung S24E650XW LCD monitor that [MisterHW] saved from being trashed. Apparently in very good condition with no visible external damage, the unit even powered up without issues. It seemed like a golden find until he got onto the Windows desktop and began to notice quaint red shimmering in darker areas and other issues that made it clear why the monitor had been tossed. Of course, the second best part about dumpster diving is seeing whether you can repair such issues.

Prior to disassembly it had been noted that percussive maintenance and bending of the frame changed the symptoms, suggesting that something was a bit loose inside. After taking the back cover and shielded enclosure off, a quick visual inspection of the boards and cables quickly revealed the likely suspect: broken traces on one of the cables.

Apparently somewhere during the assembly step in the factory the cable had been pushed against the PCB’s edge, causing the initial damage. Based on the listed assembly date the monitor had only been in use for a few years before it was tossed, so likely the symptoms would have begun and worsened as one after another of the traces gradually cracked and broke due to vibrations, thermal expansion, etc.

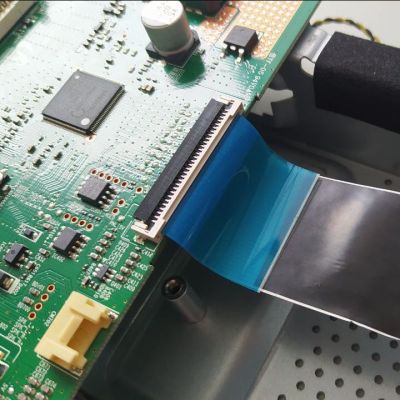
This issue made fixing the monitor very simple, however, assuming a suitable replacement cable could be found. The broken cable is a 30P 1.0 pitch PFC, with EBay throwing up a cable with similar specs for a Thomson brand TV. One purchase and anxious wait later, the replacement cable was installed as in the featured image alongside the old cable. Perhaps unsurprisingly it restored the monitor to full working order, demonstrating once again that dumpster diving is totally worth it.

Repairing A Real (and Broken) Apollo-era DSKY

Presumably the same DSKY unit installed in the simulator at MIT.

The Display/Keyboard unit – DSKY for short – is the primary way that Apollo-era astronauts communicated with the onboard computers. Not all DSKYs ended up in space, however, with the MIT hosting a simulator that features one of these units. Unfortunately the unit that ended up at [CuriousMarc]’s lab had seen better days, with the assumption being that it was the same DSKY that was installed in a photo of the old simulator. In addition to the busted EL display and two (improper) replacement keys, the insides show signs of damaged modules and possibly worse.

Without bothering to hook the unit up to the (previously restored) guidance computer, a full teardown was begun to assess the full extent of the damage. Considering that the DSKY uses latching relays for memory and two modules were ominously marked as being defective, this made for a tense wait as the unit was disassembled.

Fortunately making new DSKY-style EL displays has first been replicated in 2019, meaning that a replacement is possible. Perhaps surprisingly, the busted display still fires up in the test rig, as a testament to how robust the technology is. At the end of the teardown, the assessment is that the unit can be restored to its original condition, which will be done in the upcoming videos in this series.

Continue reading “Repairing A Real (and Broken) Apollo-era DSKY”

Broken USB Lamp Saved With A Bit Of Woodworking

For many of us, when we think of creating a custom enclosure, our minds immediately go towards our 3D printer. A bit of time in your CAD program of choice, and in an hour (or several), you’ve got a bespoke plastic box. A hacker’s dream come true.

But extruded plastic is hardly perfect. For one thing, you might want a finished piece that looks a little more attractive on your desk. Which is why we appreciate this quick hack from [Tilma]. When faced with a broken LED light and minimal equipment, he decided to transplant the repaired electronics into a scratch-built wooden frame that not only looks better than the original, but is more functional.

Continue reading “Broken USB Lamp Saved With A Bit Of Woodworking”