Are you tired of the same old video style from your favorite content creators? We can’t say that we were, exactly. But nevertheless, we appreciate this creative departure from [Eric Strebel]’s regular fare as he soups up his drill press with an old treadmill motor and a few extra features.
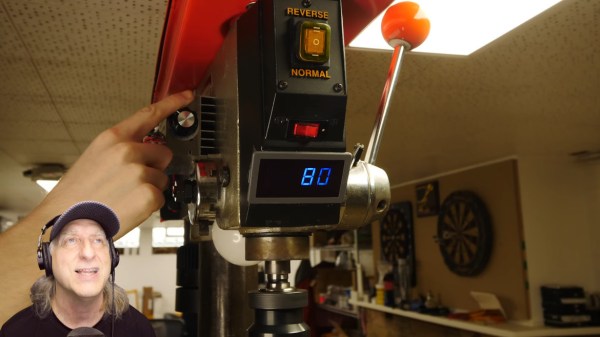
First off, that commentator in the video is right — 2.6 horsepower is a crazy amount for a drill press. Fortunately, [Eric] also added a variable speed controller and a digital tachometer to keep things in check. As an added bonus, he no longer has to get under the hood and mess with the belts.
We like what [Eric] brings to the drill press motor mod, which is already well-documented on YouTube. We love the re-use of an office chair bracket as a new motor mount. It’s probably our favorite bit aside from the 2-color forward/reverse switch plate idea: print it in whatever letter color you want with proud lettering, paint the whole thing black, and sand off the letters so the color shows. Check it out after the break.
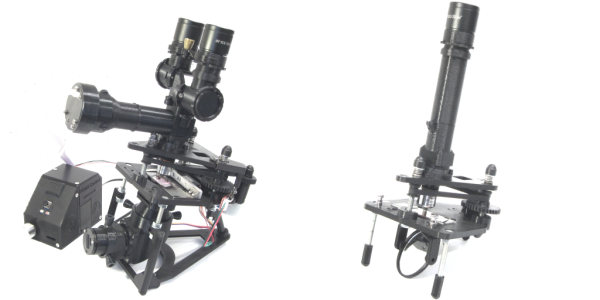
What do you get when you cross a day job as a Medical Histopathologist with an interest in 3D printing and programming? You get a fully-baked Open Source microscope, specifically the Portable Upgradeable Modular Affordable (or PUMA), that’s what. And this is no toy microscope. By combining a sprinkle of off-the-shelf electronics available from pretty much anywhere, a pound or two of filament, and a dash of high quality optical parts, PUMA cooks up quite possibly one of the best open source microscopy experiences we’ve ever tasted.
GitHub user [TadPath] works as a medical pathologist and clearly knows a thing or two about what makes a great instrument, so it is a genuine joy for us to see this tasty project laid out in such a complete fashion. Many a time we’ve looked into an high-profile project, only to find a pile of STL files and some hard to source special parts. But not here. This is deliberately designed to be buildable by practically anyone with access to a 3D printer and an eBay account.
The project is not currently certified for medical diagnostics use, but that is likely only a matter of money and time. The value for education and research (especially in developing nations) cannot really be overstated.
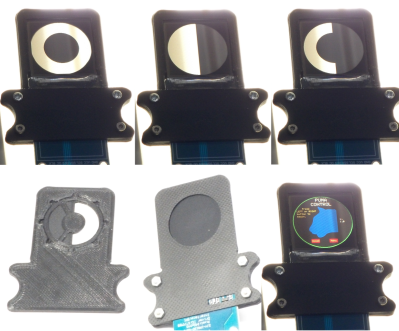
A small selection of the fixed and active aperture choices
The modularity allows a wide range of configurations from simple ambient light illumination, with a single objective, great for using out in the field without electricity, right up to a trinocular setup with TFT-based spatial light modulator enabling advanced methods such as Schlieren phase contrast (which allows visualisation of fluid flow inside a live cell, for example) and a heads-up display for making measurements from the sample. Add into the mix that PUMA is specifically designed to be quickly and easily broken down in the field, that helps busy researchers on the go, out in the sticks.
The GitHub repo has all the details you could need to build your own configuration and appropriate add-ons, everything from CAD files (FreeCAD source, so you can remix it to your heart’s content) and a detailed Bill-of-Materials for sourcing parts.
We covered fluorescence microscopy before, as well as many many other microscope related stories over the years, because quite simply, microscopes are a very important topic. Heck, this humble scribe has a binocular and a trinocular microscope on the bench next to him, and doesn’t even consider that unusual. If you’re hungry for an easily hackable, extendable and cost-effective scope, then this may be just the dish you were looking for.
Good dental hygiene is the first line of defense when it comes to your health, and– you’re already bored, aren’t you? It’s totally true, though. Take care of your teeth, and the rest of you has a better chance of staying fairly healthy.
This is like, the one thing we have control over after diet and exercise, and most people just plain fail on this front. They brush for 30 seconds, tops. Or they rarely floss. Maybe they’ve never even considered brushing or scraping their tongue.
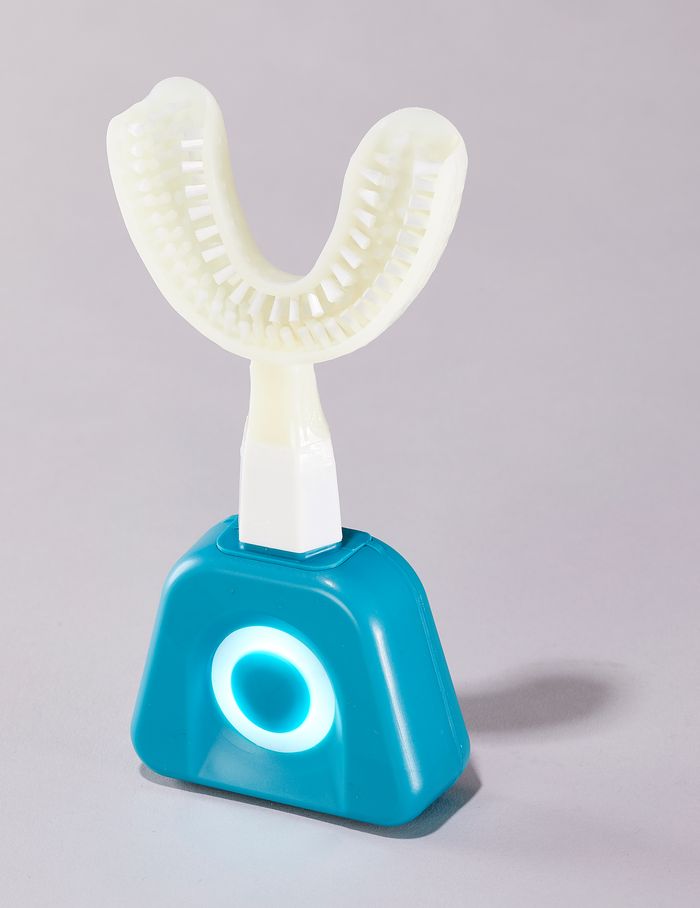
Okay, fine. You don’t want to spend the recommended two minutes twice a day working the brush around your mouth. The good news is, technology has finally caught up with you and your habits, if you can call them that. How about using something that can truly be called a teethbrush? As in, it brushes all of your teeth at once? Well, half of your teeth anyway. Allegedly, you can spend as little as 10 seconds on each arch and effectively scour your smile — that’s because the thing vibrates at an astonishing 40,000 per minute or so.
Sounds kind of scary, doesn’t it? Wait ’til you hear how much they cost. One brand is $150 off the bat, and replacement heads are close to $40 each, although they’re supposed to last for six months each (eww!). Most of them have some fancy extras that make the cost more palatable, such as a tooth-whitening mode.
What do you think? Would you use a teethbrush? We’re still on the fence. It could be interesting to develop our own, but you have to crawl before you can run. Guess we’ll start with a manual.
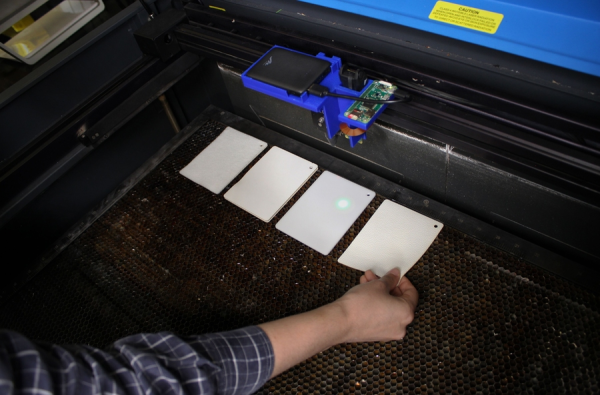
Come on now, admit it. You’ve done it. We’ve done it. You know — you were really sure that sheet of plastic stock you found lying around the hackerspace was acrylic right? You dialled in the settings, loaded the design, set the focus and pushed the little green ‘start’ button. Lots of black smoke, fire, and general badness ensued as you lunged for the red ‘stop’ button, before lifting the lid to work out how you’re going to clean this one up.
The technique makes use of so-called ‘speckle imaging’ where a material illuminated by a laser will produce a unique pattern of reflected spots, or speckles into a camera. By training a deep neural model with a large set of samples, it was found possible to detect up to 30 types of material with 98% accuracy.
The pre-baked model runs on a Raspberry PI zero with an off-the-shelf camera all powered from a power bank. This allows the whole assembly to simply drop onto an existing laser cutter head, with no wiring needed.
Even if you’re a seasoned laser cutter user, with a well-controlled stock pile, the peace-of-mind this could give would definitely be worth the effort. A more detailed description and more videos may be found by reading the full paper. Here’s hoping they release the system as open source, one day in the not-to-distant future. If not, then, you know what to do :)
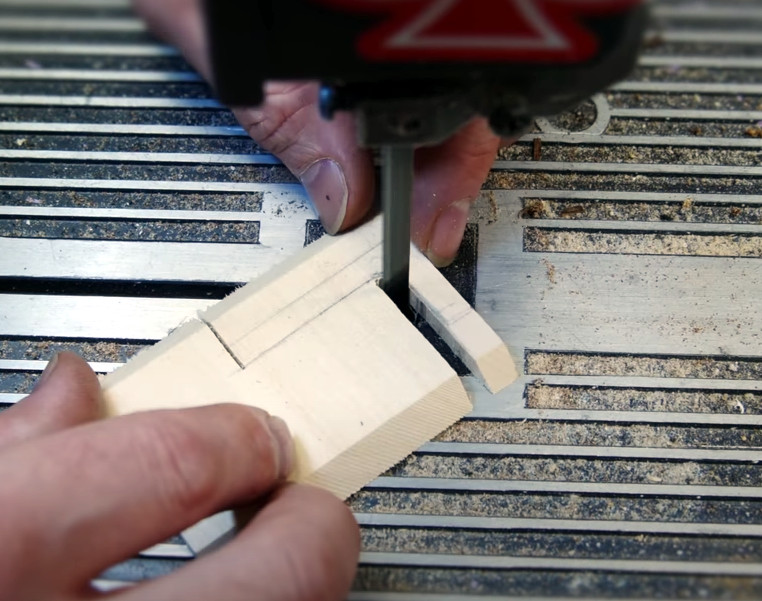
The first video assumes you’re a lumber neophyte, and goes over topics such as the different species of wood you’re likely to find at the hobby shop, proper sanding technique, and the differences between cutting with and against the grain. Some of the different cutting tools you can use are also covered, ranging from the humble hobby knife to the band saw. As always, [Eric] sprinkles the video with tips and tricks gained from his considerable professional experience, such as using some glue and a bit of sawdust to fill in any gaps left behind by an uneven joint.
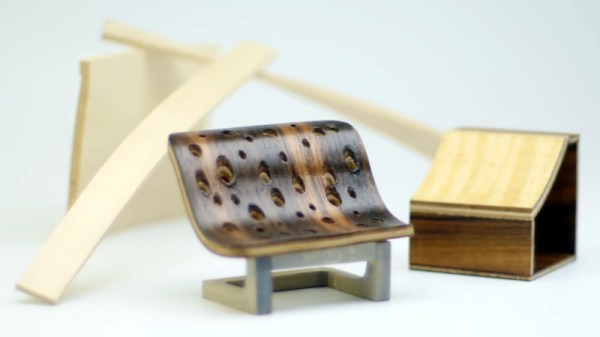
In the second video, things start getting more advanced. [Eric] demonstrates how you can create custom laminates, and how wood can be permanently bent into arbitrary shapes with sufficient steam and clamping pressure. By combining these new techniques with the basic concepts covered in the first video, surprisingly complex shapes can be formed with minimal effort.
[Eric] previously put together a similar series of videos on working with acrylic, a material that’s arguably far more familiar to the Hackaday readership. But whatever material you use, the takeaway message from this series is clear: get the right tools, learn the techniques, and professional results are well within your reach.
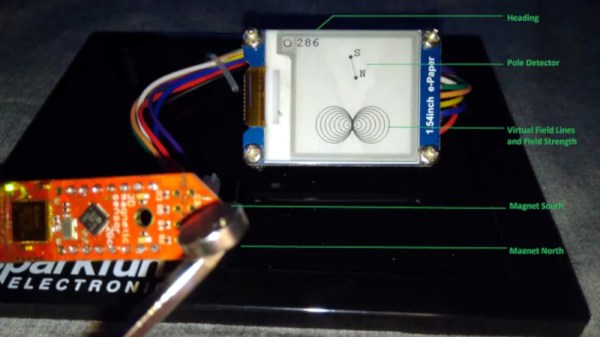
The average Hackaday reader likely knows, at least in the academic sense, what a magnetic field looks like. But as the gelatinous orbs in our skull can perceive only a tiny fraction of the EM spectrum, we have to take those textbook diagrams at face value. That is, unless you’ve got one of these nifty magnetic field visualizers developed by [Dr.Stone].
Using an XMC1100 microcontroller development board and a TLV49 3D magnetic sensor, the device is able to track the poles of a magnet in real-time and produce an approximation of what the field lines would look like on its electronic paper display. Relative field strength is indicated by the size of the visualization, which allows the user to easily compare multiple magnets. Incidentally, [Dr.Stone] notes that the current version of the hardware and software can only handle one magnet at a time; visualizing complex magnetic fields and more than two poles would take an array of sensors and likely a more powerful processor.
Do you need to visualize the field lines around a magnet? Perhaps not. But being able to quickly get an idea of how strong a magnet is and identify where its poles are could certainly come in handy. We’d like to see [Dr.Stone] take the project to the next phase and turn this into a handheld device for convenient workbench use. It would be a lot less messy than some of the previous methods we’ve seen for visualizing magnetic fields, though if you’re only worried about field strength, there’s arguably more straightforward ways to display it.
3D scanners aren’t cheap, and the last thing you want to see after purchasing one is bad data. But that’s what [Dave Does] and others were getting from their Revopoint POP scanners until some communal brainstorming uncovered the reason: the motorized turntable that came with the Kickstarter edition of the product was spinning too fast for the software to accurately keep track of the object. So he decided to replace the stepper motor controller in his turntable and document the process for anyone else who’s scanner might be struggling.
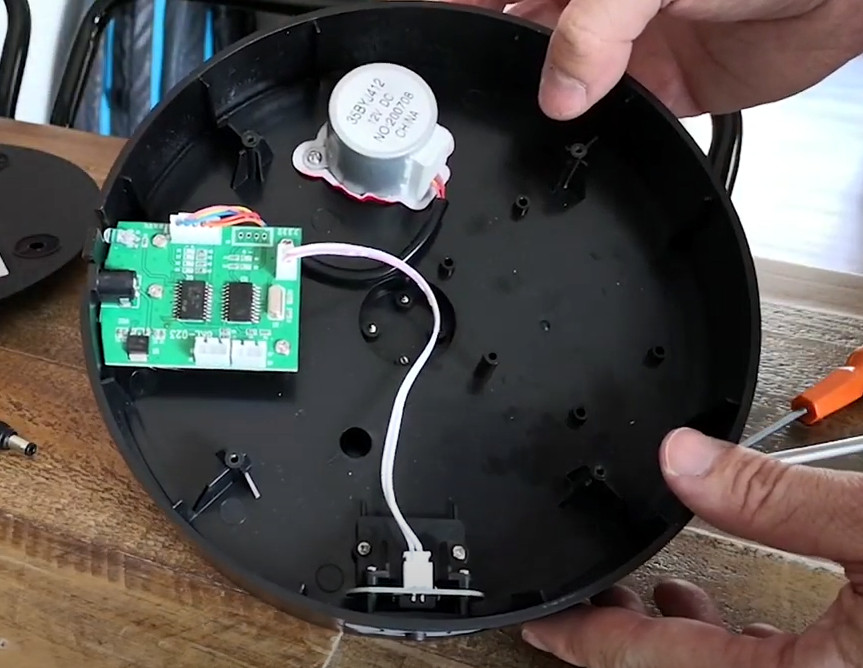
Plenty of room for expansion.
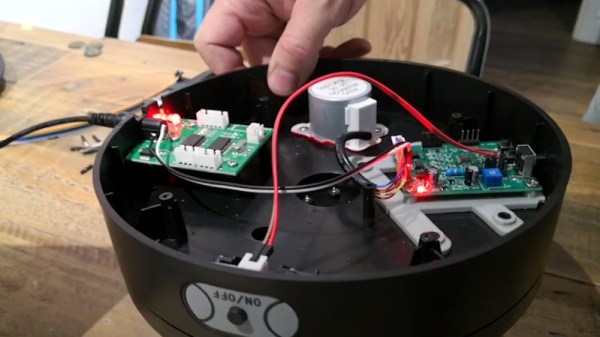
In the video below, [Dave] pops open the plastic case of the turntable and reveals a pretty sparse interior. There’s an incredible amount of empty space inside, and even some mounting studs to screw down new components, should you want to get into some hardcore upgrades. But for his purposes, a generic stepper motor controller that featured a potentiometer to adjust the speed was enough. He found a suitable board online for around $5 USD, and got to designing a 3D printed bracket that mates up to the existing screw holes on the turntable.
But it’s not exactly a drop-in replacement. For one thing, you’ve got to pop a hole in the side of the enclosure for the potentiometer knob to stick out of. You’ve also got to solder wires coming from the original DC jack and power switch to the new board to get it hooked up, but at least the motor plugs right in. In the video below, you can see [Dave] demonstrate the impressively deep throttle capability of the new driver.