Hardware Keymapper Routes Through Raspberry Pi

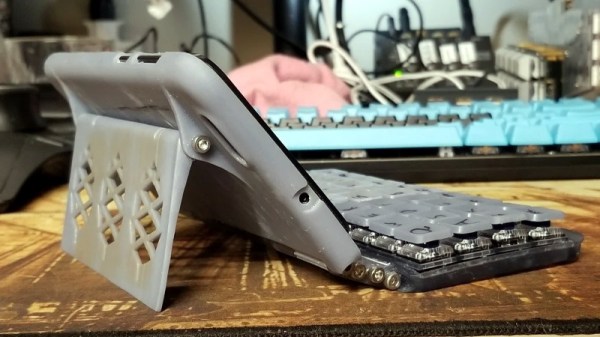
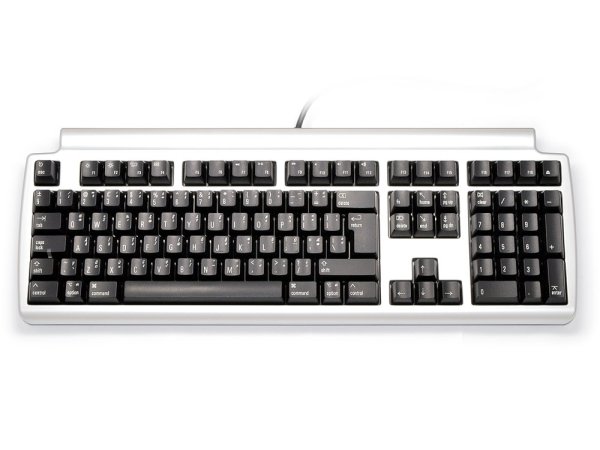
There are a lot of keyboards to choose from, and a quick trip through some of the forums will quickly show you how fanatical some people can be about very specific styles or switches. [Crdotson] doesn’t seem to be too far down the rabbit hole in that regard, but he does have a keyboard that he really likes despite one small quirk: it’s built for Mac, and some of the modifier keys aren’t laid out correctly for Windows. Since Windows has limited (and poor) options for software keymapping, he took an alternative route and built a keymapper in hardware instead.

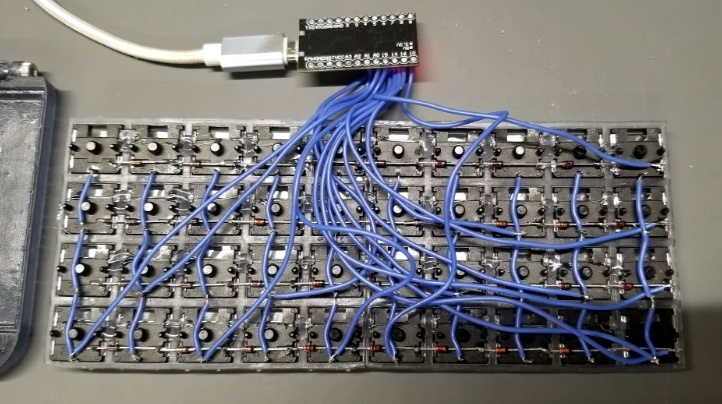
The build uses a Raspberry Pi as a go-between from the keyboard to his computer. The Pi watches the USB bus using usbmon, which allows inspection of the packets and can see which keys have been pressed. It then passes those keypresses through to the computer. His only modification to the keyboard mapping is to swap the Alt and Super (Windows) keys for his keyboard of choice, although using this software would allow any other changes to be made as well. Latency is only on the order of a few microseconds, which is not noticeable for normal use cases.

While we have seen plenty of other builds around that can map keyboards in plenty of custom ways, if you don’t have the required hardware for a bespoke solution it’s much more likely that there’s a Raspberry Pi laying around that can do the job instead. There are a few issues with the build that [crdotson] is planning to tackle, though, such as unplugging the device while a key is being pressed, which perpetually sends that keystroke to the computer without stopping. But for now it’s a workable solution for his problem.

FTDI VCP Chips With Custom PIDs Not Working On MacOS 11 Big Sur

An anonymous reader pinged us about an issue that affects people who jumped onto the latest-and-greatest OS from the Apple gardens: USB devices that stop working due to the FTDI-based USB solution. At its core appears to be that the built-in FTDI driver provided by Apple (AppleUSBFTDI.dext) only supports FTDI chips which provide the standard FTDI vendor and product ID (e.g. 0x0403 and 0x6001 respectively for the FT232R). Many products however set a custom product ID (PID) to differentiate their device, though in the thread some mention that there are driver issues even with the default VID/PID combination.

Over the past years, Apple has been restricting and changing the way kernel extensions (KExt) and driver extensions (DExt) are handled. As these FTDI chips are often used for virtual com port (VCP) purposes, such as with Arduino boards and USB-TTL adapters, this is a rather cumbersome issue that would affect anyone using Big Sur in combination with such a hardware device.

So far only the FTDI team has been somewhat responsive based on the support forum thread, with Apple seemingly rather silent on the issue.

PinePhone Gets 3D Printed Mechanical Keyboard

Do you remember when smartphones had real physical keyboards? Working the command line on some remote machine over SSH was a breeze, and you could even knock out a few lines of code if you were so inclined. But these days you’ve either got to lug around an external keyboard, or suffer through pecking out a few words per minute on a piece of glass. Doesn’t sound much like progress to us.

By the looks of it, [James Williams] doesn’t think so either. He’s designed a physical keyboard add-on that snaps onto the back of the PinePhone to deliver a proper, albeit condensed, typing experience. This is no repurposed BlackBerry board either; he’s created a custom mechanical keyboard that manages to fold into an incredibly small size thanks to resin printed keycaps and Kailh low profile switches. Other than the hand-drawn legends, it’s probably not a stretch to say this is a better keyboard than what many people have on their actual computers.

In addition to the 3D printed frame and Kailh switches, there’s also an Arduino Pro Micro onboard to communicate with the phone. Rather than use USB, the keyboard is wired to the I2C accessory port on the rear of the PinePhone. It sounds like [James] needs a little more time to polish his QMK build before its ready to release, so you might want to wait a bit before you start printing off your own copy of the parts.

Those following along with the development of the PinePhone know there’s supposedly an official keyboard accessory in the works, but who wants to wait when we’re so close to mobile Linux nirvana? Besides, we doubt it will be nearly as pleasant to type on as the board [James] has put together.

NSF Releases Video Of Arecibo’s Final Moments

Today the National Science Foundation released a pair of videos that document the collapse of the Arecibo Observatory with incredible detail. A wide shot, apparently taken from the Visitors Center, shows the 900 ton instrument platform breaking free and swinging on the remaining support cables until it smashes into the edge of the dish. The second clip, recorded by an airborne drone, is focused directly on the cables as they failed. Both can be seen in the video embedded below.

Together, they produce an invaluable visual record of what finally brought the iconic radio telescope down. As was predicted by engineers earlier in the month, the failure of another support cable on tower 4 triggered a chain reaction that brought the entire platform crashing down onto the 305 meter reflector. Footage from a drone observing the top of tower 4 shows that the entire sequence, from the first visual wire break to the remaining cables being torn from their mounts, only took five seconds. While some initially doubted the NSF’s determination that it was too dangerous to repair Arecibo, this footage seems to prove just how tenuous the structural integrity of the Observatory really was.

A drone captured the critical cable failure.

These videos will hopefully help investigators who still need to determine why the cables failed in the first place. The cable in August didn’t snap, it simply pulled lose from its mount. It was suspected that the cable may have been incorrectly installed, but as it was only a backup, the situation was not seen as critical. But when the second cable failed in November it was found to have snapped at just 60% of its minimum breaking strength.

This immediately called into question the condition of the remaining cables, and ultimately lead to the decision by the NSF to proceed with a controlled demolition of the Observatory that would preserve as much of the scientific equipment as possible. Unfortunately, the remaining cables didn’t last long enough to put that plan into action.

Continue reading “NSF Releases Video Of Arecibo’s Final Moments”

Underwater Drone Faces Trial By Water

Underwater Remote Operated Vehicles, or ROVs as they’re typically known, generally operate by tether. This is due to the poor propagation of radio waves underwater. [Simon] wanted to build such a drone, but elected to go for an alternative design with less strings attached, so to speak. Thus far, there have been challenges along the way. (Video, embedded below.)

The underwater drone uses a 3D printed chassis, replete with googly eyes that go a long way to anthropomorphizing the build. Four motors are used for control, with two for thrust in the horizontal plane and two mounted in the vertical plane for attitude control. This allows the drone to be set up at neutral buoyancy, and moved through the water column with thrust rather than complicated ballast mechanisms. The build aims to eschew tethers, instead using a shorter cable to link to a floating unit which uses radio to communicate with the operator on the shore.

The major struggle facing the build has been sealing the chassis against water ingress. This is where the layered nature of 3D printing is a drawback. Even with several treatments of paint and sealant, [Simon] has been unable to stop water getting inside the drone. Further problems concern the excess amount of ballast required to counteract the drone’s natural buoyancy due to displacement.

Regardless of the struggles, we look forward to seeing the next revision rectify some of the shortcomings of the current build. We’re sure [Simon’s] experience building an electric surfboard will come in handy. Video after the break.

Continue reading “Underwater Drone Faces Trial By Water”

Remoticon Video: Circuit Sculpture Workshop

Circuit Sculpture was one of our most anticipated workshops of Hackaday Remoticon 2020, and now it’s ready for those who missed it to enjoy. A beginning circuit sculptor could hardly ask for more than this workshop, which highlights three different approaches to building firefly circuit sculptures and is led by some of the most prominent people to ever bend brass and components to their will — Jiří Praus, Mohit Bhoite, & Kelly Heaton.

For starters, you’ll learn the different tools and techniques that each of them uses to create their sculptures. For instance, Kelly likes to use water-based clay to hold components in specific orientations while forming the sculpture and soldering it all together. Jiří and Mohit on the other hand tend to use tape. The point is that there is no right or wrong way, but to instead have all of these tips and tricks under your belt as you sculpt. And that’s what this workshop is really about.

Continue reading “Remoticon Video: Circuit Sculpture Workshop”

Crossed Wires Crash Rockets

On November 17th, a Vega rocket lifted off from French Guiana with its payload of two Earth observation satellites. The booster, coincidentally the 17th Vega to fly, performed perfectly: the solid-propellant rocket engines that make up its first three stages burned in succession. But soon after the fourth stage of the Vega ignited its liquid-fueled RD-843 engine, it became clear that something was very wrong. While telemetry showed the engine was operating as expected, the vehicle’s trajectory and acceleration started to deviate from the expected values.

There was no dramatic moment that would have indicated to the casual observer that the booster had failed. But by the time the mission clock had hit twelve minutes, there was no denying that the vehicle wasn’t going to make its intended orbit. While the live stream hosts continued extolling the virtues of the Vega rocket and the scientific payloads it carried, the screens behind them showed that the mission was doomed.

Displays behind the hosts clearly showed Vega wasn’t following the planned trajectory.

Unfortunately, there’s little room for error when it comes to spaceflight. Despite reaching a peak altitude of roughly 250 kilometers (155 miles), the Vega’s Attitude Vernier Upper Module (AVUM) failed to maintain the velocity and heading necessary to achieve orbit. Eventually the AVUM and the two satellites it carried came crashing back down to Earth, reportedly impacting an uninhabited area not far from where the third stage was expected to fall.

Although we’ve gotten a lot better at it, getting to space remains exceptionally difficult. It’s an inescapable reality that rockets will occasionally fail and their payloads will be lost. Yet the fact that Vega has had two failures in as many years is somewhat troubling, especially since the booster has only flown 17 missions so far. A success rate of 88% isn’t terrible, but it’s certainly on the lower end of the spectrum. For comparison, boosters such as the Soyuz, Falcon 9, and Atlas have success rates of 95% or higher.

Further failures could erode customer trust in the relatively new rocket, which has only been flying since 2012 and is facing stiff competition from commercial launch providers. If Vega is to become the European workhorse that operator Arianespace hopes, figuring out what went wrong on this launch and making sure it never happens again is of the utmost importance.

Continue reading “Crossed Wires Crash Rockets”