Create PCBs In Just Minutes With This Awesome Spray Etching Machine

pcb-sprayer

If you have ever produced your own PCBs at home, you know that it can be somewhat of a time consuming process. Spending 20 or so minutes manually agitating a board is a drag, and while aquarium bubbler setups improve the process, they are far from ideal. [Christian Reed] knew that if he really wanted to streamline his PCB production he had to emulate the big boys and build a PCB sprayer of his own.

His spray etcher is contained in a custom acrylic case built mostly of scraps from previous projects. It contains two compartments – one for spraying etchant on the PCBs, and another for rinsing the finished work. The system is impressive to say the least, featuring a maze of tubes and piping which allow him to etch boards and manage his chemicals with ease.

[Christian] says that although the parts list might seem daunting at first, it really is pretty easy to assemble the device. Seeing as he can etch and wash a board in about two minutes flat, we think that any amount of effort would be worth the results.

[Christian] points out that he was unable to find a guide for building this type of PCB sprayer anywhere online, so he documented the process in painstaking detail in order to make it as easy as possible to replicate his work. Be sure to check out the video below to see his etch tank in action – we’re pretty sure it will have you itching to build one this weekend.

Continue reading “Create PCBs In Just Minutes With This Awesome Spray Etching Machine”

ElectroDroid – Your Android Electronic Reference App

Earlier this week, fellow Hack a Day-er [Mike Nathan] reviewed Adafruit’s new iPhone/iPad app Circuit Playground. The comments on [Mike]’s review turned to suggesting ElectroDroid as an alternative to Circuit Playground. Surprisingly,  Hack a Day authors actually pay attention to the comments, so I’ve decided to throw my hat into the ring and offer up my review of ElectroDroid. For purposes of full disclosure, I have to add that I paid the $2.59 donation for a copy of ElectroDroid without ads, and have had no contact with the developers.

Continue reading “ElectroDroid – Your Android Electronic Reference App”

ultimate-breadboard

The Ultimate Breadboard – A Prototyping Station That Has It All

[Claudio] was working on a homebrew oscilloscope project when he started thinking about how unsuitable a standard breadboard is for a large-scale project. Rather than adding components on top of components until they became what he lovingly calls a “fragile, unforgiving crapstack”, he decided to build himself the Ultimate Breadboard.

He packed so much into his design, that it’s honestly hard to know where to begin describing it. Aside from an appropriately large breadboarding surface embedded in the center of the console, he added a power supply to the left hand side, which sits just below an Avr-Net-IO board. The right side of the console features an Arduino NG, and a pair of level converters. He also added some LED-based VU meters, a couple of 7-segment displays, an LCD display, an analog voltmeter, along with plenty of I/O connectors.

The Ultimate Breadboard might look a bit daunting at first, but it seems like an awesome setup on which to do any sort of prototyping. Be sure to check out the video below for more details and to see [Claudio] give a tour of the device.

Continue reading “The Ultimate Breadboard – A Prototyping Station That Has It All”

Build Your Own 4-channel Logic Analyzer

If you’re just getting into hobby electronics chances are there are lots of tools you’d like to get you hands on but can’t yet justify the purchases. Why not build some of the simpler ones? Here’s a great example of a 4-channel logic analyzer that can be your next project and will add to your arsenal for future endeavors.

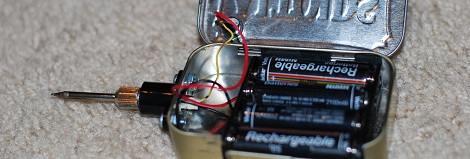
As you can see, [Vassilis’] creation uses a cellphone-sized LCD screen as the output. It is powered by four rechargeable batteries and driven by an ATmega8 microcontroller. He’s designed the tool without power regulation, relying on the ATmega’s rather wide range of operating voltages, and a few diodes to step down that voltage for the LCD screen.

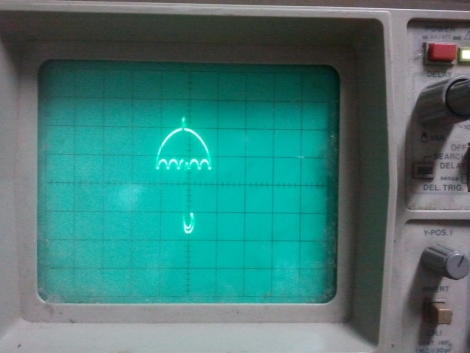
As you can see in the clip after the break, alligator leads can be used to connect the test circuit to the inputs (don’t forget the ground reference!). Thee buttons at the bottom let you navigate the captured data by panning and zooming. Perhaps the best design feature is the single-sided circuit board which should be quite easy to reproduce at home.

Continue reading “Build Your Own 4-channel Logic Analyzer”

Circuit Playground – An Electronics Reference App From Adafruit

It’s not everyday that we review software around here, but the folks at Adafruit recently put together an iOS app that I figured might be of interest. Their iPad/iPhone compatible application is called “Circuit Playground”, and it includes all sorts of handy electronics reference tools. For the context of this review, it should be noted that I paid for the application myself, and that I have had no communication with the Adafruit team regarding my assessment of the app.

Continue reading “Circuit Playground – An Electronics Reference App From Adafruit”

Printable Wire Stripper Lights Up When You Hit The Conductor

Agonize no more over stripping the insulation off of tiny wires like those used in ribbon cables. For years we’ve used razor blades to do this, as the tiniest wires don’t have a slot on our trusty wire strippers. But often we cut all the way though the conductor (or many of the strands) when doing so. [Bjbsquared] came up with this design that will alert you when you’ve hit the conductor.

It uses the two metal razor blades as electrodes in the LED circuit. When anything metal connects the two, the LED will be illuminated. This way you know you’ve cut far enough, and should be able to tug the insulation off of the wire. This image only shows half of the printed unit, a second piece covers up the inner workings, and helps keep stray fingers away from the edges of the blades.

Overkill? We don’t think so, and we hope everyone will agree this is a wonderful design.

[via Reddit and Gizmodo]

3D Print In Wax, Cast In Metal

What does dry ice, ethonal, wax beads, and a blender have in common? It was the first attempts at making media for this wax 3D printer that [Andreas] has been building up. Wanting to produce 3D printed objects out of metal, and finding that direct metal laser sintering machines were still out of reach of reason, he set out to find a different way.

After trying a few different methods of making the powdered wax himself, he decided that it was much more time effective to just buy the stuff. Using the commercially available powered wax mixed with activated carbon, and a custom printer, the wax is blasted with a moderately high powered laser. More wax powder is applied over the freshly sintered layer, and the 3d part is built upwards. Once he has the part in wax, he can then make a mold of it and cast metal using the Lost Wax Casting method.

While the quality is not perfect, and you still need a roughly 2500$ laser setup (which was borrowed from his school) its surely a step into the future.

Join us after the break for a quick video.

Continue reading “3D Print In Wax, Cast In Metal”