Open Source Tricorder Is In It For The Science

If you’re reading Hackaday there’s pretty good odds you’re at least somewhat fond of Star Trek. We’d bet good money most of you would quit your jobs today if a Starfleet recruiter showed up. That’s something you’d have in common with [PeterAJansen], who has been working for over a decade now to create something worthy of being called a tricorder. If his latest iteration, the Open Source Science Tricorder Cyberdeck, isn’t there yet, it’s pretty darn close.
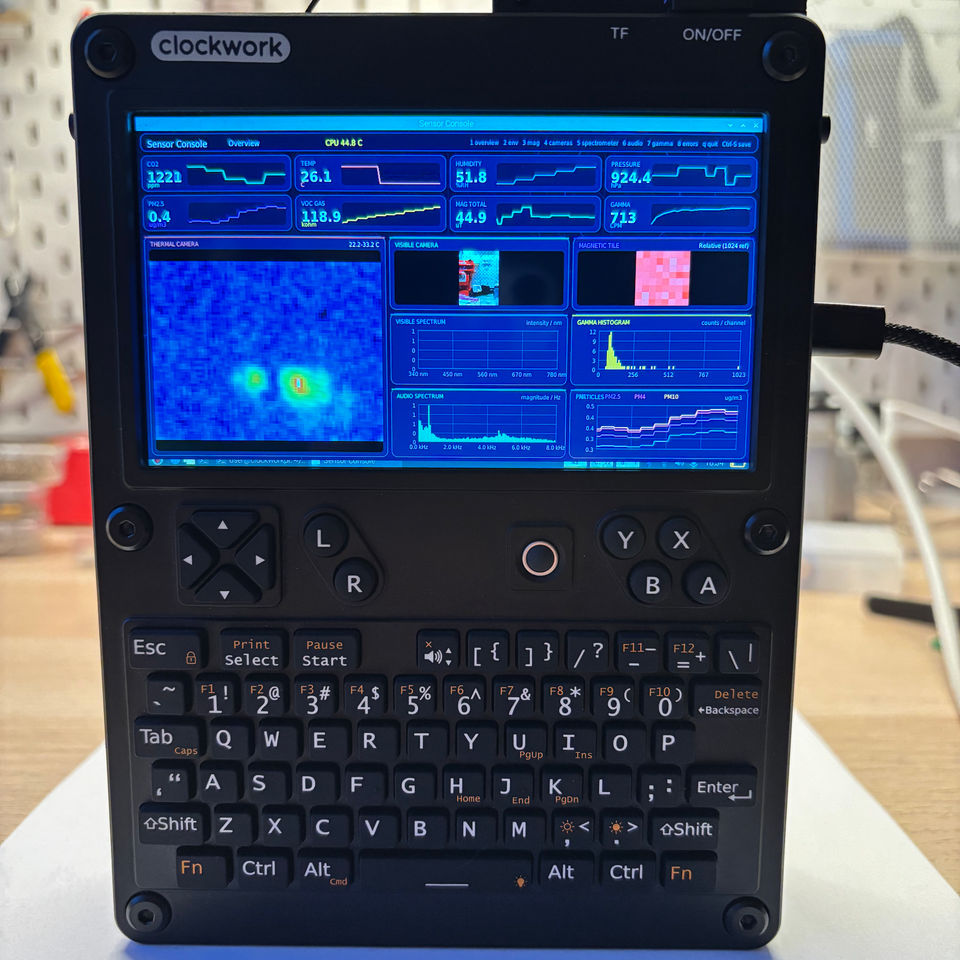
Frankly, it looks more usable than Roddenberry’s version.

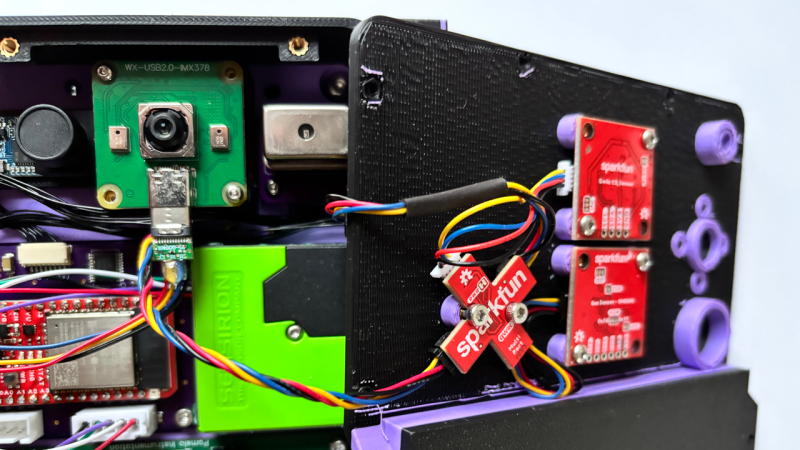
The “tri” in tricorder means three, but this device has more than three instruments– so did the ones on the show, come to think of it. You won’t be scanning for veteron radiation with this, but you do get a scintillation crystal to get a spectroscopic analysis of beta- or gamma-ray sources; there’s also a visible light spectrometer, thermal camera, and magnetic field camera along with a standard magnetometer and the usual environmental sensors to give you temperature, pressure, and humidity, plus particulate, VOC and CO2 concentration. Enough to explore an alien planet? That’s hard to say, but it seems like enough to explore this one.

The device is based around a Clockwork Pi uConsole, which takes care of the form-factor: a slabtop with a QWERTY keyboard and an IPS display in a nice screen, and a Compute Module 5 to crunch all that data. It might not be quite as stylish as the folding units seen on-screen in Star Trek, but it seems like an eminently practical form factor. There are videos of it in operation as well as being assembled on the GitHub repository,  where you can get all the details needed to make your own. It is the Open Source Science Tricorder, after all.

This isn’t the first project we’ve seen chasing tricorder glory, but many of the others were more interested in screen accuracy than science. [Peter]’s earlier “arducorder” was a very notable exception to that trend.

Thanks to [MarcCote] for the tip! If your scanners pick up something interesting in cyberspace, remember our hailing frequencies are always open. 
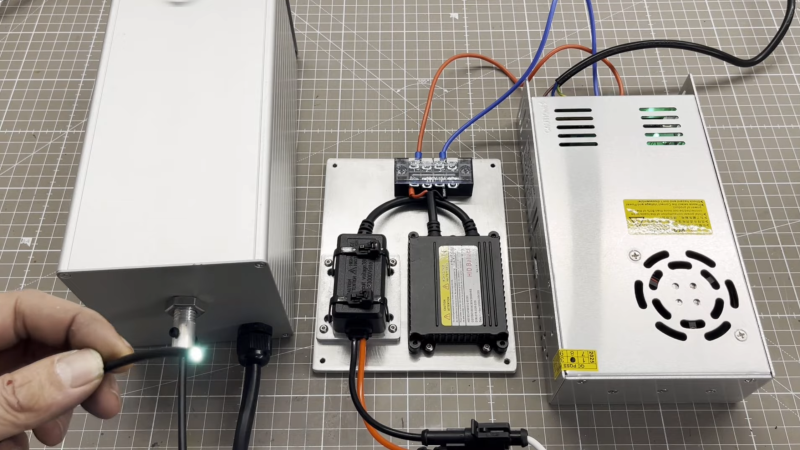
An aluminium box is visible on the left side of the image, with a power supply on the right side, and a lamp ballast in the middle. A man's hand is holding the end of an optical fiber in the lower left corner, and it is emitting a white light.

Building A Xenon Lamp For Spectroscopy

Before a spectrometer can do any useful work, it needs to be calibrated to identify wavelengths correctly. This is usually done by detecting several characteristic peaks or dips in a well-known light source and using these as a reference to identify other wavelengths. The most common reference for hobbyists is the pair of peaks produced by a mercury-vapor fluorescent light, but a more versatile option is a xenon-bulb light source, such as [Markus Bindhammer] made in his latest video.

A xenon gas discharge produces a wide band of wavelengths, which makes it a useful illumination source for absorbance spectroscopy. Even better, Xenon also has several characteristic spikes in the infrared region. For his light source, [Markus] used an H7 xenon bulb meant for a vehicle headlight. The bulb sits in the center of the source, with a concave mirror behind it and a pair of converging lenses in front of it. The converging lenses focus the light onto the end of an optical cable made of PMMA to better transmit UV. A few aluminum brackets hold all the parts in place. The concave mirror is made out of a cut-open section of aluminum pipe. The entire setup is mounted inside an aluminum case, with a fan on one end for cooling. To keep stray light out of the case, a light trap covers the fan’s outlet.

[Markus] hadn’t yet tested the light source with his unique spectrometer, but it looks as though it should work nicely. We’ve seen a wide variety of amateur spectrometers here, but it’s also illuminating to take a look at commercial scientific light sources.

A photograph with labels showing the parts of a DIY scanning spectrometer.

DIY Scanning Spectrometer Is A Bright Idea

Spectroscopy seems simple: split a beam of light into its constituent wavelengths with a prism or diffraction grating, and measure the intensity of each wavelength. The devil is in the details, though, and what looks simple is often much harder to pull of in practice. You’ll find lots of details in [Gary Boyd]’s write-up of his optical scanning spectrometer project, but no devils.

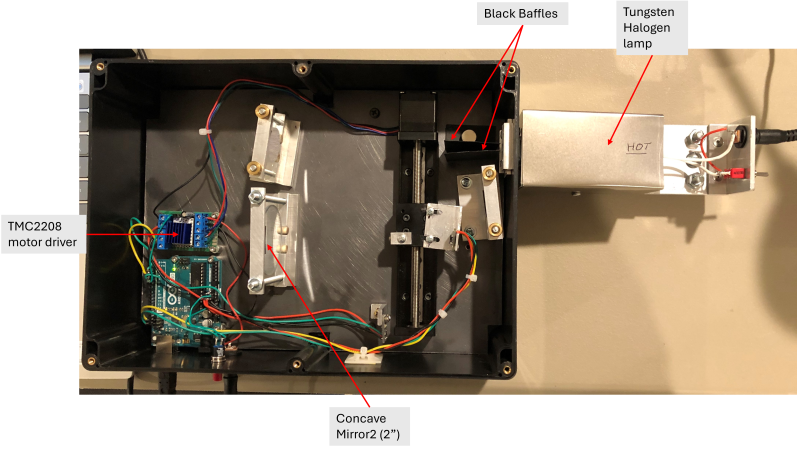
Schematic diagram of [Gary Boyd]'s spectrometer, showing optical elements and rays of light as well as major physical elements like the motor and linear stage.
Schematic diagram of [Gary Boyd]’s Czerny-Turner type scanning spectrometer.
A scanning spectrometer is opposed to the more usual camera-type spectrometer we see on these pages in that it uses a single-pixel sensor that sweeps across the spectrum, rather than spreading the spectrum across an imaging sensor.

Specifically, [Gary] has implemented a Czerny-Turner type spectrometer, which is a two-mirror design. The first concave mirror collimates the light coming into the spectrometer from its entrance slit, focusing it on a reflective diffraction grating. The second concave mirror focuses the various rays of light split by the diffraction grating onto the detector.

In this case [Gary] uses a cheap VEML 7700 ambient light sensor mounted to a small linear stage from amazon to achieve a very respectable 1 nm resolution in the range from 360 nm to 980 nm. That’s better than the human eye, so nothing to sneeze at — but [Gary] includes some ideas in his blog post to extend that even further. The whole device is controlled via an Arduino Uno that streams data to [Gary]’s PC.

[Gary] documents everything very well, from his optical mounts to the Arduino code used to drive the stepper motor and take measurements from the VEML 7700 sensor. The LED and laser “turrets” used in calibration are great designs as well. He also shares the spectra this device is capable of capturing– everything from the blackbody of a tungsten lamp used in calibration, to a cuvette of tea, to the sun itself as you can see here. If you have a couple minutes, [Gary]’s full writeup is absolutely worth a read.

This isn’t the first spectrometer we’ve highlighted– you might say we’ve shown a whole spectrum of them.

Software Hacks Unlock Cheap Spectrometer

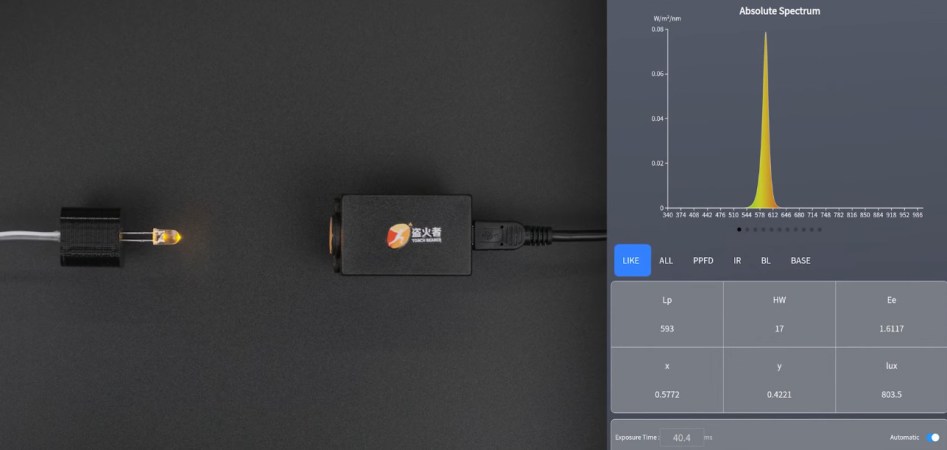
A spectrometer is one of those tools that many of us would love to have, but just can’t justify the price of. Sure there are some DIY options out there, but few of them have the convenience or capability of what’s on the commercial market. [Chris] from Zoid Technology recently found a portable spectrometer complete with Android application for just $150 USD on AliExpress which looked very promising…at least at first.

The problem is that the manufacturer, Torch Bearer, offers more expensive models of this spectrometer. In an effort to push users into those higher-priced models, arbitrary features such as data export are blocked in the software. [Chris] first thought he could get around this by reverse engineering the serial data coming from the device (interestingly, the spectrometer ships with a USB-to-serial adapter), but while he got some promising early results, he found that the actual spectrometer data was obfuscated — a graph of the results looked like stacks of LEGOs.

Continue reading “Software Hacks Unlock Cheap Spectrometer” →

A Low-Cost Spectrometer Uses Discrete LEDs And Math

A spectrometer is a pretty common lab instrument, useful for determining the absorbance of a sample across a spectrum of light. The standard design is simple; a prism or diffraction grating to break up a light source into a spectrum and a detector to measure light intensity. Shine the light through your sample, scan through the spectrum, and graph the results. Pretty easy.

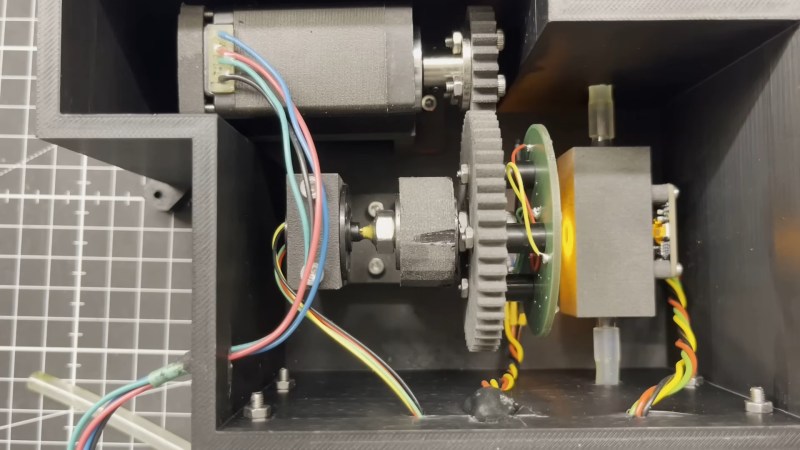
That’s not the only way to do it, though, as [Markus Bindhammer] shows with this proof-of-concept UV/visible spectrometer. Rather than a single light source, [Marb] uses six discrete LEDs, each with a different wavelength. The almost-a-rainbow’s-worth of LEDs are mounted on circular PCB, which is mounted to a stepper motor through a gear train. This allows the instrument to scan through all six colors, shining each on the sample one at a time. On the other side of the flow-through sample cuvette is an AS7341 10-channel color sensor, which can measure almost the entire spectrum from UV to IR.

The one place where this design seems iffy is that the light source spectrum isn’t continuous, as it would be in a more traditional design. But [Marb] has an answer for that; after gathering data at each wavelength, he applies a cubic spline interpolation to derive the spectrum. It’s demonstrated in the video below using chlorophyll extracted from spinach leaves, and it seems to generate a reasonable spectrum. We suppose this might miss a narrow absorbance spike, but perhaps this could be mitigated by adding a few more LEDs to the color wheel.

Continue reading “A Low-Cost Spectrometer Uses Discrete LEDs And Math” →

Spectroscopy On The Cheap

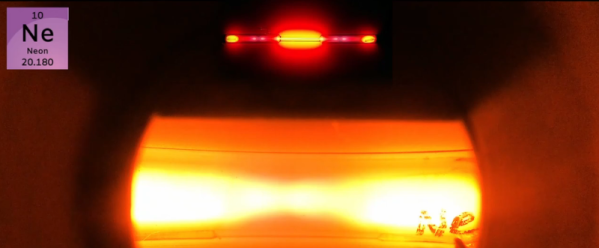
[Project 326] wanted to know exactly what gas was in some glass tubes. The answer, of course, is to use a spectrometer, but that’s an expensive piece of gear, right? Not really. Sure, these cheap devices aren’t perfect, but they are serviceable and, as the video below shows, there are ways to work around some of the limitations.

The two units in question are “The Little Garden” spectrometer and a TLM-2. Neither are especially sensitive, but both are well under $100, so you can’t expect much. Because the spectrometers were not very sensitive, a 3D printed jig and lens were used to collect more light and block ambient light interference. The jigs also allowed the inclusion of special filters, which enhanced performance quite a bit. The neon bulbs give off the greatest glow when exposed to high voltage. Other bulbs contain things like helium, xenon, and carbon dioxide. There were also tubes with mercury vapor and even deuterium.

We’ll admit it. Not everyone needs a spectrometer, but if you do, there’s a lot of really interesting info on how to get the most out of these cheap devices. Apparently, [Project 326] was frustrated that he couldn’t buy an X-ray spectrometer and has vowed to create one, so we’ll be interested to see how that goes.

Some homebrew spectrometers can get pretty fancy. Of course, there’s more to spectroscopy than just optics.

Continue reading “Spectroscopy On The Cheap” →

An Improved Spectrometer, No Lasers Required

Here at Hackaday, we love it when someone picks up the ball from a previous project and runs with it. That’s what we’re all about, really — putting out cool projects that just might stimulate someone else to extend and enhance it, or even head off in an entirely new direction. That’s how the state of the art keeps moving.

This DIY spectrometer project is a fantastic example of that ethos. It comes to us from [Michael Prasthofer], who was inspired by [Les Wright]’s PySpectrometer, a simple device cobbled together from a pocket spectroscope and a PiCam. As we noted at the time, [Les] put a lot of the complexity of his instrument in the software, but that doesn’t mean there wasn’t room for improvement.

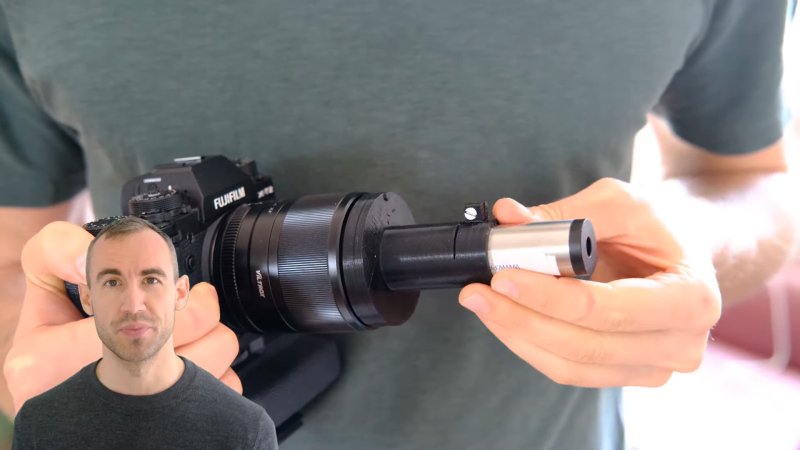
[Michael]’s goals were to make his spectrometer a little easier to build, and to improve the calibration process and overall accuracy. To help with the former, he went with software correction of the color filter array on his Fuji X-T2. This has the advantage of not requiring a high-power laser and precision micropositioner to ablate the CFA, and avoids potentially destroying an expensive camera. For the latter, [Michael] delved deep into the theory behind spectroscopy and camera optics to develop a process for correlating the intensity of light along the spectrum with the specific wavelength at that location. He also worked a little machine learning into the process, training a network to optimize the response functions.

The result is pretty accurate spectra with no lasers required for calibration. The video below goes into a lot of detail and ends up being a good introduction to some of the basics of spectroscopy, along with the not-so-basics.

Continue reading “An Improved Spectrometer, No Lasers Required” →