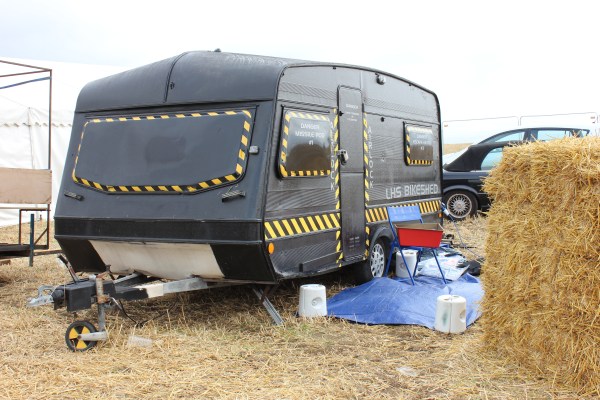
Hackerspaces always breed innovative projects. The outlandish ideas that come out of these areas typically push the boundaries of what is possible. This giant spaceship simulator is no exception, which is normally housed at the London Hackspace.
It was created by a team of DIY hackers that wanted an immersive experience that didn’t involve virtual reality goggles. Instead, they chose more of a holodeck-type game that literally would shake the people inside the sci-fi styled caravan as they traveled through virtual space fighting aliens along the way.
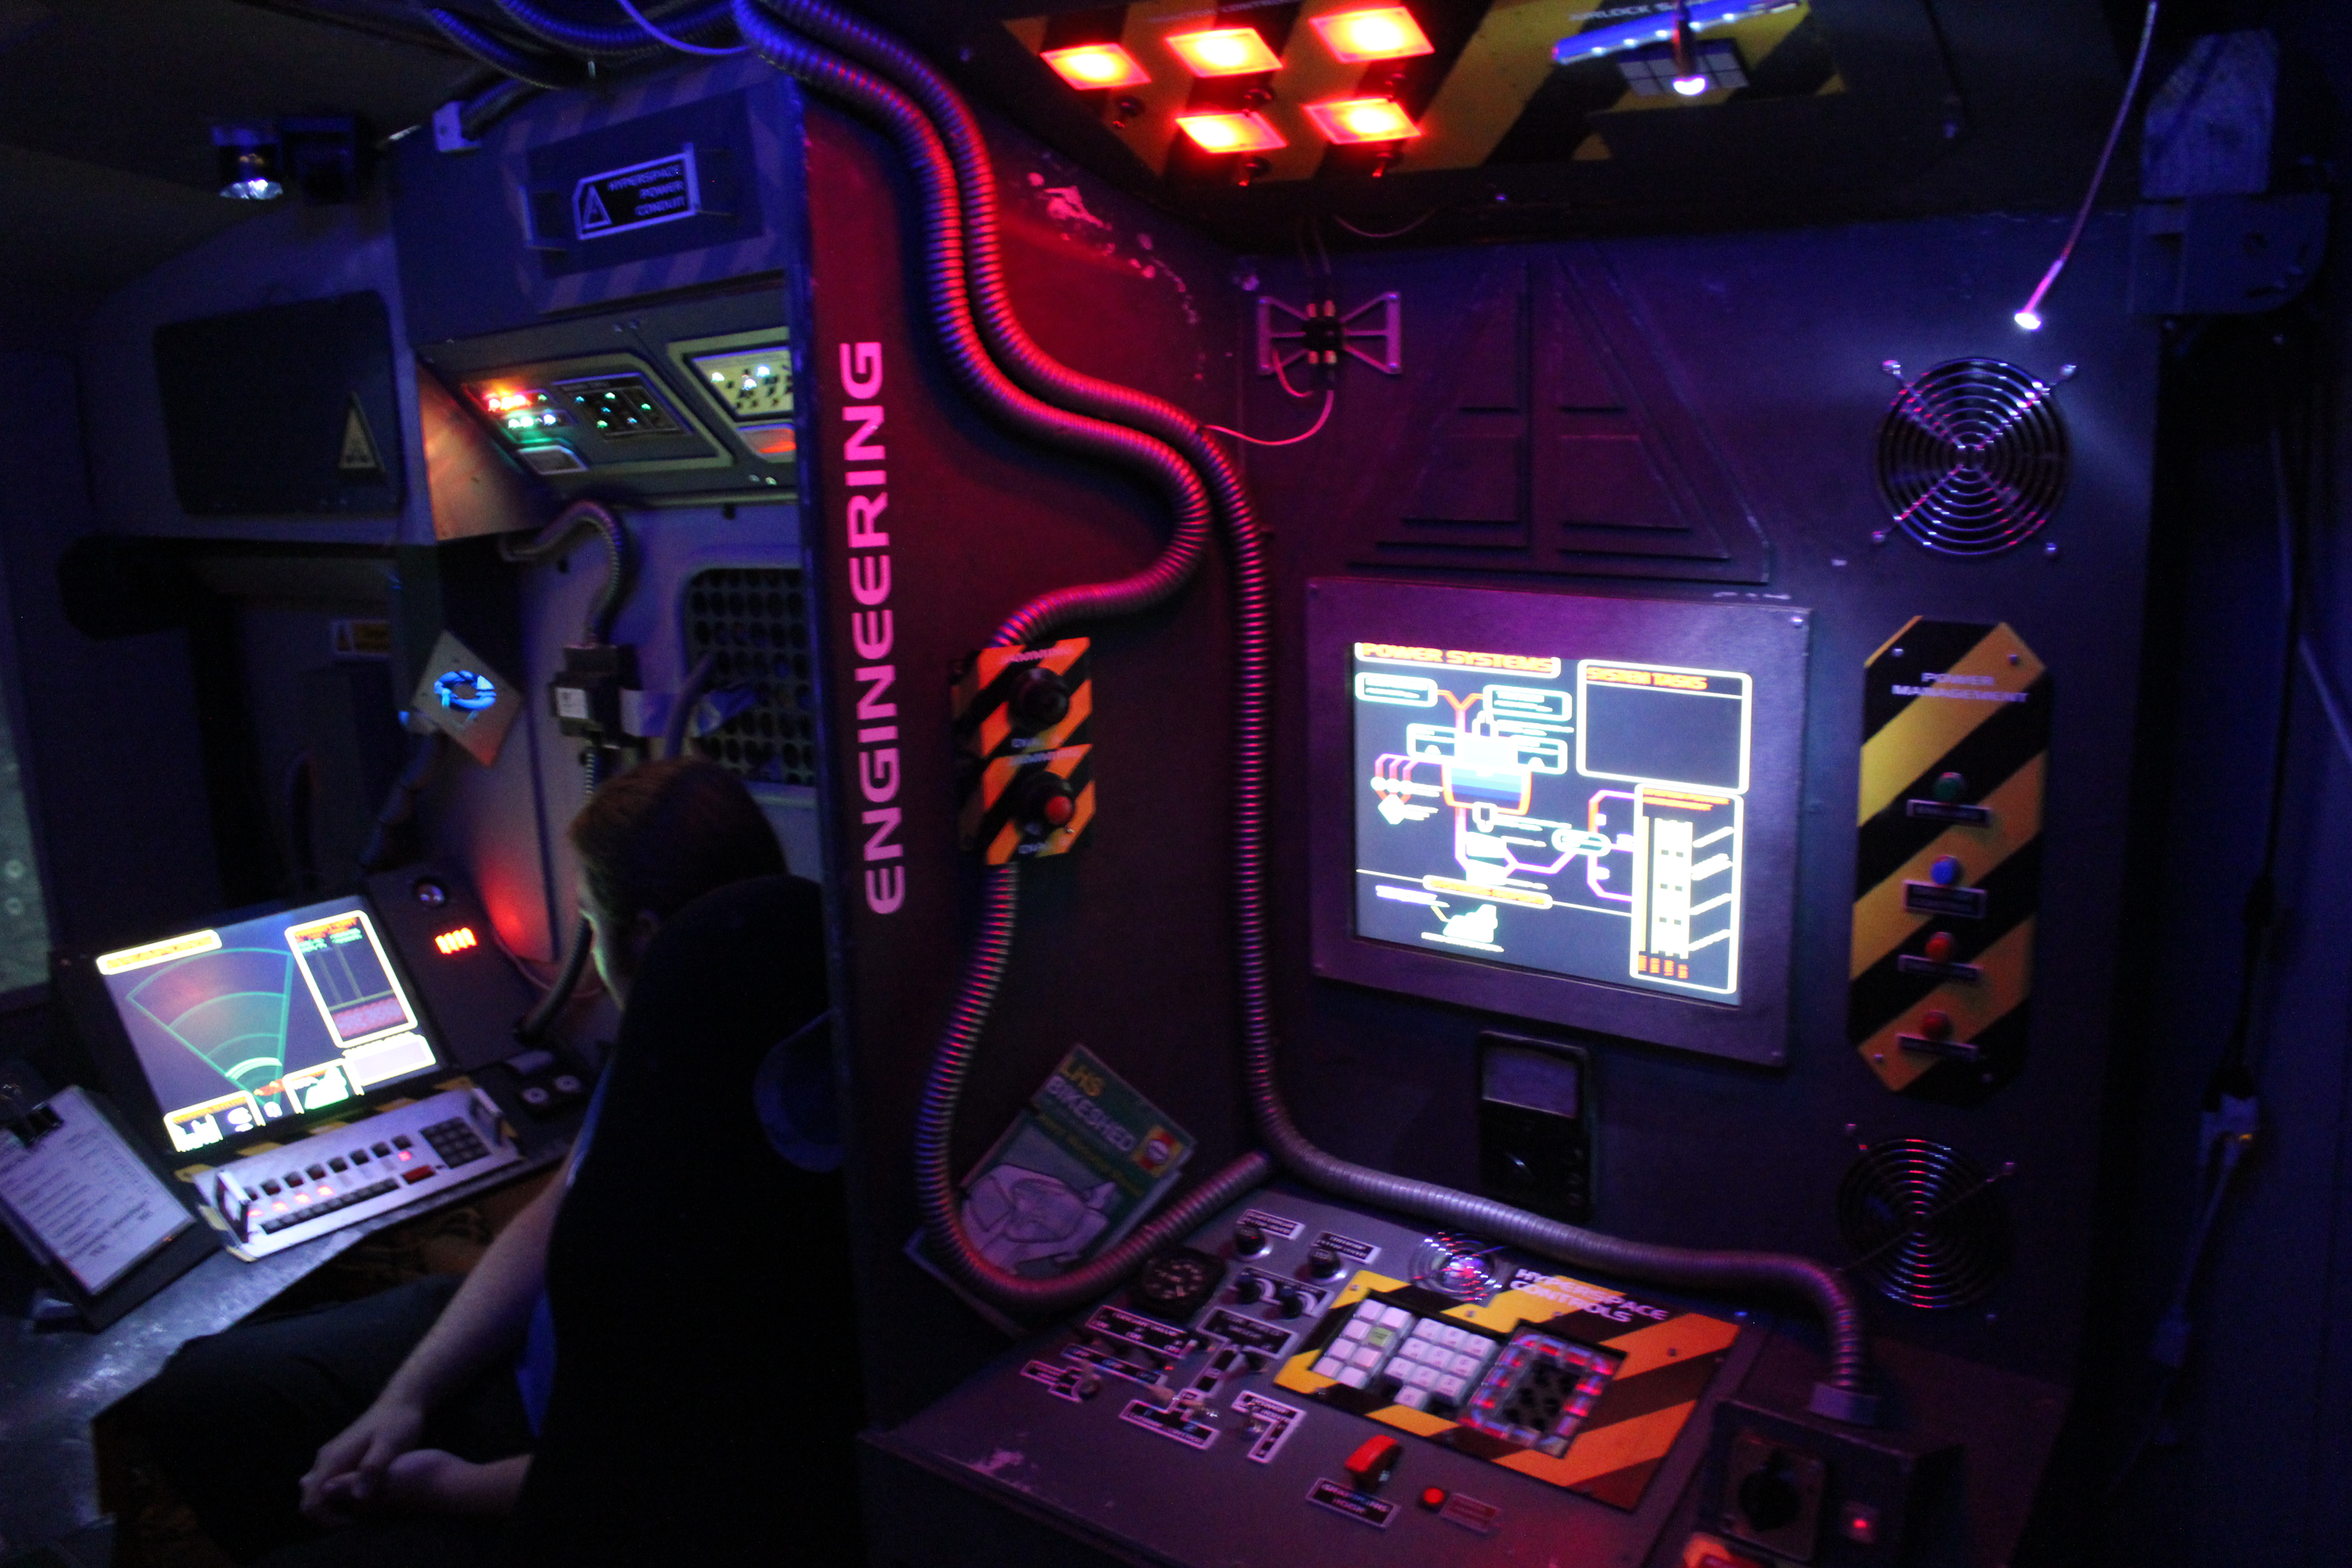 The cockpit consisted of three seats: one for a pilot, one for a tactical officer, and one an engineer. Countless amounts of computer monitors, joysticks, switches, and a wide variety of arcade-like buttons line the walls inside. The main radar screen was modeled off of the 1984 space trading video game named Elite, which has been a game geared toward virtual reality from its early beginnings.
The difference here is that the caravan acts more like a ride rather than a virtual reality game. Interaction with this simulated experience is hands-on the entire way through. The whole game is run by another member of the team who controls the experience with two Android tablets in a back room, and can trigger an unidentified space creature (a friend with an inflatable tentacle arm) to attack the unsuspecting space travelers.
If any readers decide to fashion together a large-scale simulator of their own, be sure to send in photos of the progression of the project and put it up on Hackaday.io!

 The project featured in this post is


