Dynamic Bicycle Headlight Uses The Open Road As A Display

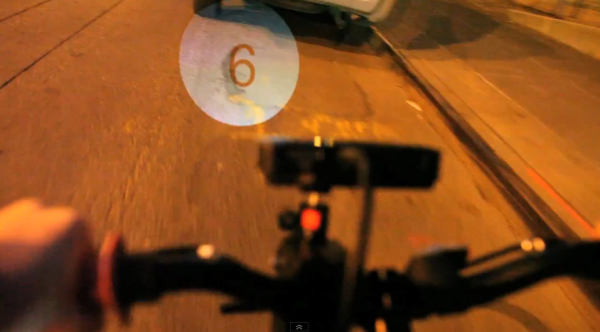
This thing is so cool it almost looks fake. But [Matt Richardson] isn’t a hoaxster. He actually built what might be called a heads-down display for your bicycle. He refers to it as a headlight because it borrows a similar function. It mounts on the handlebars and shoots light off the front of the bike. But it’s more than just a battery and a bulb, this uses a pico-projector to give that light some meaning. In the video after the break he shows it off on the streets of NYC.

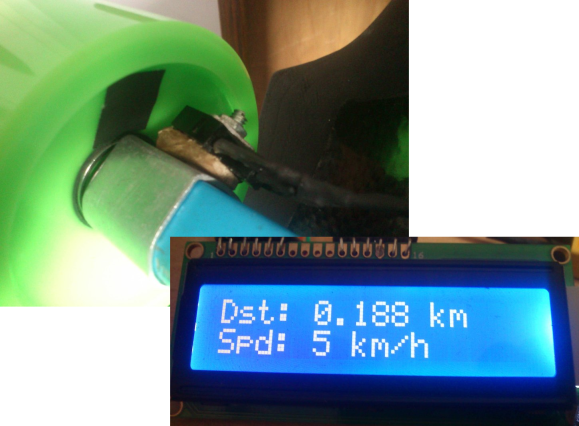
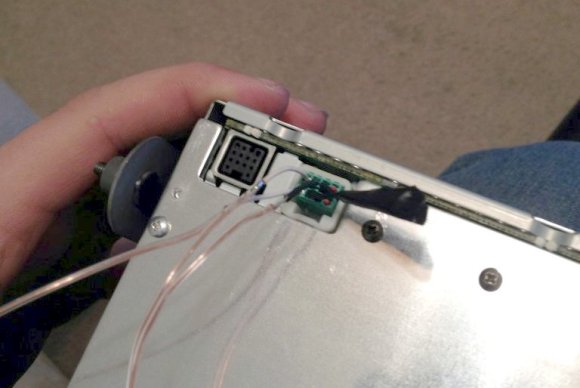
So far he’s only displaying information that has to do with the speed of travel, but the proof is there just waiting for a brilliant new use. Feeding the projector is a Raspberry Pi board. For this prototype [Matt] mounted it, along with the portable cellphone charger which plays the role of the power source, on a hunk of hardboard strapped inside the bike frame.

If you’re thinking of doing this one yourself beware of the BOM price tag. That projector he’s using runs upwards of $400. We wonder if you could hack together a rudimentary replacement with an old cellphone screen and this diy film projector?

Continue reading “Dynamic Bicycle Headlight Uses The Open Road As A Display”

A Longboard Speed And Distance Computer

longboard-speed-distance-comptuer

Why should cyclists have all of the fancy toys? Bicycle computers are very common these days but you won’t find similar hardware for skateboards and longboards. [KobraX22] isn’t taking it lying down. He built this speed and distance computer for his longboard. It doesn’t use very many components and should be easy to install.

The device monitors the rotation of one of the wheels by mounting a reflectance sensor on one of the trucks. It points toward the inside of a wheel which has a piece of black tape on it. Every time the tape passes it prevents the IR led from reflecting back at its paired receiver. This lets the Arduino count the revolutions, which are then paired with the wheel diameter to calculate speed as well as distance traveled. Of course the wheels wear down over time to so frequent riders will have to take new measurements at regular intervals.

[KobraX22] went with a QRB1114 sensor. It costs less than $2 and doesn’t require him to embed a magnet in the wheel like a hall effect sensor setup would have. It also shouldn’t interfere with any other fancy wheel hacks you’ve done, like adding a POV display.

[via Reddit]

Tymkrs’ Deconstruction For The Zombie Apocalypse

tmker

We’ve seen a few of the projects from The Deconstruction, a 48-hour build-a-thon for hackerspaces and other groups around the globe. Of course Tymkrs, a pair of geeky vloggers famous for their building prowess, were part of The Deconstruction, and in the process they came up with a few really cool builds at their hackerspace, The Rabbit Hole, in Rochester, MN.

Their theme for The Deconstruction was “a zombie apocalypse”. Instead of homemade crossbows and electric fences, Tymkrs and the rest of The Rabbit Hole put a ‘rebuilding society’ spin on the whole zombie apocalypse and ended up building things that would be useful after Z-day.

First up is a PVC bike trailer designed to easily attach to the back of a bicycle. The frame is made out of a few pieces of 2″ PVC pipe with some nylon rope knotted together for a nice webbed platform. a 5/8″ steel rod was turned down to accept two 20″ bike wheels. A useful build, even if it’s not the zombie apocalypse.

The second build is a solar japanese lantern, combining [Addie]’s love of solar lanterns and japanese-style lanterns into one great project. The materials for this build came from a broken solar-powered lantern with completely revamped electronics. There’s a Joule thief to keep the LED lit, and a few solar panels to charge up the batteries during the day. Of course the build wasn’t complete without a little decoration, so [Addie] drew four panels of rabbits for The Rabbit Hole team.

By far the most dangerous build undertaken by The Rabbit Hole is their can crusher. It’s a pair of snowblower tires powered by a disused garage door opener. The theory of operations is that a can will drop in between the rotating wheels, crushing the can, and sending it to a waste basket below the device. In practice, the device didn’t really live up to expectations, but it’s loud and dangerous, so we’ll give it a pass.

NSL Takes Their Propeller Driven Car To The Drive Through

nsl-propeller-driven-land-vehicle

So what’s the first thing you do after completing your propeller driven land tricycle build? Head on over to the Starbucks drive through and see what kind of response you get from the workers. That’s exactly what the guys from North Street Labs did. You can see the response in the clip after the jump.

Having three wheels and being moved by an electric motor with a propeller led to the name TriFly. The build is their entry in The Deconstruction, a build contest which includes other entries like the Beer pouring machine we featured on Monday. Aside from the fun with the final project, NSL’s well-produced video includes a quick trip through the fabrication process. They did a great job making the machine about 40% street legal and it’s obvious they had a blast while doing so.

Continue reading “NSL Takes Their Propeller Driven Car To The Drive Through”

Hacked Auxiliary Port For A Car Stereo

hacked-auxiliary-port-car-stereo
We’re not sure if [Apachem25] is just lucky, or if installing Auxiliary ports on most car stereos is this easy. The dealership wanted $95 to put one in, but he managed to add a 3.5mm audio-in port to his car stereo for just a couple of bucks.

The connector on the back of his head unit is a 2×4 set of pins recessed in a protective plastic ring. It turns out that the audio connector cable for a PC CD-ROM drive has a 1×4 socket that is perfect for this. [Apachem25] simply clipped one of those cables in half and used both ends to interface with the Aux port. He found the pin-out for his particular model on the Internet. He needed a specific resistance value between two of the pins to get the deck to let him use the input. All that he needed was a quick bit of soldering. The left, right, and ground are brought around the side and soldered to an audio jack he added in the face plate of the unit.

If you’re still rockin’ the cassette deck our favorite automotive Bluetooth solution is still this one for a classic Beetle.

[via Reddit]

Pulse Jet Snowmobile, Or, What Swedes Do During Hibernation

Sweden is coming out of the depths of a cold, dark winter. What better time, then, to enjoy the last few weeks of frigid temperatures, short days, and frozen lakes and rivers? That’s what Orsa Speed Weekend is all about; tearing across a frozen lake by any means necessary, including jet powered snowmobiles.

This pulse jet comes from the fruitful minds at Svarthalet Racing (Google Translation) who have put an amazing amount of work into their fuel-injected pulse jet snowmobile during these last cold winter months. They’ve even gone so far as to do some analysis regarding how much horsepower their snowmobile has. Surprisingly, it’s not much more horsepower than a small car, but that’s due to the hilarious inefficiency of pulse jets compared to more conventional engines.

This isn’t the first time we’ve seen jet powered snowmobiles build for Orsa Speed Weekend. We’ll just hope this year a few more videos will show up in our tip line.

Brake Light Backpack Overpowered With LED Pixels

led-motorcycle-backpack

Here’s another Flora Arduino based project from [Becky Stern]. It’s a backpack with brake lights and turn signals for use when motorcycling, but it should work just as well for bicyclists. From this view the project looks pretty normal, but things get downright crazy when she decided to use the WS2801 pixels for the LEDs. Sure they take all the work out of driving an array of LEDs, and they offer full color and dimming levels. But when you see the bulk of cabling and PCBs this adds to the project (shown in the video after the break) we think you’ll agree that this was an interesting choice.

That issue aside the project is a lot of fun. The system doesn’t patch into the motorcycle’s electronics. Instead, it uses an accelerometer to detect when the brakes are applied and light the LEDs according. The turn signals are switched with an RF remote control that can be mounted on the handlebars.

Anyone looking to hack outerwear with electronics can learn form the fabrication techniques used here. [Becky] details how to make holes in the bag and sew parts to them, as well as using Sugru to waterproof vulnerable components.

Continue reading “Brake Light Backpack Overpowered With LED Pixels”