If you own a video projector, be it a module small enough to fit in a mobile phone or one designed for a cinema screen, the chances are it will have a DLP at its heart. An array of microscopic mirrors on an integrated circuit, the current state of the art in video projection technology.
Perhaps you own an older video projector, or maybe a cheaper new one. If so the chances are it’ll have a small LCD screen doing its work, taking the place of the Kodachrome in something very similar to your grandparents’ slide projector or their grandparents’ magic lantern.
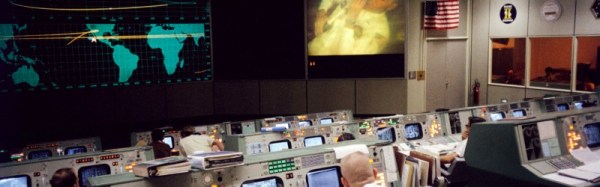
 LCD technology was invented in the 1970s, while DLP was invented at the end of the 1980s. So how did the video projectors that were such a staple of televised spectaculars in the preceding decades work? For that matter, how did NASA project their status displays on the huge screen at Mission Control? Certainly not with CRT technology, even the brightest CRT projectors weren’t up to filling a cinema-sized screen.
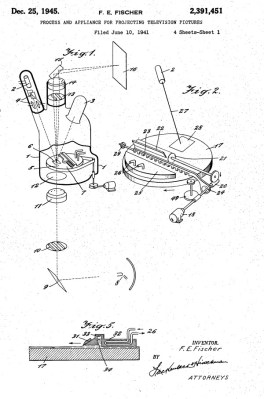
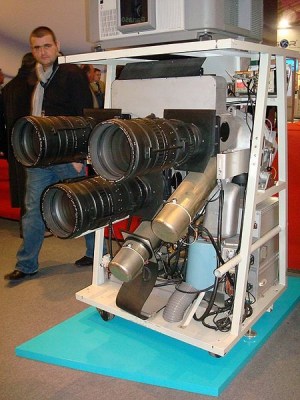
The answer came from the Eidophor (Greek: ‘eido’ and ‘phor’, ‘image’ and ‘bearer’), a device invented in the years before World War II by the Swiss physicist Dr. Fritz Fischer and granted a US patent in 1945. It featured a complex vacuum device in which an electron gun painted the video frames as a raster on an oil-covered mirror in the light path of a fairly conventional projector. High-voltage electric charges have the effect of deforming the surface of mineral oils, and it was this effect that was exploited to vary the effectiveness of the mirror as the raster was drawn. An unfortunate side-effect of tracing an oil surface with an electron beam is that a charge will build up on the oil surface, so the entire oil-covered mirror assembly had to rotate within its vacuum enclosure and pass under an electrode which removed any charge build-up.
You will probably be unaware of the exact date you last saw an eidophor performance. Quince Imaging tell us their last one was used at the TWA Dome in St Louis in July 2000. Eidophores may have become more compact over the decades but they remained costly to run, and through the 1990s they were suplanted by DLP devices that did substantially the same job with a lot less fuss.
It is not often that a search in the Hackaday archives for a technology returns no results, but the eidophor is one of those cases. Perhaps that is a fitting epitaph for a device that created its own show but never starred in it, that it is only its spectacular performances that live on.