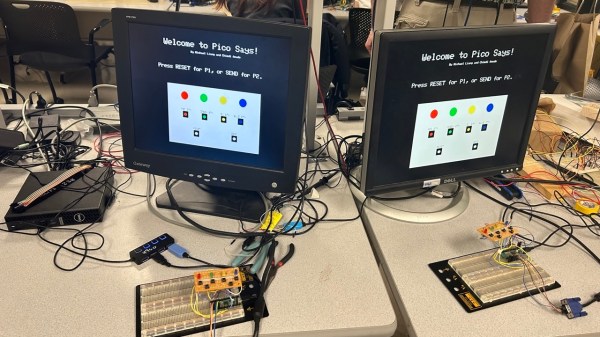
Simon Says With An RP2040

The team of [Michael] and [Chimdi] from Cornell’s Designing with Microcontrollers (ECE 4760) Fall 2023 session designed a version of Simon Says on an RP2040 which they call Pico Says. It uses UDP packets over WiFi to communicate between the players, and supports VGA graphics for output. Each player’s hardware consists of a Pico W module plus a control panel containing the four LEDs and buttons ( red, green, yellow, and blue ) plus send and reset buttons.

For purposes of this lab, the modules were build on a solderless breadboard and used perfboard for the control panels. They weren’t entirely happy with their choice of UDP because they experienced frequent datagram dropouts in the noisy environment of the microcontroller lab. They also planned to implement sound effects, but ran out of time after spending too much time on the WiFi implementation, and had to drop that feature. In the end, however, they wrapped up their project and demonstrated a working game. We can only speculate whether this bonus lesson in resource management was intended by [Dr. Hunter Adams] or not.

Two ECE 4760 course references are highlighted in the write-up that helped them jump-start the project: the UDP and VGA examples for the Pico. These are good links to put in your RP2020 toolbox for future projects, in addition to the ECE 4760 course home page itself. We’ve covered several of these projects recently, as well as the curriculum switch from the Microchip PIC32MX-based Microstick II to the RP2040 last Spring.

Continue reading “Simon Says With An RP2040”

Ethersweep: An Easy-To-Deploy Ethernet Connected Stepper Controller

[Neumi] over on Hackaday.IO wanted a simple-to-use way to drive stepper motors, which could be quickly deployed in a wide variety of applications yet to be determined. The solution is named Ethersweep, and is a small PCB stack that sits on the rear of the common NEMA17-format stepper motor. The only physical connectivity, beside the motor, are ethernet and a power supply via the user friendly XT30 connector. The system can be closed loop, with both an end-stop input as well as an on-board AMS AS5600 magnetic rotary encoder (which senses the rotating magnetic field on the rear side of the motor assembly – clever!) giving the necessary feedback. Leveraging the Trinamic TMC2208 stepper motor driver gives Ethersweep silky smooth and quiet motor control, which could be very important for some applications. A rear-facing OLED display shows some useful debug information as well as the all important IP address that was assigned to the unit.

Control is performed with the ubiquitous ATMega328 microcontroller, with the Arduino software stack deployed, 
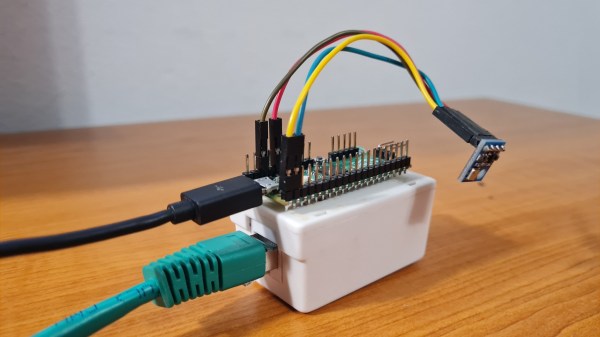
making uploading firmware a breeze. To that end, a USB port is also provided, hooked up to the uC with the cheap CP2102 USB bridge chip as per most Arduino-like designs. The thing that makes this build a little unusual is the ethernet port. The hardware side of things is taken care of with the Wiznet W5500 ethernet chip, which implements the MAC and PHY in a single device, needing only a few passives and a magjack to operate. The chip also handles the whole TCP/IP stack internally, so only needs an external SPI interface to talk to the host device.

Continue reading “Ethersweep: An Easy-To-Deploy Ethernet Connected Stepper Controller”

The Pi Pico board on top of a white box with an Ethernet jack, with a sensor module plugged onto the Pico's pin headers. A black MicroUSB and a green Ethernet cable are connected to this device.

An Elegant Ethernet Library For Your Next RP2040 Project

A few days ago we covered a project that brought Ethernet connectivity to the Raspberry Pi Pico using little more than some twisted pair and a RJ-45 connector. It was a neat trick, but not exactly ready for widespread adoption. Looking to improve on things a bit, [tvlad1234] has taken that project’s code and rewritten it into a friendly library you can use with any RP2040 board.

In case you missed it, the initial demo did 10BASE-T transmission by bit-banging with the PIO, and was able to send UDP messages to devices on the wired LAN. It was an impressive accomplishment, but its code didn’t make it easy to build your project around it. This new library makes UDP messaging as easy as a printf, offloading all non-PIO-managed Ethernet signal work onto the RP2040’s second CPU core. The library even generates a random MAC address out of your flash chip’s serial number!

As a demonstration of the new library, [tvlad1234] has put together a simple Ethernet-connected temperature monitor using the BMP085 or BMP180 sensor connect over I2C. If you feel like you could use an Ethernet transmit-only sensor in your life, browsing the source code would be a great start.

Bit-Banged Ethernet On The Raspberry Pi Pico

Whilst the Raspberry Pi RP2040 is quite a capable little chip, on the whole it’s nothing really special compared to the big brand offerings. But, the PIO peripheral is a bit special, and its inclusion was clearly a masterstroke of foresight, because it has bestowed the platform all kinds of capabilities that would be really hard to do any other way, especially for the price.

Our focus this time is on Ethernet, utilizing the PIO as a simple serialiser to push out a pre-formatted bitstream. [kingyo] so far has managed to implement the Pico-10BASE-T providing the bare minimum of UDP transmission (GitHub project) using only a handful of resistors as a proof of concept. For a safer implementation it is more usual to couple such a thing magnetically, and [kingyo] does show construction of a rudimentary pulse transformer, although off the shelf parts are obviously available for this. For the sake of completeness, it is also possible to capacitively couple Ethernet hardware (checkout this Micrel app note for starters) but it isn’t done all that much in practice.

Inside the expedient pulse transformer.

UDP is a simple Ethernet protocol for transferring application data. Being connection-less, payload data are simply formatted into a packet buffer up front. This is all fine, until you realize that the packets are pretty long and the bitrate can be quite high for a low-cost uC, which is why devices with dedicated Ethernet MAC functionality have a specific hardware serialiser-deserialiser (SERDES) block just for this function.

Like many small uC devices, the RP2040 does not have a MAC function built in, but it does have the PIO, and that can easily be programmed to perform the SERDES function in only a handful of lines of code, albeit only currently operating at 10 MBit/sec. This will cause some connectivity problems for modern switch hardware, as they will likely no longer support this low speed, but that’s easily solved by snagging some older switch hardware off eBay.

As for the UDP receive, that is promised for the future, but for getting data out of a remote device over a wired network, Pico-10BASE-T is a pretty good starting point. We’ve seen a few projects before that utilize the PIO to generate high speed signals, such as DVI, albeit with a heavy dose of overclocking needed. If you want a bit more of an intro to all things Pico, you could do worse than check out this video series we highlighted a while back.

Fried Desk Lamp Reborn: How To Use ESP8266 To Build Connected Devices

Some hacks are born of genius or necessity, and others from our sheer ham-fisted incompetence. This is not a story about the first kind. But it did give me an excuse to show how easy it is to design WiFi-connected devices that work the way you want them to, rather than the way the manufacturer had in mind.

It started out as a sensible idea – consumer electronics in Vietnam have many different electric plug types for mains AC power: A, C, G, F, and I are fairly present, with A and C being most common. For a quick review of what all those look like, this website sums it up nicely. There are universal power adapters available of course, but they tend to fit my most common type (C) poorly, resulting in intermittent power loss whenever you sneeze. So I figured I should replace all the plugs on my devices to be A-type (common to those of you in North America), as it holds well in all the power bar types I have, mainly leftover server PDUs.

This was very straightforward until I got to my desk lamp. Being a fancy Xiaomi smart lamp, they had opted to hide a transformer in the plug with such small dimensions that I failed to notice it. So instead of receiving a balmy 12 volts DC, it received 220 volts AC. With a bright flash and bang, it illuminated my desk one final time.

Continue reading “Fried Desk Lamp Reborn: How To Use ESP8266 To Build Connected Devices”

ESP8266 Upgrade Gives IKEA LEDs UDP Superpowers

It can be difficult to resist the impulse buy. You see something interesting, the price is right, and even though you know you should do your research first, you end up putting it in your cart anyway. That’s how [Tobias Girstmair] ended up being the not-so proud owner of a LEDBERG RGB LED strip from IKEA, and what eventually pushed him to replace wimpy original controller with an ESP8266.

So what was the problem with the original controller? If you can believe it, it was incapable of producing white light. When IKEA says an LED is multi-color, they apparently mean it’s only multi-color. A quick check of the reviews online seem to indicate that the white version is sold as a different SKU that apparently looks the same externally and has confused more than a few purchasers.

Rather than having to pick one or the other, [Tobias] decided he would replace the original controller with an ESP-03, hoping that would give him granular enough control over the LEDs to coax a suitably white light out of them. He didn’t want to completely start from scratch, so one of the first decisions he made was to reuse the existing PCB and MOSFETs. Some handy test points on the PCB allowed him to hook the digital pins of the ESP right to the red, blue, and green LED channels.

Then it was just a matter of coming up with the software. To keep things simple, [Tobias] decided to create a “dumb” controller that simply sets the LED color and intensity according to commands it receives over a simplified UDP protocol. Anything beyond that, such as randomized colors or special effects, is done with scripts that run on his computer and fire off the appropriate UDP commands. This also means he can manually control his newly upgraded LEDBERG strips from basically anything that can generate UDP packets, such as an application on his Android phone.

It might not be the most robust implementation we’ve ever seen, but all things considered, it looks as though this modification could be a pretty good way to get some cheap network controlled RGB lighting in your life.

45-Year Old Nixie Calculator Turned UDP Server

In this beautiful and well-documented reverse engineering feat of strength, [Eric Cohen] reverse-engineered a 1971 Singer calculator to gain control of the fabulous Nixie tubes inside. Where a lesser hacker would have simply pulled the tubes out and put them in a more modern housing, [Eric] kept it all intact.

Not even content to gut the box and toss some modern brains inside, he snooped out the calculator’s internal wiring, interfaced a Raspberry Pi to it, and overrode the calculator’s (860 Hz) bus system. With the Pi on the inside, controlling the Nixie tubes, he did what any of us would do: set up a UDP server and write an Android app for his phone to push ASCII data over to the former calculator. When it’s not running in its default clock mode, naturally.

nixie-internals

All of this is extraordinarily well documented both on his website, in a slide presentation (PDF), and in video (embedded below). Our hats are tipped to the amazing attention to detail and fantastic documentation.

Now where is that Singer EC1117 calculator from 1971 that we’ve been saving for just such an occasion?

Continue reading “45-Year Old Nixie Calculator Turned UDP Server”