Bouncing Radio Off Of Airplanes

Amateur radio operators are always trying some new stunt or other. It’s like they’ve got something to prove. Take Aircraft scatter for instance: the idea is to extend your radio’s range by bouncing it directionally off of overhead airplanes.

Radio signals travel in straight lines, which is a bummer because the Earth (despite what you’ve heard) is round. Inevitably, if you want to talk to someone far enough away, they’re over a hill. We’ve covered various oddball propagation methods recently, so if you don’t know about moonbounce, you’ve got some background reading to do. But airplane scatter was new to us.

Actually pulling it off requires knowing where the airplanes are, of course. To do so, you could simply look up the aircraft in your target area on the web, using something like FlightRadar24, but where’s the fun in that? There’s also the possibility of tracking local aircraft yourself using RTL-SDR if you’re feeling hard core.

The rest is just details. Hams [Rex Moncur (VK7MO)] and [David Smith (VK3HZ)], for instance, got 10 GHz signals to skip off airplanes over 842 km (PDF). If you’re an old-school ham operator, you’re double-checking the “gigahertz”, but it’s not a mistake. It’s tremendously impressive that these guys got a link over such a long distance using only 10 watts — but note that they’re doing it with highly directive dishes, and telescopes to aim them.

Not to discourage you from trying this at home, but there are all sorts of difficulties that you’ll encounter when you do. Airplanes moving perpendicular to the path between sender and receiver will Doppler-shift the signal, and there’s still quite a chunk of atmosphere to get the signal through. Finally, although airplanes look pretty big when they’re on the ground, they’re actually tiny when they’re up in the sky at 35,000 ft and 500 miles away; you’re bouncing your signal off of a small target.

The good news? People like [W3SZ] are sharing their well-documented results, and at least it’s 20dB easier than bouncing signals off the moon!

Thanks [Martin] for the tip!

Squash Your ESP-8266 Bugs With ESP-gdbstub

We hope we’re not insulting you by suggesting this, but it’s possible that even the best among us may be faced with bugs in our embedded code from time to time. And while we’re great fans of printf debugging over the serial port, and its high-speed equivalent — flipping a GPIO pin — there’s a time when your bug is so deep that having a real debugger is the best way to dig it out.

[slaff] has been doing some great work documenting C/C++ programming on the ESP-8266, mostly using Eclipse and some of the Arduino libraries. In the fourth part of his series of posts, he walks through using a couple debugger options for the ESP. What makes this all work is the ESP-gdbstub code from Espressif themselves. gdbstub looks great — it works both with the standard SDK as well as with FreeRTOS, so you can debug your ESP-8266 code whether it’s in an OS or on the bare metal. And all this just using the standard serial connection that’s used for programming.

Now, this still may not help with timing-related bugs. ESP-gdbstub uses the serial port, after all. But having the ability to set breakpoints and interactively inspect what’s going on in the chip’s memory is priceless, and doing so with no extra hardware connections is brilliant.

Continue reading “Squash Your ESP-8266 Bugs With ESP-gdbstub”

Hackaday Explains: Li-Fi & Visible Light Communications

A new way to transmit data is coming that could radically change the way that devices talk to each other: LiFi. Short for Light Fidelity, LiFi uses visible light to send data, creating the link between router and device with invisible pulses of light. This type of Visible Light Communication (VLC) uses something that is present in pretty much every room: an LED lightbulb.

What is LiFi?

Li-Fi sounds like the an engineer’s fevered dream: it is fast, cheap, secure and simple to implement. Speeds of up to 10Gbps have been demonstrated in the lab, and products are now available that offer 10Mbps speed. It is cheap because it can use a modified LED lightbulb. It is secure because it only works where the light is visible: step out of the room and the signal is lost. It is simple to implement because it uses an existing technology: LEDs.

The basis of the technology is in turning the LED light on and off very fast. By switching an LED on and off millions of times a second, you can create a data signal that can be detected by a sensor, but which is invisible to the human eye. At the other end, another LED detects these pulses, and can send light pulses back in response, creating a bi-directional link. If you combine this with wired Ethernet or a WiFi network, you have an awesome combination: an Internet connection that uses visible light for the last link.

Continue reading “Hackaday Explains: Li-Fi & Visible Light Communications”

Raspberry Pi $2 WiFi Through Epic SDIO Hack

These are the times that we live in: the Raspberry Pi Zero comes out — a full freaking Linux computer on a chip for $5 — and people complain that it doesn’t have this or that. Top place on the list of desiderata is probably a tie between audio out and WiFi connectivity. USB is a solution for both of these, but with one USB port it’s going to be a scarce commodity, so any help is welcome.

Hackaday.io hacker [ajlitt] is looking for a way out of the WiFi bind. His solution? The Raspberry Pi series of chips has a special function on a bunch of the GPIO pins that make it easier to talk to SDIO devices. SDIO is an extension of the SPI-like protocol that’s used with SD memory cards. The idea with SDIO was that you could plug a GPS or something into your PDA’s SD card slot. We don’t have PDAs anymore, but the SDIO spec remains.

[ajlitt] dug up an SDIO driver for the ESP8089 chip, and found that you can liberate the ESP8266’s SPI bus by removing a flash memory chip that’s taking up the SPI lines. Connect the SPI lines on the ESP8266 to the SDIO lines on the Raspberry Pi, and the rest is taken care of by the drivers. “The rest”, by the way, includes bringing the ESP’s processor up, dumping new firmware into it over the SPI/SDIO lines to convince it to act as an SDIO WiFi adapter, and all the rest of the hardware communication stuff that drivers do.

The result is WiFi connectivity without USB, requiring only some reasonably fine-pitch soldering, and unlike this hack you don’t have to worry about USB bus contention. So now you can add a $2 WiFi board to you $5 computer and you’ve still got the USB free. It’s not as fast as a dedicated WiFi dongle, but it gets the job done. Take that, Hackaday’s own [Rud Merriam]!

Thanks [J0z0r] for the tip!

Quick Network Bridge Gets Off-grid Home Back Online

Off-grid living isn’t for everyone, but it has gotten easier in recent years. Cheap solar panels and wind turbines let you generate your own power, and there are plenty of strategies to deal with fuel, water and sanitation. But the one thing many folks find hard to do without – high-speed internet access – has few options for the really remote homestead. [tlankford01] wants to fix that and is working on an open-source mesh network to provide high-speed internet access to off-grid communities.

But first he had to deal with a major problem. With high-speed access provided by a Clearwire wireless network, streaming content to his two flat-screen TVs wasn’t a problem. At least until Sprint bought Clearwire and shut down the service in early November. Another ISP covered his area, but his house lies in a depression out of line of sight of their tower. So he rigged up a bridge between the WiMAX network and his lab. The bridge sits on a hill in sight of the ISP’s tower 3.5 miles away. Solar panels, a charge controller and deep-cycle batteries power everything, and a wireless link down the hill rounds out the build.

This is obviously a temporary solution, and probably wouldn’t last long in winter weather. But it’s working for now, and more importantly it’s acting as proof of concept for a larger mesh system [tlankford01] has in mind. There are plenty of details on what that would look like on his project page (linked above), and it’s worth a look too if you’re interested in off-grid connectivity.

More ESP32 Info Dribbles Out

In case you’ve been hiding under a virtual rock over the last two years, you might have missed it when Espressif turned the IoT game on its head by releasing a chip with WiFi and a decent embedded processor for under $1 in bulk, and costing not much more than that in a module.

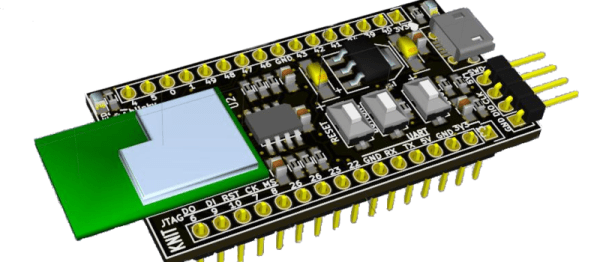
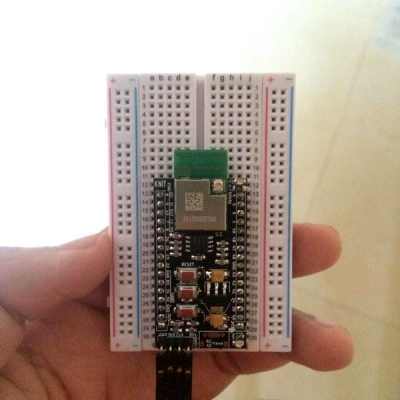
They’re looking to repeat the success of the ESP8266 with the ESP32, that should be coming out any time now. As we get closer to the release date, details start to dribble out. [Alberto], who makes very nice-looking pinout diagrams for a number of our favorite chips and modules, has already made us an ESP32 module pinout diagram.

And [Rudi] has been digging up nearly every crumb of info on the ESP32 that’s publicly available. For instance, it was through his website that we learned that the new RTOS SDK source is already up on GitHub.

There’s also a source of official information in the ESP32 forum, but there’s not much news there just yet. We expect this to change as more beta units make it out into the wild.

We covered the announcement of the forthcoming ESP32 last month, and we have to say that we’re looking forward to getting a module or two in our hands. Twin cores, BTLE support, and better DMA are tops on our list of neat features.

Light Up Your Day With This LED Clock

We love clocks, and [Chris] got our attention with the internet enabled Light Clock. Time is displayed via RGB LED strip in a number of different ways around a 3D printed white disk. All the modes are based on two selectable colors to indicate hours and minutes, either in a gradient fashion or a hard stop.

Light is provided by a 144 LED neopixel strip and is powered by a beefy 4 amp 5 volt power supply, which also powers the controller. Brains are provided by a ESP8266 powered NodeMCU-12E board, and software is written using ESP8266 for Arduino core.

Being a WiFi enabled micro controller it is a simple matter of connecting to the clock using WiFi and using the embedded web pages to select your local timezone, color palette, and display mode. The correct time is set by network and will never be wrong. While there is a Kickstarter for selling the finished project, instructions and software are provided for making your own if you wish.

Join us after the break for the promotional Kickstarter and demonstration video

Continue reading “Light Up Your Day With This LED Clock”