Useless machines might not do any work or produce anything of value on their own, but they can be a great learning tool, and are often beautifully crafted as an expression of the builder’s artistic talents. By and large, they consist of a switch to turn the machine on, and an arm that switches the machine back off in response to this. Vladimir had a different take, and built this twisting vase useless machine instead.
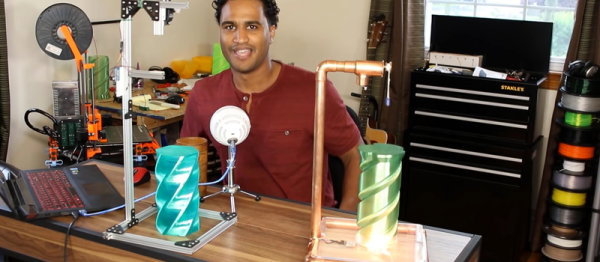
The build references the twisting vases we saw recently – [Vladimir] loved the way they so elegantly opened and closed, and decided to base the build around that. The useless part of the machine is the lifting mechanism – a servo turns a pulley, which uses a magnet on a rope to lift the vase. Upon reaching a certain point, the vase drops, and the magnet is once again lowered to lift it back up again.
The first prototype used a simple delay-based timing loop to determine when to drop the magnet again, however over time this would fall out of sync with the vase’s position and the magnet would fail to attach to the vase. For the second version, [Vladimir] improved things by using a limit switch to determine the position of the vase instead of running on timing alone. The machine’s frame was also rebuilt using copper pipe, which allowed the wires and servo to be hidden from sight. The second revision of the project shows the difference polish can make – differences like these make the machine more suitable for display as a curio in a stylish home setting, rather then a messy project that lives on the workbench only.
Be sure to check out the video of the project below the break. For a simpler useless machine, check out this build.
Continue reading “New Useless Machine Does The Twist”