3D Printing Pen And CNC Machine Yields Cheap 3D Printer

3D printers are ubiquitous now, but they’re still prohibitively expensive for some people. Some printers cost thousands, but even more inexpensive options aren’t exactly cheap. [Daniel] decided that this was unacceptable, and set out to make a basic 3D printer for under $100 by including only the bare essentials needed for creating anything out of melted plastic.

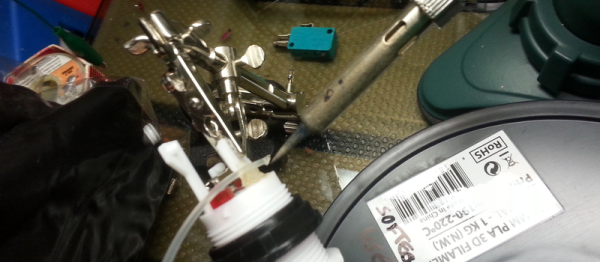
3D printers are essentially four parts: a bed, filament, and a hot end and extruder. In a previous project, [Daniel] used parts from old CD drives to create a three-axis CNC machine which he uses for the bed. To take care of the hot end and extruder, he is using a 3D printing pen which he mounts to the CNC machine and voila: a 3D printer!

It’s not quite as simple as just strapping a 3D printing pen to a CNC machine, though. The pen and the CNC machine have to communicate with each other so that the pen knows when to place filament and the CNC machine knows when to move. For that, [Daniel] went with a trusty Arduino in order to switch the pen on and off. Once it’s working, it’s time to start printing!

[Daniel] does note that this is a design that’s relatively limited in terms of print size and resolution, but for the price it can’t be beat. If you’re interested in getting started with 3D printing, a setup like this would be perfect. 3D pens are a pretty new idea too, and it’s interesting to see them used in different ways like this.

Hackaday Links: October 25, 2015

There are dozens of different 3D printable cases out there for the Raspberry Pi, but the BeagleBone Black, as useful as it is, doesn’t have as many options. The folks at 3D hubs thought they could solve this with a portable electronics lab for the BBB. It opens like a book, fits a half-size breadboard inside, and looks very cool.

The guy who 3D printed his lawnmower has a very, very large 3D printer. He now added a hammock to it, just so he could hang out during the very long prints.

There’s a box somewhere in your attic, basement, or garage filled with IDE cables. Wouldn’t they be useful for projects? Yep, only not all the wires work; some are grounds tied together, some are not wired straight through, and some are missing. [esot.eric] has the definitive guide for 80-wire IDE cables.

Like case mods? Here’s a golden apple, made out of walnut. Yes, there are better woods he could have used. It’s a wooden replica of a Mac 128 with a Mac Mini and LCD stuffed inside. Want a video? Here you go.

If you have a 3D printer, you’re probably familiar with PEEK. It’s the plastic used as a thermal break in non-all-metal hotends. Now it’s a filament. An extraordinarily expensive filament at €900 per kilogram. Printing temperature is 370°C, so you’ll need an all-metal hotend.

It’s the Kickstarter that just keeps going and going and going. That’s not a bad thing, though: there really isn’t much of a market for new Amiga 1200 cases. We’ve featured this project before, but the last time was unsuccessful. Now, with seven days left and just over $14k to go, it might make it this time.

Fitting 3D Prints On Eagle Boards

One of the hardest things you’ll ever do is mesh your electronic design with a mechanical design. Getting holes for switches in the right place is a pain, and if you do it enough, you’ll realize the beauty of panel mount jacks. This is especially true when using Eagle to design a PCB, but with a few tricks, it’s possible to build 3D printable pieces directly from Eagle designs.

[Tyler] built a clock with a bunch of LEDs. While the clock worked great, there was a lot of light leakage around the segments of his custom seven-segment numbers. The solution is a light mask, and [Tyler] figured out how to make one in Eagle.

The first step is to draw a new layer on the Eagle board that defines the light mask. This is exported as an EPS file in the CAM processor that gives him a 2D drawing. At least it’s to scale.

The next step is to install Inkscape and install paths2openscad. This turns the two-dimensional drawing into a 2D object that can be rendered in OpenSCAD and exported as a 3D printable STL file.

Does the project work? The results are great – the entire light mask is a single-wall print, and since this light mask doesn’t need any mechanical strength, it should hold up well. The clock looks much better than before, and [Tyler] has a new technique for making 3D objects for his 2D PCBs.

Converting A 3D Printer From 3mm To 1.75mm

A few weeks ago, I published a post discussing the filament diameters common in 3d printing. For no reason whatsoever, consumer 3D printers have settled on two different sizes of filament. Yes, there are differences, but those differences are just a function of engineering tradeoffs and historical choices. [Thomas], YouTube’s 3D printing guru, took this post as a challenge: what does it take to convert a printer to accept different sizes of filament? Not much, actually.

The printer [Thomas] is changing out to accept 1.75mm is the Lulzbot Mini, one of the most popular printers that would ever need this modification. The only required materials is a new hot end suitable for 1.75mm filament, a 4mm drill, and a few wrenches and allen keys. It would be a smart idea to get a hot end that uses the same thermistor as the old one, but that’s not a deal-breaker as the problem can be fixed in the firmware.

Disassembly was easy enough, and after mounting the PTFE tubing, cutting the old wires, soldering in the new hot end, thermistor, and fan, [Thomas] had everything set up and ready to go.

It should be noted that changing a 3mm hot end to 1.75mm doesn’t really do anything. Just about every filament is available in both sizes, although it may not be convenient to buy 3mm filament locally. It would be a good idea to change out the hot end so can standardize your workshop or hackerspace on a single diameter of filament.

Continue reading “Converting A 3D Printer From 3mm To 1.75mm”

Hackaday Links: October 11, 2015

[Kratz] just turned into a rock hound and has a bunch of rocks from Montana that need tumbling. This requires a rock tumbler, and why build a rock tumbler when you can just rip apart an old inkjet printer? It’s one of those builds that document themselves, with the only other necessary parts being a Pizza Hut thermos from the 80s and a bunch of grit.

Boot a Raspberry Pi from a USB stick. You can’t actually do that. On every Raspberry Pi, there needs to be a boot partition on the SD card. However, there’s no limitation on where the OS resides,  and [Jonathan] has all the steps to replicate this build spelled out.

Some guys in Norway built a 3D printer controller based on the BeagleBone. The Replicape is now in its second hardware revision, and they’re doing some interesting things this time around. The stepper drivers are the ‘quiet’ Trinamic chips, and there’s support for inductive sensors, more fans, and servo control.

Looking for one of those ‘router chipsets on a single board’? Here you go. It’s the NixCoreX1, and it’s pretty much a small WiFi router on a single board.

[Mowry] designed a synthesizer. This synth has four-voice polyphony, 12 waveforms, ADSR envelopes, a rudimentary sequencer, and fits inside an Altoids tin. The software is based on The Synth, but [Mowry] did come up with a pretty cool project here.

3D Printing Has Evolved Two Filament Standards

We’re far beyond the heyday of the RepRap project, and the Hackaday tip line isn’t seeing multiple Kickstarters for 3D printers every week. In a way, this is a bit of a loss. The rapid evolution of the low-cost 3D printer seen in the first half of this decade will never be matched, and from now on we’ll only see incremental improvements instead of the revolutionary steps taken by the first Prusa, the first Printrbot, and even the Makerbot Replicator.

This doesn’t mean everything is standardized. There’s still enough room for arguing over deltas versus Cartesians, beds moving on the Y axis versus moving along the Z, and a host of other details that make the current crop of printers so diverse. One of these small arguments is especially interesting: the diameter of the filament. Today, you can get any type of plastic you want, in any color, in two sizes: 1.75 and 3mm. If you think about it, it’s bizarre. Why on Earth would filament manufacturers, hot end fabricators, and even printer manufacturers decide to support two different varieties of the same consumable? The answer is a mix of a historical choice, engineering tradeoffs, and an absolutely arbitrary consequence of what 3D printers actually do.

Continue reading “3D Printing Has Evolved Two Filament Standards”

Enormous Delta-bot 3D Designed To Print An Entire House

[Massimo Moretti] has a big idea – to build housing on the cheap from locally sourced materials for a burgeoning world population. He also has a background in 3D printing, and he’s brought the two concepts together by building a 12 meter tall delta-bot that can print a house from clay.

The printer, dubbed Big Delta for obvious reasons, was unveiled in a sort of Burning Man festival last weekend in Massa Lombarda, Italy, near the headquarters of [Moretti]’s WASProject. From the Italian-language video after the break, we can see that Big Delta moves an extruder for locally sourced clay over a print area of about 20 square meters. A video that was previously posted on WASProject’s web site showed the printer in action with clay during the festival, but it appears to have been taken down by the copyright holder. Still, another video of a smaller version of Big Delta shows that clay can be extruded into durable structures, so scaling up to full-sized dwellings should be feasible with the 4 meter delta’s big brother.

Clay extrusion is not the only medium for 3D printed houses, so we’ll reserve judgment on Big Delta until we’ve seen it print a livable structure. If it does, the possibilities are endless – imagine adding another axis to the Big Delta by having it wheel itself around a site to print an entire village.

Continue reading “Enormous Delta-bot 3D Designed To Print An Entire House”