3D Printed Gun Fires Nerf Darts

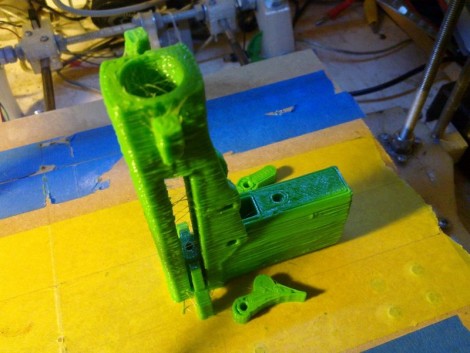
[Vik Olliver] adds a bit more power to what has traditionally been a store-bought toy by designing this printable dart gun. His design prints the follower in the track where it belongs, which means it’s not going to come loose unless the material itself fails. After printing you’ll need to clean up that track just a bit, and ream out the pivot holes for the trigger parts. Two pieces of filament are used as the axles for pivot points and can be melted in place after assembly. A third length of filament acts as a spring, making this a completely plastic gun. Well, not completely; a couple of strong rubber bands deliver the stored energy which sends the Nerf dart on its way. The design is parametric so you can adjust it for the dart dimensions of your choosing before  printing begins.

If you still haven’t managed to boot-strap your own 3D printer don’t fret. You can always give this Nerf dart sniper rifle a try.

3D Printer Gets A Big Resolution Improvement

[Jose Carlos Veloso Junior] has been working on his 3D printer to improve the resolution. We looked in on his project back in October when he was printing the blue busts like the one seen above.

We were impressed by the resolution he was able to achieve back then, using liquid resin that is cured with visible light. The resin creates a thin layer on a glass tray, and is cured when a projector shines precisely positioned light from below. The cured resin is then lifted on the Z-axis, and the next layer in the printing process is hardened by the projector’s light.

Well, this newest rendition far outperforms the initial iteration. The bust on the right looks like it’s been hand-buffed to remove the layer lines, but it actually just came off of the printer. [Jose] made a video of the new equipment in action, which you can watch after the break. He’s keeping most of the juicy bits to himself but he did tell us that the improvement he achieved were due to multiple changes in the process. He tweaked the software to use a more precise curing time, the resin formula has been improved, the ability to isolate pixels without hardening resin around them has been stepped up, and he’s made changes to the way the printer is calibrated and how it lifts the hardened model.

This is fantastic. Kudos to you sir!

Continue reading “3D Printer Gets A Big Resolution Improvement”

Molded Parts: Prusa Mendel In 30 Minutes

This set of white RepRap parts were created in molds, instead of being printed by another RepRap. [Mark A. Ganter] of the University of Washington admits that this breaks the idea of a 3D printer that is self-replicating. But the molds – which were created by tweaking Prusa Mendel parts to be mold friendly – have the ability to produce every plastic part necessary to build your own RepRap and they can do it much faster. Once the molds were completed [Mark] and his students were able to produce a full set of parts in just 30 minutes, cutting as much as 14 hours off of the time it would have taken to print the parts. Still not convinced? How about this: the molds can be created by a 3D printer or by using a high-resolution power printing method like they have here.

The process starts by printing master parts, then creating a silicone RTV mold from them. Once the molds are ready, [Mark’s] team pours polyurethane into them and waits for it to harden. They plan to share the STL files in less than a week so that you can make your own molds to use to build your RepRap army.

My RepRap Is Bigger Than Yours

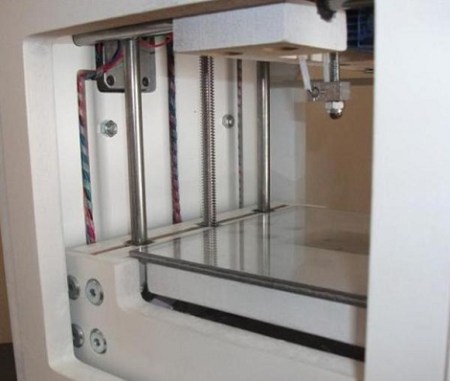
This 3D printer build is a thing of beauty. It prints in ABS plastic on quite a large base. The platform provides all of the X and Y movement, making the gantry stationary except for the Z axis. it is possible to print parts up to about 15″x15″ by 13″ high. The gray hose snaking down around the right side of the print head is a fume extractor, keeping the air clear around the PID controlled head, and heated base. Judging from the example items this prints with fantastic accuracy.

[via Make]

Make Your Own Cookie Cutters This Year

In case you needed another reason to build, borrow, or buy a 3D printer, here’s one way to design and print your own cookie cutters. [Nikolaus Gradwohl] put together a processing app that aims to make the design process a bit easier. So if you’ve never designed a printable object before, but can get your hands on a MakerBot or similar device through a friend or your local hackerspace, this is for you. Check out the video after the break to see the process of making a cutter in the shape of a mushroom, or just download the app and give it a go.

Continue reading “Make Your Own Cookie Cutters This Year”

3D Printing With LEGO

With 2400 LEGO bricks and a lot of patience, [Will Gorman] built a LEGO 3D printer. It’s similar to a RepRap or a Makerbot, but instead of extruding plastic, it uses pre-extruded building blocks (aka LEGO bricks).  The grey wall extending far above the unit itself is a feed magazine which holds the raw material. A Java application takes an MLCad file and translates it into building instructions for the printer. Those instructions are then sent to the device via USB. See it happen after the break.

Now this just needs to be combined with the LEGO sorting machine for an inexhaustible supply of bricks.

Continue reading “3D Printing With LEGO”

Laser Cutter Doubles As A 3D Printer

[Bart] figured out how to use his laser cutter as a 3D printer. We’ve checked in on his open source laser cutter in the past and we’re happy to see he’s now done with the build. But rather than stop there he took it a step further. For less than $200 he built an extruder head and added RepRap circuitry. You can see in the image above the laser tube is in the background and the extruder head with a line of black filament is mounted on the gantry. [Bart] has other plans for extensibility as well, including a knife cutter, a pen plotter, and a Dremel mount.