6502 Goes FPGA (Again)

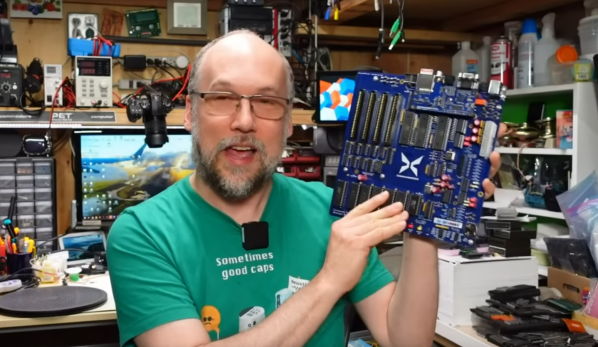
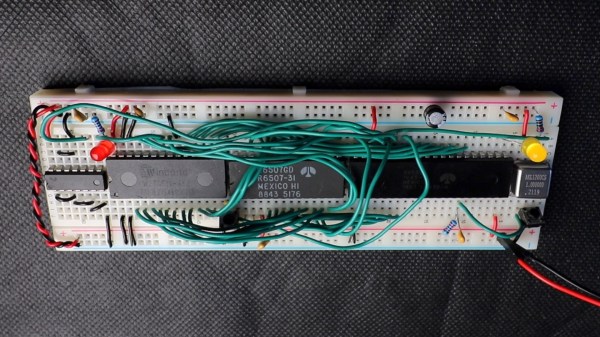
While there has been no shortage of FPGA-based recreations of classic processors, we always enjoy seeing a new approach. Last month [Some Assembly Required] took on the challenge to recreate a classic computer from the ground up and started with a 6502 implementation in Verilog. You can see in the second video below that he’s made good progress and there are apparently more videos to come.

The ROL instruction is the subject of the second video. We liked the approach of looking at what the instruction does and how many cycles it takes on different variants It is always good to make sure you know exactly what you are trying to accomplish before you get started.

Continue reading “6502 Goes FPGA (Again)”

WS2812s On A 6502

We can still remember when the WS2812 LED first came into our consciousness, way back in the mists of time. The timing diagrams in the datasheet-of-questionable-veracity made it sound quite tricky, with tight timing tolerances and essentially a high-speed two-bit PWM data protocol at 500 kHz. It was a challenge to bit-bang with an ATtiny85 back then, but there’s no way something as old and crusty as an Apple II would be up to snuff, right?

[Anders Nielsen] took up the challenge of getting the venerable 6502 processor to drive Neopixels and won! After all, if the chip is good enough for Bender and the Terminator T-800, it should be able to blink some colored LEDs, right? The secret sauce is shift registers!

Specifically, [Anders] abuses the 74LS165 parallel-in, serial-out shift register for his dirty work. Instead of bit-banging the WS2812’s “long high is a 1, short high is a 0” signal directly, the first few bits of the shift register are hard-wired to VCC and the last few to GND.

The bits in the middle determine if the pulse shifted out is long or short, and they’re set by the 6502, through a 6522 VIA chip, just like the Apple II would have. Clocking the data out of the shift register handles the timing-critical stuff. Very clever!

Video below the break.

Continue reading “WS2812s On A 6502”

Here’s A 100 MHz Pin-Compatible 6502 Replacement

The MOS Technology 6502 CPU was a popular part in its day. In various modified versions, it powered everything from the Commodore 64 to the Nintendo Entertainment System, and showed up in a million other applications too. A popular variant is the 65C02, and [Jürgen] decided to whip up a pin-compatible FPGA version that runs at a blazing 100MHz.

The CPU core was borrowed from work by [Arlet Ottens] and extended with 65C02 functionality by [Ed Spittles] and [David Banks]. [Jürgen] then packaged that core in a Spartan-6 FPGA and placed it on a small PCB the size of the original 65C02’s 40-pin dual inline package.

The FPGA is set up to access the external CPU bus with the timing matched to the clock of the host machine. However, internally, the CPU core runs at 100MHz. It copies RAM and ROM from the host machine into its own internal 64 kilobyte RAM, minus the areas used for memory-mapped I/O by the host. The CPU then runs at full 100MHz speed except when it needs to talk to those I/O addresses.

It allows the chip to accelerate plenty of tasks without completely flipping out when used with older hardware that can’t run at anywhere near 100MHz. The pin-compatible design has been tested successfully in an Apple II and a Commodore 8032, as well as a variety of vintage chess computers.

We’ve seen the opposite before too, with a real 6502 paired with a FPGA acting as the rest of the computer. If you’ve got any cutting-edge 6502 hacks of your own (not a misprint!), let us know!

[Thanks to David Palmer for the tip]

The Ultimate 1541 Talk by Michael Steil, presented at the Vintage Computer Festival West

The Ultimate Commodore 1541 Drive Talk: A Deep Dive Into Disks, Controllers, And Much More

When we think of retrocomputing, it’s very often the computers themselves that get all the glory.  There’s nothing wrong with this of course- the computers of the late 70’s and 80’s were incredible machines that were chock full of hacks in their own right. But some of the most interesting hacks of the day happened not in the computers, but rather in their peripherals. A devotee of such periphery is [Michael Steil], who was driven to compile years of research, knowledge, and hard data into The Ultimate Commodore 1541 Drive Talk which you can view below the break.

In the talk, [Michael] covers the physical disk composition and construction, the disk drives, controller hardware, and the evolution thereof. The bit-by-bit breakdown of the tracks, sectors, and header information on the disks themselves is fascinating, as is the discussion of various copy protection techniques used by vendors to prevent piracy at a time when sneakernet was in full swing.

The descent into the circuitry of the controller reveals a venerable 6502 CPU which powered many vintage computers. Further discussion divulges the secrets for getting higher performance from the 1541 drive using innovations that are as recent as 2013.

A computer historian and archaeologist, [Michael] discusses how using modified vintage hardware is sometimes enough to save your old floppy collection. He also shows how modern interfaces that read disks all the way down to the magnetic flux level can be used to reconstruct missing data.

[Michael] masterfully lays bare the complexity, engineering, and hackery that went into storing less than 200kb of data. Whether you’re a Commodore enthusiast or not, your appreciation for the 32GB USB stick collecting dust on your desk is bound to grow!

We’ve covered [Michael]’s exploits before, and you may wish to check out the Ultimate Apollo Guidance Computer Talk or the Ultimate Gameboy Talk. Do you have your own favorite retrocomputer hacks and insights to share? Be sure to let us know via the Tip Line!

Continue reading “The Ultimate Commodore 1541 Drive Talk: A Deep Dive Into Disks, Controllers, And Much More”

David Murray and Kevin Williams with an early X16 prototype

Commander X16: A Dreamy 8 Bit Computer Comes Closer To Reality

Imagine the ultimate homage to 1980s 8-bit home computers. It might  look like [David Murray] aka The 8-Bit Guy’s Commander X16.

As a core group of geeks, hackers, and developers age, we yearn for the computers of our youth. VIC-20s, Commodore Pets, 64s, 128s, Ataris, Apple IIes, and the list goes on and on. For many of us, our first hands on experience with a computer was with such a machine that is now called “retro”. Sadly, many of these relics are getting more expensive as demand increases and supplies dwindle. Working examples are harder to find, and even those can break down. Original monitors, peripherals, and accessories are also getting scarcer. This is all quite understandable when we consider that some of these classics are over 40 years old.

What was it that we loved about these old rigs that makes them so attractive? [David] decided to distil what makes a classic a classic, and then turn that list into a spec list for what he calls his “Dream Computer”. He found that things like a printed and spiral bound manual were a big part of the charm and utility of these early home computers. Booting directly to a prompt and being able to directly control the hardware was another highly desirable trait.

[David] also took the time to determine what people don’t like about these retro machines: Wacky keyboard layouts, composite video output, and glacially slow storage. Swapping multiple floppies to load a program or respooling a cassette tape is just as undesirable in 2021 as it was in 1981. Who knew?

X16 Prototype #3
The X16’s’ prototyping is still in progress.

The result of [David]’s research is the Commander X16. Inspired by the VIC-20, it’s a fresh take on the retrocomputer that only uses parts that are currently available. You can see the first video in a series about the development of the X16 below the break. Be aware that a lot of progress has been made since the video came out in 2019, but it still provides an excellent starting point for learning about the project.

The X16’s specifications read like dream list made in the mid 80s: 256 color VGA, up to 2MB memory, an 8 MHz 6502, plenty of expansion ports, and even ports for SNES style controllers.  And what else will this dream machine include? You guessed it: A spiral bound manual!

It’s not possible to list all of the great features of the X16 in this space, so check out the Commander X16 FAQ for all the details. If this project makes your heart go pitter patter, you may be interested to know that they need help with software development! An emulator is available for development. The goal is to have a healthy software ecosystem in place when the X16 launches.

You may also enjoy reading about other 6502 retrocomputer reports such as this “Brain in a vat” 6502 computer, or a guided tour of the birthplace of the 6502 and the Commodore 64 with our very own Bil Herd.

Thank you to [Truth] for bringing us a report of this fine project via the Tip Line. Keep those tips coming!

Continue reading “Commander X16: A Dreamy 8 Bit Computer Comes Closer To Reality”

Cerberus 2080 — Three-Headed Retro Computing Project

For seven months, [Bernardo Kastrup] at [TheByteAttic] has been realizing his childhood dream of building his own computer. It was this dream that steered him into the field of computer design at the age of 17. After thirty years in the industry, he finally has some time to design the computer he dreamt about as a kid. His requirements are ambitious: fully open design, gate-level details, thru-hole or PLCC for easy hacking, well-established processors with existing tool chains, low-cost development tools for CPLDs, no FPGA, standard ITX case compatible, and so on. He quite reasonably decides to use more modern electronics for video (VGA), keyboard (PS/2), and program storage (flash drive). Along the way, he chooses to put three processors on the board instead of one:

  • Zilog Z84C0010 (Z80)
  • WDC W65C0256 (6502)
  • AVR ATMEGA328 (RISC Controller)

When coming up with the concept and requirements, [Bernardo] had a fictitious alternate history in mind — one where there were follow-ups to the ZX80, PET/CBM, or TRS-80 from the late 1970s that were extensions to the original systems. But he also wanted a clean design, without cost-cutting gimmicks, in order to make it easier for learners to focus on computing itself — a didactic architecture, as he describes it. Turn the crank for seven long months, and we have the Cerberus 2080. [Bernardo] has put the design on GitHub, and made a video series out of the whole process, of which the introduction video is below the break. There’s even an online emulator developed by retro hacker  [Andy Toone].

We wrote about the 6502-based ERIC-1 project back in 2014 which shared the bus with an ATMEGA simulating ROM. The Minty Z80 project from 2019 also uses a similar technique. Thanks to [Frédéric] for sending us the tip.

Continue reading “Cerberus 2080 — Three-Headed Retro Computing Project”

Gorgeous 6502 Celebrates Craftsmanship Of The Early Homebrewers

The days when a computer had a front panel bristling with switches and LEDs are long gone, and on balance that’s probably for the better in terms of ease of use, raw power, and convenience. That’s not to say there aren’t those who long for the days of flipping switches to enter programs, of course, but it’s a somewhat limited market. So unless you can find an old IMSAI or Altair, chances are you’ll have to roll your own — and you could do a lot worse than this aluminum beauty of a 6502 machine.

The machine is named PERSEUS-8 by its creator, [Mitsuru Yamada]. It follows earlier machines bearing the PERSEUS badge, all of them completely homebrewed and equally gorgeous. The PERSEUS-8 would have been an impressive machine had it come along 45 years ago — the 2 MHz version of the 6502, a full 16-bit memory address space, and 16 kB of battery-backed RAM. But the mechanical and electrical construction methods and the care and craftsmanship taken are where this build really shines. The case is fabricated out of aluminum sheets and angles and looks like it could have come from a server rack. The front panel is to die for — [Mitsuru] carefully brushed the aluminum before drilling the dozens of holes needed for the toggle switches and LEDs. And the insides are equally lovely — socketed chips neatly arranged on perfboard with everything wired up using period-correct wirewrap methods. Even the labels, both on the front panel and even on the motherboard, are a joy to behold.

Builds like this are the ones that really inspire us to take the extra steps needed to make our projects not only work, but also to be beautiful. We’ve seen this kind of craftsmanship from [Mitsuru] before — recall this serial terminal that never was, or the machine that came before the PERSEUS-8.