You never know where a hack will take you. Sometimes a simple project will take on a life of its own and become a huge software framework. Other times, a reading blog can turn into a weekend project. Hackaday.io is the place to upload every project, big, small, or somewhere in between. This week on the Hacklet, we’re taking a look at two projects – one big, one small.
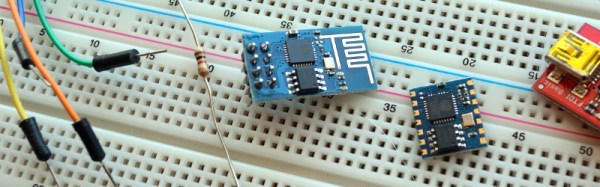
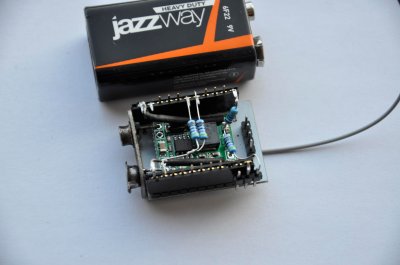 [Rand Druid] recently spent a Weekend on the Dark Side, creating an ESP8266 packet injector. The project started when [Rand] read about [Kripthor’s] deauth packet injection attacks right here on Hackaday. He initially created the WiFi denial of service throwie mentioned in the article. The basic Bill of Materials (BOM) for this device is an ESP8266 module, a DC/DC converter, a 9V battery, connectors, and a few resistors. This worked well, but some devices (most notably [Rand’s] son’s Android Phone) would disconnect and reconnect so quickly the attack had no practical impact.
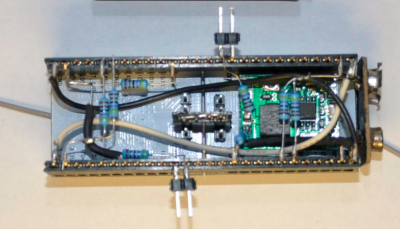 [Rand] fixed the problem by adding a second ESP8266 module. The first is the listener. It listens for WiFi access points. Once an AP is found, it sends this information to the second jammer” module via a unidirectional single line serial link. The jammer module pumps out deauth packets at full speed. He even managed to create a single executable which performs as both listener and jammer. At boot, the software sends out a series 0xFF bytes through the serial port. The listener has its serial transmit pin directly connected to the jammer’s serial receive line. When the jammer receives the 0xFF bytes, it jumps into the correct function. This was more than enough to kick that pesky Android phone off the network. As with the original article, we have to stress that you should only use modules like these for testing on your own equipment. Be careful out there folks!
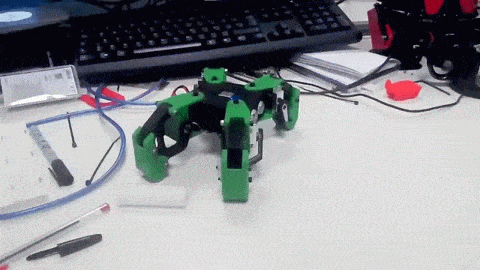
 [Kevin Harrington] loves robots, but hates reinventing the wheel every time he creates a new machine. He’s built BowlerStudio: A robotics development platform to combat this problem. BowlerStudio was a semifinalist in the 2015 Hackaday Prize. BowlerStudio is a soup-to-nuts platform for creating all sorts of robots. [Kevin] has integrated Computer Aided Design (CAD), 3D modeling, kinematics, machine vision, and a simulation engine complete with physics modeling into one whopper of a software package. To prove how versatile the system is, he designed a hexapod robot in the CAD portion of the program. The robot then taught itself to walk in the simulation. Once the design was 3D printed, the real robot walked right off the bread board. [Kevin] linked the hardware and software with DyIO, another of his projects.
BowlerStudio is a huge boon for just about any robotics hacker, as well as educators. An entire curriculum could be created around the system. Thanks to its Java roots, BowlerStudio is also a multi-platform. [Kevin] has binaries ready to go for Windows, Mac, and Ubuntu.
The newest feature in BowlerStudio is JBullet. JBullet is a Java port of the Bullet physics library. Physics means that important real world effects like gravity and surface friction can now be added to simulations. In [Kevin’s] own words “This project is starting to feel more and more like a game engine targeted towards designing robotics and engineering tools.”
That’s it for this week’s Hacklet. As always, see you next week. Same hack time, same hack channel, bringing you the best of Hackaday.io!