Putting Cheap Motorcycle Tachometers To Work

With so much data being thrown at our eyeballs these days, it’s worryingly easy for the actually important stuff to slip by occasionally. So when [Liam Jackson] wanted a way to visualize the number of test failures popping up in the continuous integration system at work, he went with a novel but effective solution — universal motorcycle tachometers.

It turns out these little gauges can be had for under $10 a piece from the usual overseas retailers, and are very easy to drive with a microcontroller. As [Liam] explains, all you need to do other than providing them with 12 volts, is feed them a PWM signal. Even though the gauges are designed for a 12 V system, they apparently don’t have any problem responding to the 5 V logic level from the Arduino’s pins.

As for the frequency he says that 1,000 RPM corresponds to 16.66 Hz, so you can just multiply up from there to show whatever number you wish. That said, [Liam] warns that the gauges draw several hundred milliamps once the needle gets into the two digit range, so keep that in mind. Conveniently, those number happen to be in red anyway…

For his particular application, [Liam] put three of the gauges together to create a very handsome dashboard. If you want to recreate his setup exactly he’s made the STLs available for the gauge cluster housing. Note the small OLED at the center, this offers a way to show a bit more context than the three analog gauges alone can express, especially if you’ve got an application where you might be switching between multiple data sources.

Over the years we’ve seen several projects that repurposed analog gauges of various types, often for showing computer performance, but they generally involved having to drive the galvanometers directly. That these tachometers can simply be fed a simple digital signal should make implementing them into your project much easier.

Vintage Meters Reborn As Steam Punk Clock

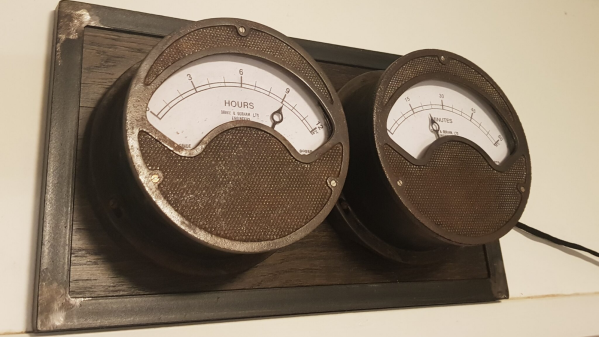
[Build Comics], purveyors of comic strips “where tools are heroes”, have saved another pair of old, vintage, analog meters from the junkyard by converting them into a Meter Clock. The real heroes of the story are their trusty tools – Mac X the knife, Mr. TS the table saw and his trusty band of clamps, G. Rinder the angle grinder, Weldy the welder, Sharp Eye the marker, rounded up by Sandy the Sander and Jiggy Saw. The Drake & Gorham (London) meters going under the knife appear similar to vintage hardware from just after the end of World War II, such as this Ferranti Ammeter found at the Science Museum Group, making them at least 75 years old.

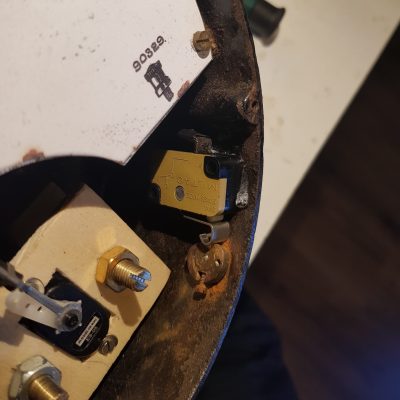
A small cam is used to engage the DST switch.

As you might expect, the conversion process is reminiscent of their previous projects. The original moving-coil movements are discarded, and the pointer is attached to a servo which will act as the new movement. Fresh dials are prepared to replace the original ampere markings with hours and minutes. To retain some of the original charm, the new dials have discoloration and blemishes replicated from the old dials.

The set screw which was once used to align the pointer with the zero mark on the dial is now used to activate a micro switch that enables daylight savings time. Two additional buttons provide a convenient interface to adjust the time. Precision time signals are derived from a DS3231 RTC module connected to an Arduino. A pair of seven segment displays are connected to the Arduino to make it easier to set the time. A piece of oak plank, surrounded by a metal angled frame, is used as a base for mounting the two meters so that the clock can be hung up on the wall.

If you’d like to build some more vintage inspired instrumentation, [Build Comics] have you covered with a Classy Weather Display or a Plant Moisture Gauge.

Continue reading “Vintage Meters Reborn As Steam Punk Clock”

Vintage Ammeter Becomes Plant Moisture Gauge

It’s not uncommon to happen across vintage measurement equipment at the local flea market or garage sale. Often with an irresistible aesthetic, and built to last decades, these tools nonetheless tend to be sidelined when modern multimeters are available. [Build Comics] had just such a piece on hand, and decided to repurpose it with some modern hardware instead.

The build begins with a Hartmann & Braun 60 amp ammeter. Replete in a nice wooden box, it’s the perfect candidate for a modern refit. The device uses an indicator of the moving iron type. Intending to turn the device into a soil moisture monitor, [Build Comics] began by removing the original heavy-wound coil. In its place, a custom coil was installed instead, wound on a 3D printed bobbin using a modified sewing machine. This allows the meter to be easily driven by an Arduino with little more than a transistor on a GPIO pin. To detect moisture, a Iduino ME110 moisture probe was used. Complete with cloth-covered wire to maintain the vintage look. The original meter plate was also photographed, modified, and reprinted, to read moisture levels instead of current.

If you’re interested in these gauge restoration techniques but don’t have a green thumb, no worries. [Build Comics] used similar tricks to put together a gorgeous weather station that would look great on your desk.

Continue reading “Vintage Ammeter Becomes Plant Moisture Gauge”

Vintage Gauges Turned Classy Weather Display

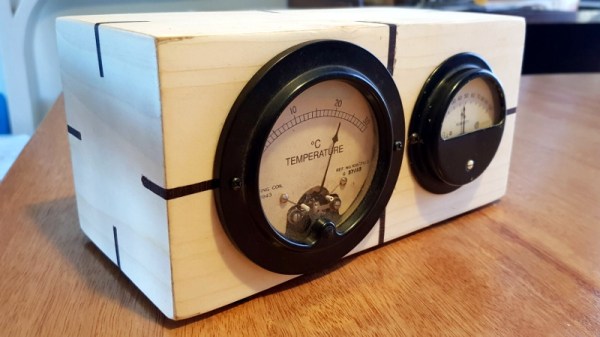
It’s always good to see old hardware saved from the junk pile, especially when the end result is as impressive as this analog gauge weather display put together by [Build Comics]. It ended up being a truly multidisciplinary project, combing not only restoration work and modern microcontroller trickery, but a dash of woodworking for good measure.

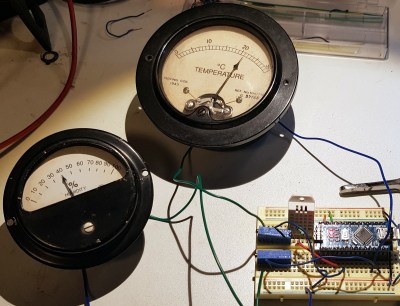
Naturally, the gauges themselves are the real stars of the show. They started out with rusted internals and broken glass, but parts from a sacrificial donor and some TLC from [Build Comics] got them back in working order. We especially like the effort that was put into making the scale markings look authentic, with scans of the originals modified in GIMP to indicate temperature and humidity while retaining the period appropriate details.

To drive the 1940s era indicators, [Build Comics] is using an Arduino Nano and a DHT22 sensor that can detect temperature and humidity. A couple of trimmer pots are included for fine tuning the gauges, and everything is mounted to a small scrap of perfboard hidden inside of the custom-made pine enclosure.

This is hardly the first time we’ve seen analog gauges hooked up to modern electronics, but most of the projects are just that: modern. While the end look might be somewhat polarizing, we think maintaining the hardware’s classic style was the right call.

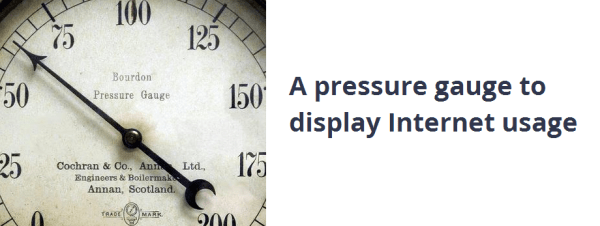
Pressure Gauge Used to Monitor Internet Usage

Steam Gauge Keeps Track Of Your Internet Usage

There’s a certain appeal to analog gauges in a vastly digital world. [Ed Konowal] is a Network Operations Supervisor for a school district in Florida — part of his job is to ensure a stable and fast internet connection, so he decided to make an internet usage gauge for his office.

What we really like about this hack is the fact that [Ed] had no idea how to do it. It’s a simple enough idea, right? Google was his friend and Ed started learning about all kinds of things. Raspberry Pi’s and Arduinos, wireless receiver/transmitters, servos and steppers, Python…

After quite a bit of trial and error, [Ed] eventually settled on a wired design which uses a Raspberry Pi running a Python program to poll the internet bandwidth, which in turn calculates the servo position for the dial and sends that number to the Arduino to move it into position. This repeats every 10 seconds. Pretty cool!

Kind of reminds us of this project to make custom gauges using a stepper motor breakout board!

[Thank Justin!]

Breaking Open The Quirky Nimbus

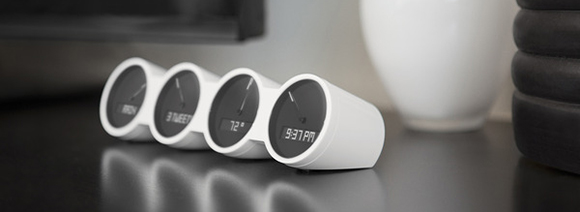
Nimbus

The Nimbus is a little Internet-connected device put out by a company called Quirky. It features four analog dials, each with graphic LCDs, with WiFi connectivity to show you how many tweets you’ve made in the past day. You know, in case you forgot, or something.

[Edu] didn’t find the social media-oriented Nimbus very useful, but Internet connected analog gauges are just so cool, so out came the screwdriver and the writing of new firmware commenced.

Inside the Nimbus there’s an SPI Flash, PIC micro, and an Electric Imp, a tiny ARM microcontroller and WiFi adapter stuffed inside an SD card. The Imp is always tied to a cloud service, in this case, a Quirky-lined cloud, but the folks at Quirky were keen to help [Edu] in his quest for better firmware.

After figuring out all the traces, [Edu] wrote a simple firmware that can control everything there is to control – the dials, displays, two buttons, and a speaker. So far he’s put some graphics on the display and PWM’d the theme from Monkey Island. This is just scratching the surface of what the device can do – [Edu] can still make use of the WiFi connectivity, and those dials can do much more than spin around in circles.

Monkey Island video below.

Continue reading “Breaking Open The Quirky Nimbus”

Custom Gauges With A Stepper Motor Breakout Board

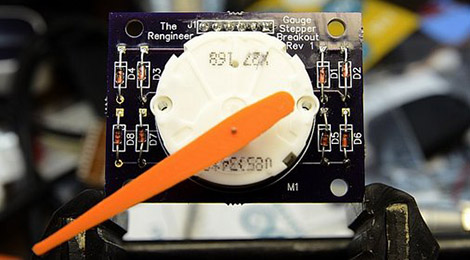
Throw some blinking LEDs on a project and it’s bound to make the front page of Hackaday. We do love builds of a more analog character, though, and this analog gauge stepper motor breakout board seems like just the ticket to make those projects a reality.

The idea behind the project is simple: take a stepper motor, put a needle on it, and connect it to an Arduino. Instant analog gauge, measuring anything an Arduino can calculate.

The motor used in the build is a Switec X27.168, the same motor used in the dashboard of tens of thousands of automobiles from dozens of different makes and models. Controlling the motors is done through [Guy Carpenter]’s Switec X25 library for the Arduino, allowing an Arduino Uno to control up to three stepper motor gauges simultaneously.

The movement of the needle is amazingly smooth and quite fast, as seen in the video after the break. A pretty cool piece of kit if you want a more analog display than LEDs and LCDs can provide.

Continue reading “Custom Gauges With A Stepper Motor Breakout Board”