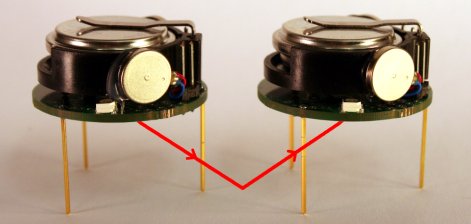
Reader, [Michael Rubenstein], sent in a project he’s been working on. Kilobot, as stated in the paper(pdf), overcomes the big problems with real world swarm robotics simulations; cost, experiment setup time, and maintenance. The robot can be communicated with wirelessly, charged in bulk, and mass programmed in under a minute. Typically, robots used for swarm research cost over a $100, so large scale experiments are left to software simulation. These, however, rarely include the real world physics, sensor error, and other modifying factors that only arise in a physical robot. Impressively enough, the kilobot comes in far under a hundred and still has many of the features of its costlier brothers. It can sense other robots, report its status, and has full differential steer (achieved, surprisingly, through bristle locomotion). There are a few cool videos of the robot in operation on the project site that are definitely worth a look.
atmega328120 Articles
Warm Tube Clock, Take 2
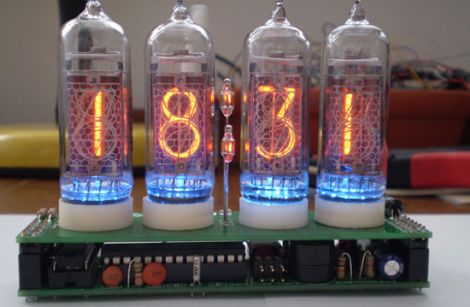
[Mure] wrote in to let us know he has put the finishing touches on the second iteration of his Warm Tube Nixie clock. We featured his original creation here last year, and while many things remain the same, he has still found a few things that he was able to improve on.
The first notable feature is the new real time clock. Instead of using a discrete crystal to keep time and a temperature sensor for compensation, he has opted to use a DS3231 RTC IC. It is far more accurate than the crystal, and it features a built-in temperature sensor as well. The alarm functionality has been simplified too, moving the controls into firmware rather than having to use a sliding switch to do so.
With the mainboard redesign, it would have been easy to leave behind the nixie “shields” he created for his first clock, but with a focus on interoperability, he chose to make this clock fully compatible with version one’s shields and vice versa.
While the changes aren’t groundbreaking, it’s nice to see a project like this undergo continued refinements. If you want to build a clone of this clock, [Mure] has made sure that all of the schematics and source code are available on his site.
Continue reading to see a brief video demo of the clock in action.
Roll Away Clock Becomes A Programmable Rover
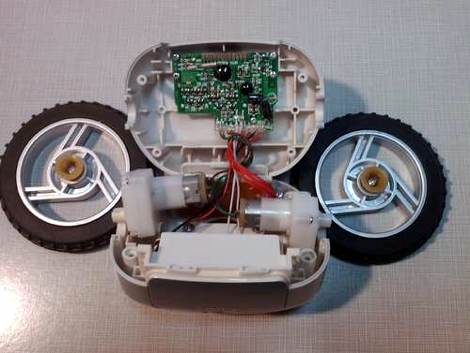
The parts laid bare in the picture above all make up a roll away alarm clock that flees when you don’t get out of bed. It’s an interesting idea, but considering most folks don’t sleep on hardwood floors we can understand why [TheRafMan] was able to pick this gem up for under $5. That’s quite a deal because there’s a very usable LCD module at the top. But for this hack, he focused on using the gearhead motors to make a programmable rover.
In order to make this programmable [TheRafMan] had to add a microcontroller. He chose an Arduino variant, called the Ardweeny. It’s a board that piggy-backs the ATmega328. But he didn’t use a stock Ardweeny; he’s altered it to play nicely with jumper wire. The uC is able to interface with the gearhead motors thanks to an L293D h-bridge motor driver chip. As you can see in the clip after the jump, the rover can now be driven around using a Wii Nunchuck or via a USB connection. If you’ve got a Bluetooth module lying around it wouldn’t be hard to make this a wireless solution that can be controlled with the accelerometers in a Wii remote.
Continue reading “Roll Away Clock Becomes A Programmable Rover”
AVR: The Facts About Flash Memory
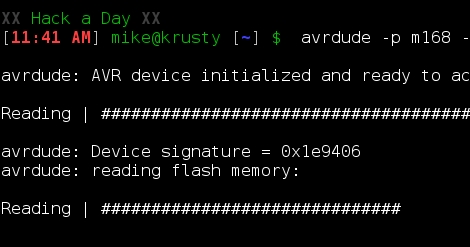
Here’s a nice little discussion about reading and writing AVR flash memory that [Windel] put together. He’s using an In System Programmer to read the flash memory from an ATmega328 using AVRdude, the programming software which we used in our AVR Programming Tutorials. He covers the particulars of the commands, how this might be useful, and finishes up with the gotcha’s involved in reading back code from the chip. We recently tried this out with that LED light bulb but were unsuccessful because the lock bits on the ATtiny13 chip had been set in order to protect the firmware from our prying eyes. Hopefully you’ll have more luck with these methods.
DIY Ultrasonic Range Finder For $5
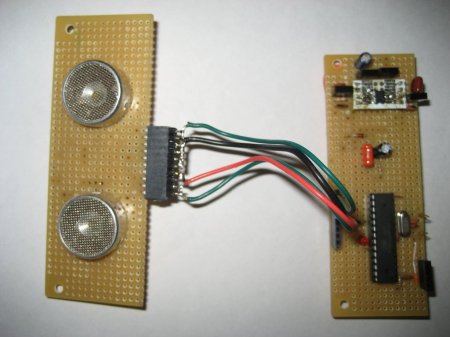
After finding some ultrasonic transducers online for a dollar each [Kerry Wong] decided to create an ultrasonic range finder. The result is much like parallax’s PING))) sensor but much cheaper. His post is not only a good way to save some money, but also does a good job of explaining how ultrasonic sensors work. The transmit circuit is essentially an H-bridge, much like what you would use to control a motor. To listen to the returning echo he uses a pair of high gain/low noise op-amps to filter and amplify the signal. The board he uses to test the range finder (not included in the cost) is an ATMega328 running the Arduino boot loader. He also provides lots of example code to boot.
Developing An Electronic Board Game
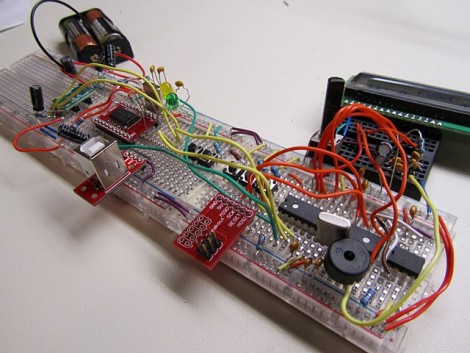
[Zach] enjoys playing the game Catch Phrase, but the complexity of the words makes this game a no-go for the little ones. We remember that the game used to be mechanical, using paper disks with the words on them. Those would be easy to recreate with your own dictionary set, but since it has transitioned to an electronic unit that option is out the window. So [Zach] decided to build his own version of the game that lets you use custom word sets after drawing inspiration from another Catch Phrase hack.
He’s calling it AVRphrase since it uses an AVR ATmega328. You’ll also find five buttons, a piezo buzzer, and a character LCD included in the design. He saw the project all the way through to the end, having a PCB manufactured, and installing it in a project box. A demonstration of the finished game can be seen after the break. [Zach] ended up with 9 working units at a cost of about $30 each.
Warm Tube Clock
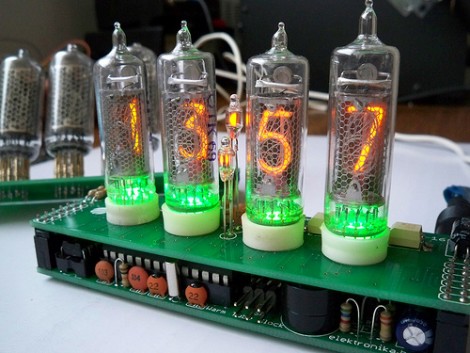
The Warm Tube Clock is the new kid on the block of Nixie Tube clocks. It takes inspiration from, and uses the same voltage driver circuit as the Ice Tube Clock. But this one uses four tubes instead of that hard-to-find single tube. It has a few other tricks up its sleeve. The shield that hosts the tubes has been designed for two different types. It also hosts an RGB LED for each tube, which adds the green glow seen above, and has a couple of small neon indicator bulbs which serve as the colon between hours and minutes.
The driver board centers around an ATmega328 running about three thousand lines of code. The firmware offers a lot of options including sound feedback, and a setting for every clock, calendar, alarm, and LED color toggle imaginable. See for yourself as the settings video, embedded after the break, walks you through each stage of the menu. We can’t help but think you need an instruction manual to set this thing up.

