Shrinket, The Homebrew Trinket

shrink

We’ve seen a lot of Trinket builds over the past few months, but so far few people have capitalized on the Trinket’s minimalism. It’s a fairly simple circuit, as far as dev boards go, and with careful planning can be built entirely on perfboard. That’s what [villeki] did, with a project he calls Shrinket.

After looking at the schematic for the Trinket, [villeki] figured he could best the very small footprint of this ATtiny85 board. To do this, he mounted the uC on the bottom side of the board, bending the pins so they could be easily soldered to the pins. The only real challenge in building this tiny board was the USB connector. To fit this connector on board, the copper pads were carefully scraped off the protoboard and wires run to the zeniers.

The Shrinket is impressively small – only 0.6″x 0.9″ – and a very impressive example of soldering skills. If you’re looking for a project to hone your free-form soldering skills, this is a great way to spend an hour or two. Bonus, you probably already have the parts required (or a reasonable substitute) sitting around.

Chachka: A Trinket Clone

Why would you clone something as cheap as the adafruit Trinket? Well, because you can, of course. And that’s exactly why [Ray] started to build a clone two days after his Trinket came in the mail. He encourages you to support adafruit by buying at least one Trinket before attempting a clone, and we agree. Besides, you’ll be able to use the support forum with a clear conscience.

[Ray]’s design uses an 1800Ω pull-up resistor rather than the 1500Ω in the Trinket. He made this change based on his experience with V-USB and the ATtiny85. He has a lot more information on his build on the Arduino forum. Check out a short video of Chachka responding to a Sony-esque remote control after the break.

Need an application for your Trinket clone? Check out this incredibly well-built USB volume knob.

Continue reading “Chachka: A Trinket Clone”

The Tiniest SD Card Locker

sdlocker-tiny

In case you weren’t aware, that little ‘write protect’ switch on your SD cards probably doesn’t do anything. It’s only a switch, really, and if an SD card reader doesn’t bother to send that signal to your computer, it’s completely ineffective. Then there’s the question of your OS actually doing something with that write protect signal.

The better way to go about write protecting an SD card is using the TMP_WRITE_PROTECT bit on the SD card’s controller. [Nephiel] came up with an amazingly small device to set that bit, with the entire circuit fitting inside an old Playstation memory card.

[Nephiel] based his project on [Karl Lunt]’s SD Card Locker we saw late last year. [Karl]’s SD Locker uses an ATMega328 microcontroller, a pair of AA batteries, and an SD card socket to perform the bit toggling. This is still a very small device that fits inside an Altoids tin, but [Nephiel] thought he could make it smaller.

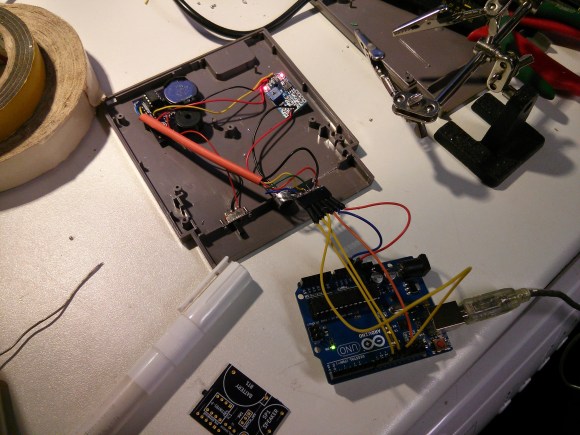
The new and improved version uses an ATTiny85 for SPI access to the SD card. A single button and LED serves as the user interface: with the LED off, the SD card is writable. Press the button, the card is locked, and the LED lights up.

A Vibrating Timepiece

vibratingWatch

It may not look like much, but the above pictured device is [qquuiinn’s] handy little watch that indicates time through pulsed vibrations. Perhaps we should refrain from labeling it as a “watch,” however, considering it’s [qquuiinn’s] intention to remove the need to actually look at the thing. Vibrations occur in grandfather clock format, with one long vibration for each hour, accompanied by one, two, or three short pulses for the quarter-hour increments.

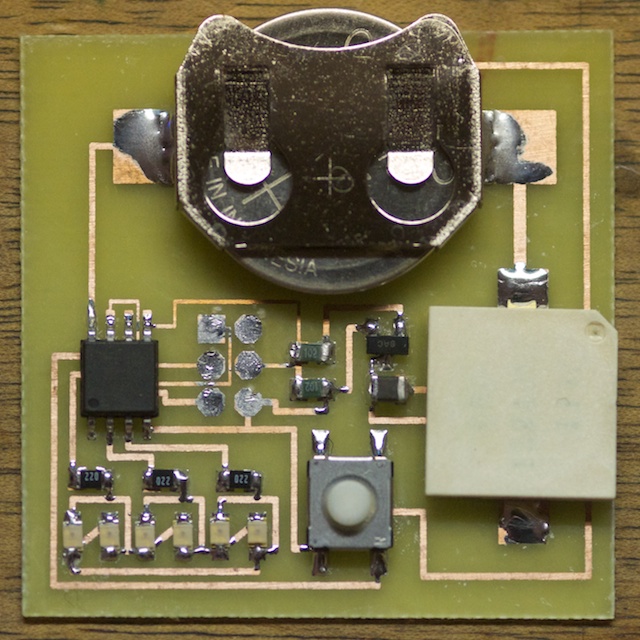
The design is straightforward, using an ATTiny85 for the brains along with a few analog components. The vibration motor sticks to the protoboard with some glue, joining the microcontroller, a coin cell battery, and a pushbutton on a small protoboard. The button allows for manual time requests; one press responds with the current time (approximated, probably) in vibrations. The build is a work in progress, and [qquuiinn] acknowledges the lack of an RTC (real-time clock) causes some drift in the timepiece’s accuracy. We suspect, however, that you’d address that problem—twice daily—when you replace the battery: it only lasts ten hours.

Trimming The Fat From AVR GCC

avr

[Ralph] has been working on an extraordinarily tiny bootloader for the ATtiny85, and although coding in assembly does have some merits in this regard, writing in C and using AVR Libc is so much more convenient. Through his trials of slimming down pieces of code to the bare minimum, he’s found a few ways to easily trim a few bytes off code compiled with AVR-GCC.

To test his ideas out, [Ralph] first coded up a short program that reads the ATtiny85’s internal temperature sensor. Dissassembling the code, he found the a jump to a function called __ctors_end: before the jump to main. According to the ATtiny85 datasheet, this call sets the IO registers to their initial values. These initial values are 0, so that’s 16 bytes that can be saved. This function also sets the stack pointer to its initial value, so another 16 bytes can be optimized out.

If you’re not using interrupts on an ATtiny, you can get rid of 30 bytes of code by getting rid of the interrupt vector table. In the end, [Ralph] was able to take a 274 byte program and trim it down to 190 bytes. Compared to the 8k of Flash on the ‘tiny85, it’s a small amount saved, but if you’re banging your head against the limitations of this micro’s storage, this might be a good place to start.

Now if you want to hear some stories about optimizing code you’ve got to check out the Once Upon Atari documentary. They spent months hand optimizing code to make it fit on the cartridges.

Hackaday Links: November 24, 2013

hackaday-links-chain

We love home theater hacks and this one especially since it is also part of a larger home automation project. [Falldeaf] use Z-Wave wireless home automation and includes mains switching for his television. The only problem being that when power is switch back on the TV remains in the standby state. His solution was to use an ATtiny85 to detect power, then push the IR code to turn the TV on after a short delay.

[Pjkim] wanted to prototype using the Tiva Launchpad on his Mac. He managed to get a toolchain up and running that includes the TivaWare libraries. He put together a guide that shows how to set up Eclipse and Energia for the Tiva family. If you haven’t heard of Energia check out the Github Readme.

Most folks have a smartphone and you can bet that the handsets are Bluetooth enabled. But we think there is still a low percentage who are connecting their smartphone audio to wireless speakers. [Anton Veretenenko] shows how you can use some cheap KRC-86B modules from Ali Express to make your own wireless speakers. He’s even powering his hack with a single 18650 Li-Ion cell.

Taking a turn away from electronics we got a chuckle out of [CADFood’s] plan to make pearls with his bicycle. He used DesignSpark Mechanical to model what amounts to a bicycle powered ball mill. It attaches to his spokes and after taking a hammer to some oyster shells he loads them up and goes for a ride. Well actually he needs to go for a bunch of rides. The idea is that about six months of bicycling will yield a cache of pearls. [Thanks Holger]

We enjoyed this article on how designing powered scooters is changing engineering education. We’re happy to see that hacking is starting to be widely accepted as a functional and effective way to gain and pass on knowledge.

If you have access to a 3D printer you can own some of the relics from the Smithsonian. They’ve been 3D scanning some pieces in their collection and you can download the models.

And finally, [GravityRoad] is working on building a delta-bot arm to use as part of a performance art project. Check out one of the most recent development videos and if that gets you interested there’s much more on the website. [Thanks Charles]


Cloning The Trinket For A USB Volume Knob

A while back, [Rupert] wrote a blog post on using V-USB with the very small, 8-pin ATtiny85. Since then, the space of dev boards for 8-pin micros with USB has exploded, the most recent being Adafruit’s Trinket. [Rupert] liked what he saw with the Trinket bootloader and decided to clone the circuit into a useful package. Thus was born an awesome looking USB volume knob complete with a heavy aluminum knob, rotary encoder, and RGB LED strip.

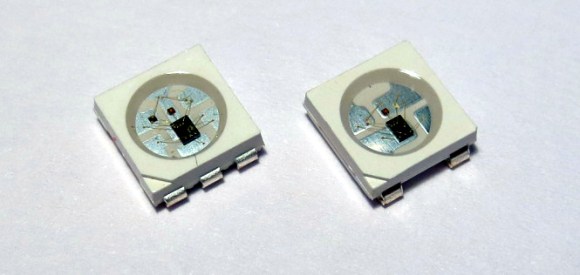
[Rupert] got his V-USB/ATtiny85/rotary encoder circuit working, and at the expense of a ‘mute’ control, also added an awesome looking RGB LED ring powered by Adafruit’s Neopixels. The PCB [Rupert] fabbed is pretty well suited for being manufactured one-sided. If you’ve ever wanted an awesome volume knob for your computer, all the files are available form [Rupert]’s blog.

Just as an aside, [Rupert] has been working on getting the Trinket bootloader working on the ATtiny84, a very similar microcontroller to the ’85, but with eight analog pins. It’s a neat device that I’ve made a small V-USB breakout board for, but like [Rupert], I’m stuck on porting the bootloader. If anyone has the Trinket/Gemma firmware running on an ATtiny84, send that in. We’ll put it up.