Creating music is a perfect hobby for anyone into hacking, and the amount of musical hacks and self-made instruments we come across here makes that supremely evident. It’s just a great match: you can either go full-on into engineering mode as music is in the end “just” applied physics, or simply ignore all of the theory and take an artistic approach by simply doing whatever feels right. The sweet spot is of course somewhere in between — a solid grasp of some music theory fundamentals won’t hurt, but too much overthinking eventually will.
The obvious choice to combine a favorite pastime like electronics or programming with creating music would be in the realm of electronic music, and as compelling as building synthesizers sounds, I’ll be going for the next best thing instead: the electric guitar. Despite its general popularity, the enormous potential that lies within the electric guitar is rarely fully utilized. Everyone seems to just focus on amp settings and effect pedals when looking for that special or unique sound, while the guitar itself is seen as this immutable object bestowed on us by the universe with all its predestined, magical characteristics. Toggle a pickup switch, and if we’re feeling extra perky, give that tone pot a little spin, that’s all there is to it.
The thing is, the guitar’s electrical setup — or wiring — in its stock form simply is as boring and generic as it can get. Sure, it’s a safe choice that does the job well enough, but there’s this entirely different world of tonal variety and individual controllability locked inside of it, and all it really takes is a screwdriver and soldering iron to release it. Plus, this might serve as an interesting application area to dive into simple analog electronics, so even if guitars aren’t your thing yet, maybe this will tickle your creativity bone. And if bass is more your thing, well, let me be ignorant and declare that a bass is just a longer guitar with thicker, lower-tuned strings, meaning everything that follows pretty much applies to bass as well, even if I talk about guitars.
However, in order to modify something, it helps to understand how it functions. So today, we’ll only focus on the basics of an electric guitar, i.e. what’s inside them and what defines and affects their tone. But don’t worry, once we have the fundamentals covered, we’ll be all settled to get to the juicy bits next time.
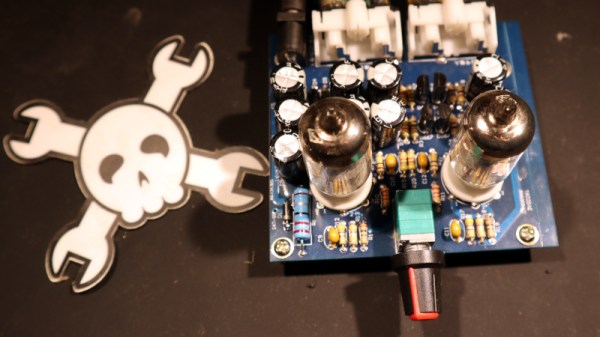
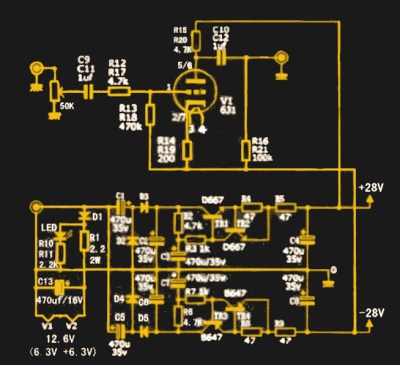 What I received for my tenner was a press-seal bag with a PCB and a pile of components, and not much else. No instructions, which would have been worrisome were the board not clearly marked with the value of each component. The circuit was on the vendor’s website and is so commonly used for these sort of kits that it can be found all over the web — a very conventional twin common-cathode amplifier using a pair of 6J1 miniature pentodes, and powered through a +25 V and -25 V supply derived from a 12 VAC input via a voltage multiplier and regulator circuit. It has a volume potentiometer, two sets of phono sockets for input and output, and the slightly naff addition of a blue LED beneath each tube socket to impart a blue glow. I think I’ll pass on that component.