A Mobile Radio Power Controller

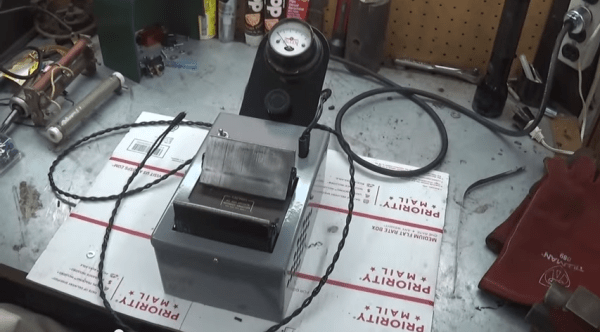
[Pete], a.k.a. [KD8TBW] wanted to install his Yaesu radio in his car. From experience, he knew that having a radio in a car inevitable led to leaving it on once in a while, and this time, he wanted a device that would turn his rig on and off when the key was in the ignition. He ended up building a mobile radio power converter. It takes the 12V from the car when the alternator is running, and shuts everything off when the engine has stopped.

The Yaesu radio in question – an FT-8800 does have an automatic power off feature, but this is a terrible way of doing things. There is no way to turn the radio back on, and the radio must be left in a non-scanning mode.

In what he hopes to be his last design in EagleCAD, [Pete] whipped up a board featuring an ATtiny85 that measures the voltage in the car; when it’s ~14V, the alternator is working, and the radio can be switched on. When it drops to ~12V, it’s time to turn the radio off. It’s a great project, and with the 3D printed case, it can easily be shoved inside the console. Video below.

Continue reading “A Mobile Radio Power Controller”

THP Entry: Digital Gauges For Everything Automotive

DDAQ

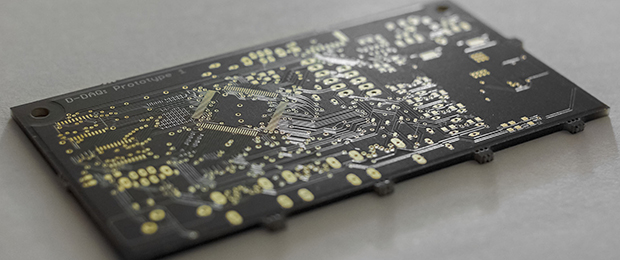
Way back in 2007, someone on a VW TDI forum came up with a new boost gauge project. At the time, it was a remarkable feat of engineering, capable of displaying the manifold pressure on a tiny OLED on the dashboard. No project has yet reached this caliber since. [Digital Corpus] is revisiting the project, making it his own, adding a few upgrades, and entering it into the Hackaday Prize.

The D-DAQ, as [Digital] calls his new project is using an absolute pressure sensor, unlike its predecessor. This gives the turbo gauge a much larger range than the original project, and also allows the D-DAQ to measure partial vacuum in non-diesel turbos.

In addition, the D-DAQ has a much wider scope than the original project, and as such will function as much more than a simple boost gauge. [Digital] sees the D-DAQ as being a complete performance monitor and logger, capable of tracking the exhaust gas temperature, battery voltage, and just about anything else with 10 analog pins. Data will be saved to a MicroSD card, and instead of a single display, the D-DAQ will feature three 160×128 OLEDs.

It’s certainly not what you’d expect from a Hackaday Prize entry, but with these features, it’s very possible the D-DAQ could be a successful product


SpaceWrencherThe project featured in this post is an entry in The Hackaday Prize. Build something awesome and win a trip to space or hundreds of other prizes.

Koenigsegg 3D-Printing For Production Vehicles

Koenigsegg with Printed Parts

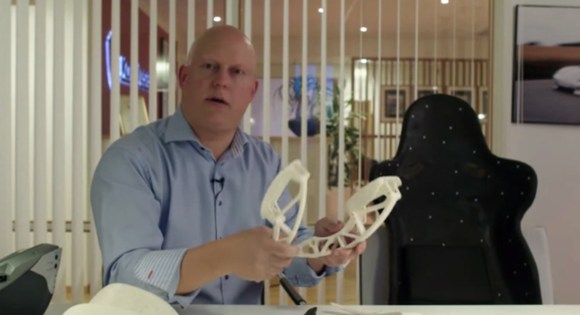
We’re not surprised to see a car manufacturer using 3D-printing technology, but we think this may be the first time we’ve heard of 3D-prints going into production vehicles. You’ve likely heard of Christian von Koenigsegg’s cars if you’re a fan of BBC’s Top Gear, where the hypercar screams its way into the leading lap times.

Now it seems the Swedish car manufacturer has integrated 3D printing and scanning into the design process. Christian himself explains the benefits of both for iterative design: they roughed out a chair, adjusting it as they went until it was about the right shape and was comfortable. They then used a laser scanner to bring it into a CAD file, which significantly accelerated the production process. He’s also got some examples of brake pedals printed from ABS—they normally machine them out of aluminum—to test the fits and the feeling. They make adjustments as necessary to the prints, sometimes carving them up by hand, then break out the laser scanner again to capture any modifications, bring it back to CAD, and reprint the model.

Interestingly, they’ve been printing some bits and pieces for production cars out of ABS for a few years. Considering the low volume they are working with, it makes sense. Videos and more info after the jump.

Continue reading “Koenigsegg 3D-Printing For Production Vehicles”

The Hacklet #2

2

A new edition of The Hacklet is now available It covers some of our favorite stuff going on in the Hackaday Projects community.

In this edition, we round up a few hacks involving cars. There’s Bluetooth Low Energy connectivity, vehicle telematics, and tools to hack into your car’s CAN bus. If you’ve ever wanted to clear that pesky check engine light without paying the dealer, or unlock your car with a smart watch, these are worth a look.

Next up are a bunch of LED hacks. This starts with a DIY theater light, then looks at a portable DJ booth, finishing off with our Evil Overlords’ own LED visualization platform.

Finally, we check out a new 3D printer design. This one uses polar coordinates instead of the Cartesian coordinate system that most printers use. This gives it the unique ability to print with multiple extruders at the same time.

Once again, let us know what you think of this edition in the comments. Our goal is to keep you entertained with some of the coolest hacks on the site.

CAN Hacking: The Hardware

So far we have discussed the basics of CAN, in-vehicle networks, and protocols used over CAN. We’re going to wrap up with a discussion of CAN tools, and parts to build your own CAN hardware.

Wiring

Unfortunately, there’s no set standard for CAN connections. The most common connector for high-speed CAN is a DE-9, with CAN high on pin 7 and CAN low on pin 2. However cables will differ, and many are incompatible.

CAN needs to be terminated, preferably by a 120 ohm resistance on either end of the bus. In practice, you can stick a single 120 ohm resistor across the bus to deal with termination.

Tools

A good CAN tool will let you transmit and receive CAN messages, interpret live data using CAN databases, and talk CAN protocols. The tools with this feature set are proprietary and expensive, but some hacker friendly options exist.

GoodThopter

The GoodThopter12

Based on [Travis Goodspeed’s] GoodFET, the GoodThopter by [Q] uses the Microchip MCP2515 CAN to SPI controller to access the bus. The open hardware tool lets you send and receive messages using Python scripts.

CAN Bus Triple

CAN Bus Triple

The CAN Bus Triple device provides an interface to three CAN buses, and can be programmed in an environment similar to Arduino. The open source code provided lets you muck with the second generation Mazda 3. Unfortunately, the hardware does not appear to be open source.

Saleae Logic

Saleae Logic

It’s not open source, but the Saleae Logic is a very handy and cheap tool for looking at CAN buses. It can capture, decode, and display CAN traffic. This is most useful when you’re building your own CAN hardware.

DIY

The Parts

If you want to design your own hardware for CAN, you’ll need two things: a CAN controller, and a CAN transceiver.

The CAN controller generates and interprets CAN messages. There’s many microcontrollers on the market with built-in CAN controllers, such as the Atmel ATmega32M1, Freescale S08D, and the TI Tiva C Series. When using a built-in CAN controller, you’ll have to use an external oscillator, internal oscillators are not sufficiently accurate for high-speed CAN. If you want to add CAN to an existing microcontroller, the MCP2515 is an option. It’s a standalone CAN controller that communicates over SPI.

The transceiver translates signals from the controller to the bus, and from the bus to the transceiver. Different transceivers are needed for high-speed and low-speed CAN networks. The NXP TJA1050 works with high-speed buses, and the ON Semi NCV7356 works with low-speed, single wire buses.

Dev Boards

There’s a ton of development boards out there featuring microcontrollers with a CAN controller. The Arduino Due‘s SAM3 processor has a controller, but there’s no transceiver on the board. You can pick up a CAN bus shield, and the Due CAN Library to get started.

The ChipKIT Max32 is similar to the Due. It has two CAN controllers, but you’ll need to provide external transceivers to actually get on a bus. Fortunately there’s a shield for that. The ChipKIT is officially supported by Ford’s OpenXC Platform, so you can grab their firmware.

That concludes our discussion of CAN Hacking. Hopefully you’re now ready to go out and experiment with the protocol. If you have questions, send them along to our tip line with “CAN Hacking” in the subject, and we’ll compile some answers. If you liked this series and want to suggest a topic for the next set of posts we’d love to hear that as well!

CAN Hacking

CAN Hacking: Protocols

We’ve gone over the basics of CAN and looked into how CAN databases work. Now we will look at a few protocols that are commonly used over CAN.

In the last article we looked at CAN databases, where each bit of a message is mapped to a specific meaning. For example, bit 1 of a CAN message with ID 0x400 might represent whether the engine is currently running or not.

However, for more complex communications we need to use protocols. These can map many meanings to a single CAN ID by agreeing on a structure for sending and receiving data.

Continue reading “CAN Hacking: Protocols”

CAN Hacking: The In-vehicle Network

Last time, we discussed how in-vehicle networks work over CAN. Now we’ll look into the protocol and how it’s used in the automotive industry.

The Bus

On the hardware side, there’s two types of CAN: differential (or high-speed) and single wire. Differential uses two wires and can operate up to 1 Mbps. Single wire runs on a single wire, and at lower speeds, but is cheaper to implement. Differential is used in more critical applications, such as engine control, and single wire is used for less important things, such as HVAC and window control.

Many controllers can connect to the same bus in a multi-master configuration. All messages are broadcast to every controller on the bus.

An oversimplified in-vehicle network

Continue reading “CAN Hacking: The In-vehicle Network”