Minimum Viable Quad Build Shows What Starting From Nothing Can Accomplish

While it’s great to be experienced and have a ton of specialist knowledge needed to solve a problem, there’s something liberating about coming at things from a position of ignorance. Starting at ground zero can lead you down the path less traveled, and reveal solutions that might otherwise not have presented themselves. And, if [Robin Debreuil]’s exploration of the “minimum viable quadcopter” is any example, some pretty fun failure modes too.

The minimum viable product concept is nothing new of course, being a core concept in Lean methodologies and a common practice in many different industries. The idea of building an MVP is to get something working and in the hands of users, who will then give you feedback on everything wrong with it, plus, if you’re lucky, what you got right. That feedback informs the next design, which leads to more feedback and a whole iterative process that should design the perfect widget.

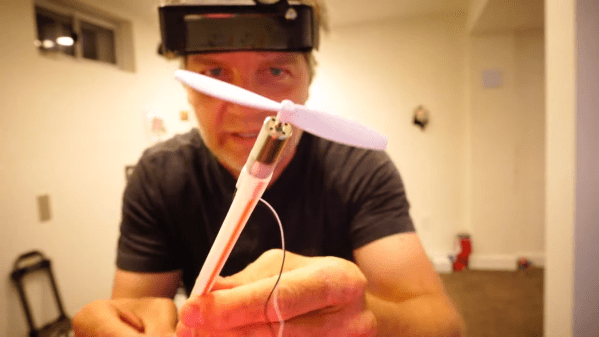
In [Robin]’s case, he wanted to build a quadcopter, but didn’t know where to start. So his first version was as simple as possible: a motor with a propellor and a small LiPo battery. No chassis, no control electronics — nothing. And it worked just about as well as expected. But fixing that problem led to different designs, the process of which was fascinating — we especially liked the quad with opposing motors controlled by mercury tilt switches to sense attitude changes.

In the end, [Robin] took a more conventional tack and used a microcontroller and BetaFlight to get his popsicle stick and hot glue UAV airborne. But the decision to start with a minimum viable design and iterate from there was a powerful learning experience in tune with [Robin]’s off-beat and low-key outlook, which we’ve seen before with his use of bismuth for desoldering and his scratch-off PCBs.

Continue reading “Minimum Viable Quad Build Shows What Starting From Nothing Can Accomplish”

Printed TS100 Case Beats The Heat With A Bearing

As we’ve said many times in the past, the creation of custom cases and enclosures is one of the best and most obvious applications for desktop 3D printing. When armed with even an entry-level printer, your projects will never again have to suffer through the indignity of getting hot glued into a nondescript plastic box. But if you’re printing with basic PLA, you need to be careful that nothing gets too hot inside.

Which was a problem when [Oleg Vint] started work on this 3D printed case for the popular TS100 soldering iron. But with the addition of a standard 608 bearing, the case provides a safe spot for the iron to cool off before it gets buttoned back up for storage. Of course, you can also use the flip-out perch to hold the iron while you’re working.

The bearing stand that served as inspiration for the case.

As [Oleg] explains on the Thingiverse page for the case, he actually blended a few existing projects together to arrive at the final design. Specifically, the idea of using the 608 bearing came from a printable TS100 stand originally designed in 2017 by [MightyNozzle]. Released under Creative Commons, [Oleg] was able to mash the bearing stand together with elements from several other printable TS100 cases to come up with his unique combined solution.

In a physical sense, this project is a great example of the sort of bespoke creations that are made possible by desktop 3D printing. But it’s also a testament to the incredible community that’s sprung up around this technology. While the logistics of it still could use some work, seeing hackers and makers swap and combine their designs like this is extremely inspiring.

[Thanks Arturo182]

Given Enough Time, Even A Circle Can Get Complicated

With the weather getting a little nicer, [Michael] thought that running some plant hangers off on his CNC router would be a simple stay-at-home project. After all, you just need to cut a couple circles out of a sheet of plywood…right?

Sure, but [Michael] realized that simply cutting out a ring wasn’t a very efficient approach. Unless you happen to need progressively smaller plant hangers, or maybe a new set of drink coasters, the center disc ends up being wasted material. That might not have been a big deal a few months ago, but when a trip to the Home Depot for more plywood could literally be hazardous to your health, that kind of inefficiency just won’t do.

He reasoned it would be better to break the ring down into sections, which could easily be nested so they fit neatly on a square plywood panel. Of course, now those sections need to be connected to each other in a way that’s strong enough for the ring to hold up the weight of the plant.

So that means extra pieces need to be cut out to serve as braces, and you’ll need to screw it all together, so better add some nuts and bolts to the BOM. You’ll probably want some eye bolts as well, but in a pinch you could just weld washers to the heads of screws like [Michael] did once he ran out of the good stuff.

Some would argue that the time [Michael] spent coming up with this revised design is more valuable than the wood he avoided wasting, which might be true if he was on the job and getting paid hourly. But when it’s a personal project, and quarantine has made sourcing materials difficult, we think it’s a fantastic example of working with what you’ve got on hand.

Jeremy Cook Is Living His Strandbeest Dream

The first thing Jeremy Cook thought when he saw a video of Theo Jansen’s Strandbeest walking across the beach was how incredible the machine looked. His second thought was that there was no way he’d ever be able to build something like that himself. It’s a feeling that most of us have had at one time or another, especially when starting down a path we’ve never been on before.

But those doubts didn’t keep him from researching how the Strandbeest worked, or stop him from taking the first tentative steps towards building his own version. It certainly didn’t happen overnight. It didn’t happen over a month or even a year, either.

ClearCrawler at the 2019 Hackaday Superconference

For those keeping score, his talk at the 2019 Hackaday Superconference, “Strandbeests: From Impossible Build to Dominating My Garage” is the culmination of over six years of experimentation and iteration.

His first builds could barely move, and when they did, it wasn’t for long. But the latest version, which he demonstrated live in front of a packed audience at the LA College of Music, trotted across the stage with an almost otherworldly smoothness. To say that he’s gotten good at building these machines would be something of an understatement.

Jeremy’s talk is primarily focused on his Strandbeest creations, but it’s also a fascinating look at how a person can gradually move from inspiration to mastery through incremental improvements. He could have stopped after the first, second, or even third failure. But instead he persisted to the point he’s an expert at something he once believed was out of his reach.

Continue reading “Jeremy Cook Is Living His Strandbeest Dream”

Improving Mister Screamer; An 80 Decibel Filament Alarm

I created a prototype 3D printer filament alarm that worked, but the process also brought some new problems and issues to the surface that I hadn’t foreseen when I first started. Today I’m going to dive further into the prototyping process to gain some insight on designing for a well-specified problem. What I came up with is an easy to build pendant that passively hangs from the filament and alerts you if anything about that changes.

I began with a need to know when my 3D printer was out of filament, so that I could drop whatever I was doing and insert a new spool of filament right up against the end of the previous spool. By doing this within four minutes of the filament running out, printing very large jobs could continue uninterrupted. The device I designed was called Mister Screamer.

Continue reading “Improving Mister Screamer; An 80 Decibel Filament Alarm”

Koenigsegg 3D-Printing For Production Vehicles

Koenigsegg with Printed Parts

We’re not surprised to see a car manufacturer using 3D-printing technology, but we think this may be the first time we’ve heard of 3D-prints going into production vehicles. You’ve likely heard of Christian von Koenigsegg’s cars if you’re a fan of BBC’s Top Gear, where the hypercar screams its way into the leading lap times.

Now it seems the Swedish car manufacturer has integrated 3D printing and scanning into the design process. Christian himself explains the benefits of both for iterative design: they roughed out a chair, adjusting it as they went until it was about the right shape and was comfortable. They then used a laser scanner to bring it into a CAD file, which significantly accelerated the production process. He’s also got some examples of brake pedals printed from ABS—they normally machine them out of aluminum—to test the fits and the feeling. They make adjustments as necessary to the prints, sometimes carving them up by hand, then break out the laser scanner again to capture any modifications, bring it back to CAD, and reprint the model.

Interestingly, they’ve been printing some bits and pieces for production cars out of ABS for a few years. Considering the low volume they are working with, it makes sense. Videos and more info after the jump.

Continue reading “Koenigsegg 3D-Printing For Production Vehicles”