Microcontroller Speech Synthesis Lets Your Project Be Heard

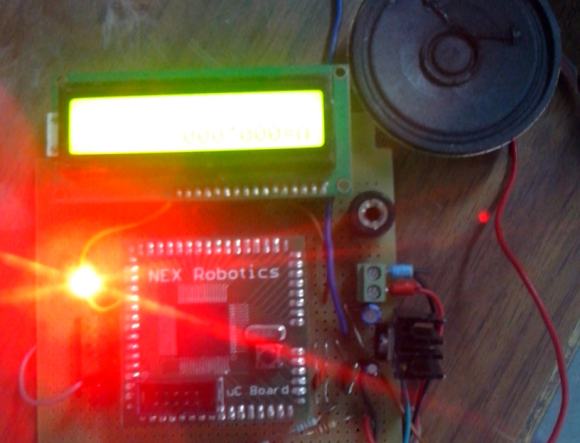
[Aditya] had a project that called for spoken output. He admits that he could have built a PC-based solution, but he found that adding speech by using a microcontroller was not only a cheap and portable alternative, it was also a fun and easy build.

His design uses an ATMega128. Many microcontrollers would work, but his major requirements were PWM generation and plenty of memory to store the file(s). The output is cleaned up in a simple low pass filter before going to the 8Ω speaker.

[Aditya] lays his tracks in WAV format and then compresses it to 8-bit/8kHz. He found a C++ function that converts the track data into a huge arrays and then digitizes it. He uses two timers, one to generate the waveform and second one to time the square wave. [Aditya] has a zip of samples available on his site that will speak the digits 0-9.

The Two Component Random Number Generator

attiny10

[Karl] was in need of a hardware random number generator, but is needs had a few caveats: it needed to be cheap, and sufficiently random. Random number generation can get quite crazy with Geiger tubes, lava lamps, and radioactive decay, but a much smaller solution was found in an 8 pin AVR microcontroller.

The solution uses AVRentropy, a library that uses the watchdog timer’s jitter in AVR microcontrollers to provide cryptographically secure random numbers. Setting up the circuit was easy – an ATtiny45 microcontroller was connected to a cheap chinese USB to serial converter. Three wires, and the circuit is complete. The code was simple as well; it’s just a call to initialize the entropy and write the bits to the serial port.

There are a few drawbacks to this build. Because the entropy library must wait until enough entropy is gathered, it can only produce about two 32-bit numbers per second. That’s all [Karl] needed for his application, though, and with an enclosure made from a wine cork and marble, he has the prettiest and smallest random number generator around.

Hack All The Things In The Time You Save With This LED Pomodoro Timer

Do you want to use your time more productively but are tomato-averse? [Robin]’s LED Pomodoro timer could be the perfect hack for you.
The Pomodoro Technique is a time management solution developed in the late 1980s. The basic idea is to spend a very focused 25 minutes performing some activity such as working or studying and then take a 5-minute break. Many of its proponents use a tomato-shaped kitchen timer to alert them to switch between the two states, but [Robin] wanted to make his own and learn along the way.

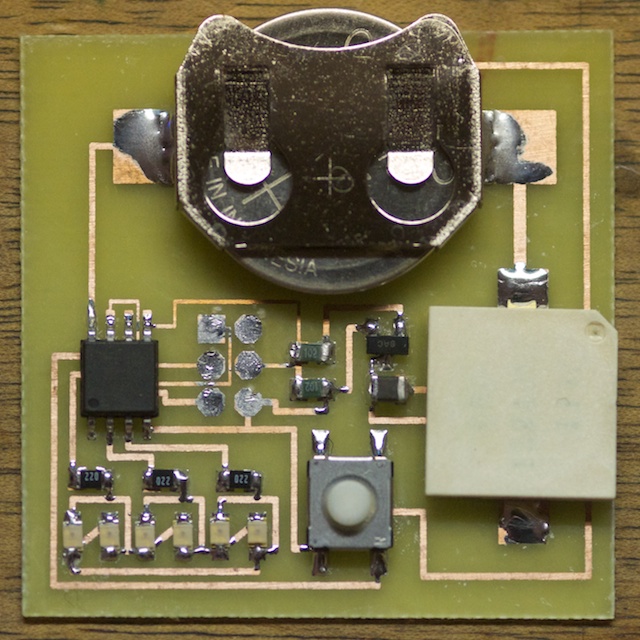
First, he wanted to use an ATtiny85 and learn about its features. Specifically, he used its timers, PWM, and low-power sleep mode. [Robin] used Charlieplexing to drive a total of six LEDs. When the timer starts, five yellow LEDs are driven high to indicate each 5-minute slice of work time. A red LED is lit during the 5-minute break.

[Robin] also explored compact PCB design and fabrication. All components are SMD and his board is 4cm square. [Robin] is using this SMD buzzer for discrete feedback. He included a footprint for a six-pin ISP header and programmed it with pogo pins. The timer is completely interrupt-driven: one click of the tactile button starts the work counter, and the buzzer sounds when time is up. A second click starts the break counter.

[Robin] has made everything available in his GitHub repo and encourages you to use it. Time’s a-wastin’!

Heatsink Tester Shows Thermal Resistance Isn’t Futile

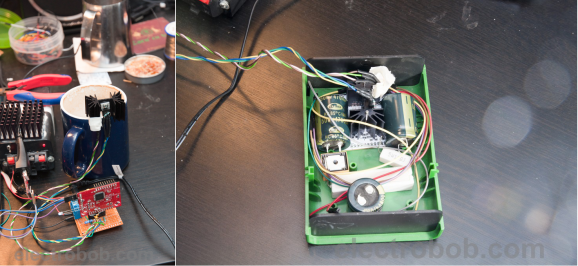
[Bogdan] knows that it’s hard to model the cooling needs of any given project. It’s important to know how much heat a system can dissipate given the housing material, airflow opportunity, and the proximity of neighboring components. Inspired by an aluminium-walled enclosure that allows for mounted transistors, he devised and built a heatsink tester.

He’s using an ATXMEGA32A4U, a temperature sensor, and a IRF540 MOSFET. A specific power is dissipated across the transistor, and the temperature sensor measures the heatsink as close as possible to the transistor. Through the serial connection, he gets back the supply voltage, current, calculated power, DAC set, temperature, and calculated thermal resistance in the terminal.

[Bogdan]’s tester assumes that it is reading the ambient temperature, so the circuit needs to warm up first. He found that an hour is generally long enough to reach this point. He also found that the system exhibits high thermal inertia, so it regulates the DAC output based on the dissipated power.

Hackaday Links: January 26, 2014

hackaday-links-chain

The automotive industry is rolling more and more tech into their offerings. This is great for us because replacement or salvaged parts are great for projects. Here’s one component to look for. [MikesElectricStuff] tears apart the thermal imaging camera form an Audi. [via Hacked Gadgets]

Give your valentine an analog love note on the big day. [Tom’s] LED heart chaser design does it without any coding. It’s a 555 timer with CD4017 decade counter. The nice thing about the setup is a trimpot adjusts the chaser speed.

[Jan] is overclocking his Arduino to 32 MHz. For us that’s kind of an “eh” sort of thing. But his statement that you need to use a clock generator because the chip won’t work with an oscillator at that frequency raised an eyebrow. We saw an AVR chip running from a 32MHz crystal oscillator in the RetroWiz project from yesterday. So do we have it wrong or does [Jan]? Share your opinion in the comments.

Download a copy of the Apple II DOS source code… legally. Yay for releasing old code into the wild! The Computer History Museum has the DOS source code and a bunch of interesting history about it. [via Dangerous Prototypes]

While we were prowling around DP for the last link we came across [Ian’s] post on a new version of Bus Pirate cables. We’ve got the old rainbow cables which are pretty convenient. But if you’ve used them you’ll agree, hunting for the correct color for each connection isn’t anywhere near a fool-proof method. The new cable uses shrink tube printed with probe labels. They sound like a huge pain to manufacture. But this makes connections a lot easier. In our experience, when it doesn’t work its always a hardware problem! Hopefully this will mean fewer botched connections.

Make your tiny LiPo cells last longer. Not capacity wise, but physically. The delicate connections to the monitor PCB break easily, and the plug is really hard to connect and disconnect. [Sean] shows how he uses electrical tape for strain relief, and a bit of filing to loosen up the connector.

KerbalEdu: Kerbal Space Program for education. That’s right, you can play Kerbal as part of school now. Some may shake their heads at this, but school should be fun. And done right, we think gaming is a perfect way to educate. These initiatives must be the precursor to A Young Lady’s Illustrated Primer method of education. Right?

Minicomputers On Microcontrollers

Developed in the very late 60s and through the 70s, the PDP-11 series of minicomputers was quite possibly the single most important computer ever created. The first widely distributed versions of Unix and C were developed on the PDP-11, and it’s hardware influence can be found in everything from the Motorola 68000 to the MSP430.

When [Dave Cheney] saw the recent 8086 simulator written in 4kB of C code, he realized simulating entire computer systems doesn’t actually require a whole lot of resources outside a big chunk of memory. Armed with an Arduino Mega clone, he set out on one of the coolest projects we’ve seen in a while: simulating a PDP-11 on an AVR.

[Dave] used an ATMega2560-powered Arduino Mega clone with an Ethernet module for the hardware of this build. Attached to it is a shield filled up with a pair of RAM chips that expand relatively limited amount of RAM on the ‘Mega.

So far, [Dave] has his simulated system booting Unix V6 off an SD card. For PDP-11 storage, he’s also simulating an RK05 disk drive, a massive 14 inch platter containing 2.5 Megabytes of data. Compared to the original PDP-11/40, [Dave] estimates his machine is about 10 times slower. Still, an original 11/40 system fills multiple server racks, and the most common installations consume several kilowatts of power. The Arduino Mega can fit in a pocket and can be powered over USB.

Future developments for this system include improving the accuracy of the simulator, running more advanced operating systems and the DEC diagnostic programs, and possibly speeding up the simulation. We’d suggest adding some switches and blinkenlights on an additional shield, but that’s just us.

All the code can be found on [Dave]’s git, with a description of his SPI RAM shield coming shortly.

An Arduino With Better Speech Recognition Than Siri

The lowly Arduino, an 8-bit AVR microcontroller with a pitiful amount of RAM, terribly small Flash storage space, and effectively no peripherals to speak of, has better speech recognition capabilities than your Android or iDevice.  Eighty percent accuracy, compared to Siri’s sixty.Here’s the video to prove it.

This uSpeech library created by [Arjo Chakravarty] uses a Goertzel algorithm to turn input from a microphone connected to one of the Arduino’s analog pins into phonemes. From there, it’s relatively easy to turn these captured phonemes into function calls for lighting a LED, turning a servo, or even replicating the Siri, the modern-day version of the Microsoft paperclip.

There is one caveat for the uSpeech library: it will only respond to predefined phrases and not normal speech. Still, that’s an extremely impressive accomplishment for a simple microcontroller.

This isn’t the first time we’ve seen [Arjo]’s uSpeech library, but it is the first time we’ve seen it in action. When this was posted months and months ago, [Arjo] was behind the Great Firewall of China and couldn’t post a proper demo. Since this the uSpeech library is a spectacular achievement we asked for a few videos showing off a few applications. No one made the effort, so [Arjo] decided to make use of his new VPN and show off his work to the world.

Video below.

Continue reading “An Arduino With Better Speech Recognition Than Siri”