Fixing The Rovio Battery Charging Circuit

[Chris] was unhappy with the battery performance of his Rovio. It seems that he’s not alone, so he set out to reverse engineer the battery charging circuit to see if there was a fix. Boy is there, what he found is the diode above, apparently installed backwards when compared to the silk screen diode symbol. Now it’s entirely possible that the silk screen is wrong and this was fixed during assembly. We think that’s unlikely because if the closer of the two diodes was supposed to have the same polarity as the one next to it there should have been room to install them both in exactly the same orientation. [Chris] pulled out a soldering iron and changed the diode to match the silk screen. That fixed his problem and he’s now getting better performance than he ever has.

[From our comments section]

Tuesday Two-Fer: Battery Cases And ABS Lettering

These are both interesting, unrelated, and can’t quite stand on their own so we threw them into one post.

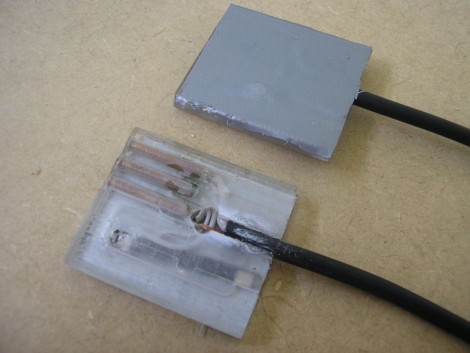
On the left you see the product of using toner transfer on ABS plastic. [Bogdan] tried this out as a way to make front panels for his enclosures. It really shouldn’t work very well because ABS has a lower melting point than toner does. But it seems that it takes a while for the ABS to heat up. If you’re quick, ironing for about 10 seconds, you can get the toner to stick to the plastic and then soak the paper off, leaving your printed design looking nice and clean.

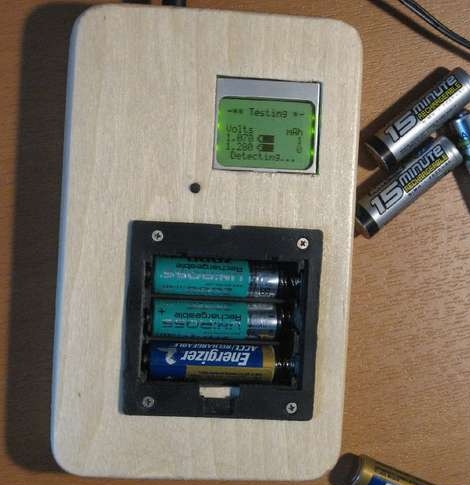
To the right you see a printed battery case. [Nikolaus Gradwohl] ran across the same problem we’ve face many times: how to attach batteries to your projects? We’ve duct-taped them together, used the blister packs they’re sold in, Dremeled them out of thrift-store toys and just about every other thing you can imagine. He decided to make them easy to manufacture with a 3D-printer. This is accomplished with an OpenSCAD file he wrote. Plug in the size and number of batteries and a printable package will be automatically generated.

Beefy Battery Backup Still Running After A Decade

In 1997 [Michael Butkus Jr.] found an uninterruptible power supply in the dumpster. The batteries were shot, but he needed a backup to keep his pellet stove running for heat, drive the exhaust fan to keep the smoke out of the house, and power his computer and other electronics. After a bit of head scratching he decided to beef up the UPS using deep-cycle batteries.

He actually built two of these. One is smaller, and similar to what we’ve seen before. The other is larger and uses four batteries, two pairs in parallel which are then connected in series. He’s careful to use heavy gauge wiring and 50 amp fuses for each battery, both of which will protect against the risk of fire. One thing we found interesting is that the batteries are stored in the basement, directly below the UPS which is connected via a short run of 12 gauge home electrical wire.

We were happy to see that he’s done updates at the top of his post over the years. He lost a few batteries due to neglectfully letting the water levels drop too much. He did switch over to sealed automotive batteries sometime in 2004 or 2005. Looks like things have been going strong ever since.

[Thanks Spencer]

Making Your Own Lithium-ion Batteries

You can make your own lithium-ion batteries if you have a source for individual cells and a control board to match your desired voltage levels. [Bill Porter] put together a quick tutorial where he makes a 14.4V 2.2 AH battery for about $10. He picked up a set of cable-modem backup batteries (used to make sure your bundled phone service doesn’t quit working when the power goes out) and tore out the cells. After reconfiguring the connections and swapping out the controller board the original 8V battery is now 14V. This doesn’t take into account any problems with battery life and charge leveling, but that’s a whole different tutorial waiting to happen.

If this type of battery hack is child’s play to you, take a look at a more involved lithium iron phosphate build.

Electric Scooter Sings As It Travels

[youtube=http://www.youtube.com/watch?v=MaQuRnZYKPc]

This scooter has been fitted with a three-phase induction motor. It reminds us of the sound effects from vehicles in the Jetsons. Right now they’re using lead-acid batteries and get about 15 miles of range from one charge. Once they switch over to lithium polymer they calculate the range will be closer to 45 miles due to the reduced weight and increased capacity. Not bad for $600 in parts, and we’d bet it’s both faster and more stable than the one-wheeled-wonder we saw last week.

Replace Batteries With USB Power

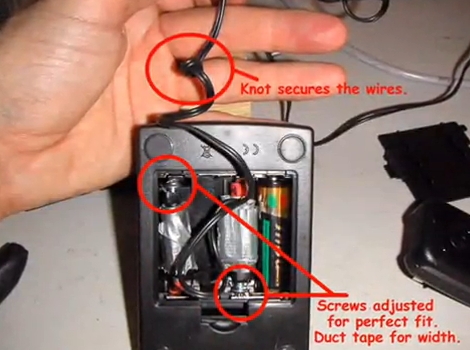
[Mark Bog] thought it was a waste to use batteries for his desktop touch pad. Quite frankly we agree that if you can avoid using disposable cells you should. He ditched the dual AA batteries inside of his Magic Trackpad and built a battery-sized adapter to feed it some juice. It consists of a dowel of similar diameter with a screw in each end. He scavenged a USB cord, connecting hot and ground wires to the corresponding pole of the adapter. Now his Trackpad is USB powered and never in need of a battery replacement or even a recharge.

We’re not familiar with the inner workings of Apple’s Magic Trackpad. We assume there’s a voltage regulator inside and we hope it doesn’t have a problem working with the 5V regulated power coming in from the adapter. If you’ve got the skinny on the hardware we’d love to hear about it in the comments. One last thing: because the forum linked above requires a login to view the images in the post, we’ve embedded the rest of them after the break for your convenience.

Continue reading “Replace Batteries With USB Power”

The Quest For A Bicycle Power System

[Garote] has been extremely busy. Busy building an electrical system into his bicycle, and even busier writing a monumental post about it. He covers an impressive range of topics, starting with the goal of adding a generator, battery, charging system, lights, and accessories to the bike. From there he clicks off one thing at a time, researching and ordering a wheel with a Dynamo hub for the generator, assembling and testing the cells of his battery, choosing the controller board for the charging system, and designing the accessory circuits like the iPhone charger above. If he adds too much more to the two-wheeled rig he’s going to have to plan a big road trip with it.

[Thanks Xuxo]