Pull-out Pantry Fills Space Next To Refrigerator

pull-out-pantry


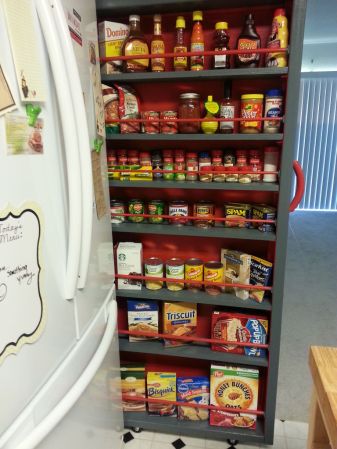
Your refrigerator needs a few inches of space on the hinge side in order for the door to open fully. If there’s a wall on that side it means you leave a gap. A bit of lumber and some inexpensive hardware can turn that gap into a pull-out pantry.

This picture is from [Ratmax00’s] pantry project. He had a 6.5″ gap to work with and started the build by making a wooden frame using pocket screws for the butt joints. Four casters were added to the bottom to make it roll in and out easily. He needed a handle and a way to make sure commodities didn’t fall off the shelves. He chose to use a 3D printer for brackets that hold the fence dowels and a custom handle. If you don’t have that just hit the cabinet hardware aisle at your local home store.

We wonder if it would have been possible to use full-extension draw rails mounted above and below the cabinet in addition to a couple of wheels? This would help keep the pantry from scraping against the fridge or the wall.

While you’re building bookshelf sized things why not get to work on a hidden door as well?

Star Wars Themed MAME Cabinet Is Perfect In This Basement Bar

star-wars-themed-mame-cabinet

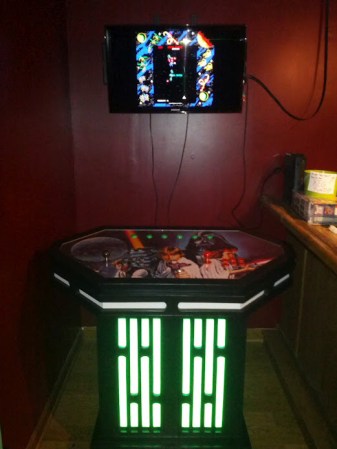
Fans of the Star Wars series will immediately recognize these illuminated vertical bars as a piece of the style from the original movie. They decorate the MAME cabinet recently installed in this home bar. You’ve got to admit, it looks amazing. But we’re always on the prowl for the build log and this annotated 46 image set has no shortage of goodies.

The project started off as a very ordinary looking plywood frame. But it takes shape quickly as the rounded-over grills were added to the box. Holes were cut behind them to accept the acrylic that serves as a diffuser and to allow the LEDs to shine through from the inside. There are several shelves which will be used to store additional gaming systems in the future. For now all that’s inside is a pretty beefy computer that runs the emulators, allowing games to be played via the arcade buttons or using wireless Xbox controllers.

Make sure you get all the way to the end of the build images. We were delighted by the custom icons in the arcade buttons. Instead of the common player one and player two images there are silhouettes of Star Wars characters and objects. This attention to detail really makes the build something special!

[Thanks Jason]

A Folded Horn Enclosure To Make The Most Out Of A Subwoofer

To make the most out of his home theater sound system [Baccula] built this folded horn enclosure for as much bass sound as possible. The design was conceived by [Bill Fitzmaurice] who thought there needed to be a better way to use the subwoofers which are typically used in home systems. His design is called the Tuba HT and it is aimed at a 15″ speaker. [Bill] charges for the building plans, but we don’t mind living vicariously through [Baccula’s] construction album.

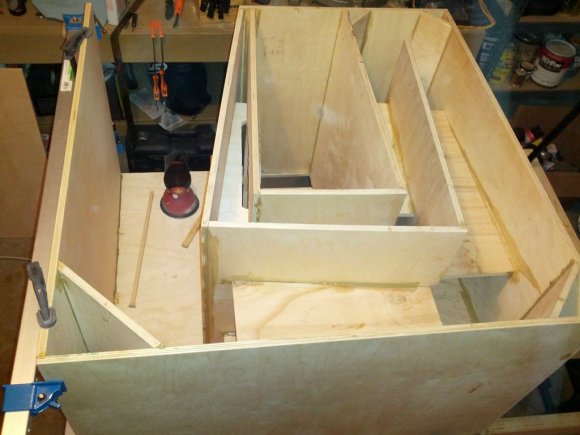
As you can see, there are a lot of wood parts that went into the cabinet. It starts with a base of 2×4 framing. From there the plywood sawdust really starts to fly as each component is produced. During assembly [Baccula] is careful to fully glue each joint — you don’t want to find out that your sub cabinet vibrates after you get everything installed. All together the new piece of living room furniture stands three feet tall and deep and two feet wide.

The album has no captions but you can read a bit more about the project in the Reddit comments.

Adding Digital Game Indicators To A Neo Geo Arcade Cabinet

neogeo

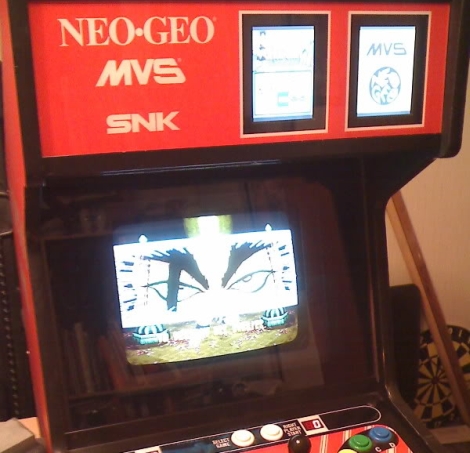
[George] is a Neo Geo aficionado, and among his collection of paraphernalia, he has a MVS-Mini game console. His mini “Multi Video System” is a 2-slot model, meaning that it can hold two game cartridges at a time, which are indicated by plastic cards inserted in the cabinet’s face plate. Instead of swapping those cards out each time he changed cartridges, he thought it would be far cooler to install digital displays instead.

He scoured just about every retail store he could before finding a handful of small 5” digital picture frames that looked to fit the bill. After some careful cabinet modifications he had them wired up and ready for display. The frames don’t hold a ton of pictures, but they do support the use of SD cards. [George] says that he’ll likely just buy a ton of small SD cards, swapping them out whenever he changes games, though over time that might become as tedious as swapping out the plastic cards.

We would love to see [George] take his new digital display up a level, so be sure to share your ideas in the comments. Perhaps we can persuade him to automate things a bit.

Mame Cabinet Springs To Life From Ikea Furniture

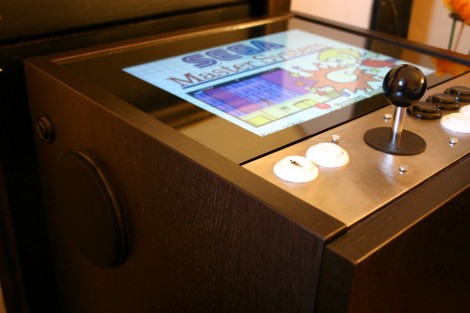
[Jed] built a MAME cabinet into some flat pack furniture (translated). For the housing he chose an Ikea Ramvik side table. This is a perfect piece of furniture for the project for several reasons; it’s cheap, coming in at under $70, it’s a reasonable height to use while sitting on the sofa, it has a built-in drawer that will hide the guts of the system, and it was designed to use a piece of glass as the table surface.

The electronics are pretty straight forward. A notebook computer runs the MAME frontend, with an auxiliary screen which is framed nicely under the glass. Controls are standard coin-op type buttons soldered to the contacts on the PCB from a USB joystick. The brushed aluminum bezel added to the surface of the table keeps the modern finished look that one would want with a showpiece like this one.

We always like to keep our eyes open for hackable items when visiting Ikea. Make sure to check out their As-Is department (preferably as soon as they open) to find hackable furniture on the cheap.

MeggyCade: When Handheld Pixel Gaming Isn’t Enough

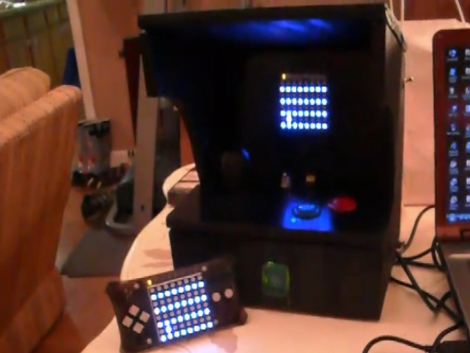
[Bomber Punk] built his own arcade cabinet, but you won’t find any MAME games here. He made the enclosure to house a Meggy Jr. 8×8 pixel graphics game console. Proper coin-op buttons and a joystick replace the stock tactile switches that come with the kit. [Bomber Punk] has also added a lighted coin slot. A three-cell battery pack powers the beast, with a programming port to one side so that different games can be loaded from a PC. We’d like to see a processor upgrade that would allow multiple games to be stored on a stand-alone system.

Take a look at the video after the break, it’ll bring a smile to your face.

Continue reading “MeggyCade: When Handheld Pixel Gaming Isn’t Enough”

Mini Pinball Is All-pixels

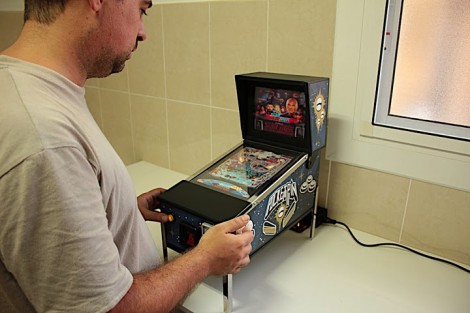
You won’t find those familiar steel balls inside this mini-pinball cabinet. That’s because [Luis’] latest creation is a fun way to play virtual pinball. The playing field is a 10″ LCD screen with an accompanying 8″ screen in the marquee. Inside the well-crafted case you’ll find a mini-ITX motherboard running HyperPin, a frontend software suite for LCD-based virtual pinball. He’s also using PinMame for the score board that was often provided by a gas plasma display on newer mechanical machines. There’s video after the break, and take a moment to check out [Luis’] other mini-cabinet builds.

What’s that you say? No substitute for the real thing? That’s exactly what [Ben Heck] thinks too.

Continue reading “Mini Pinball Is All-pixels”